Blog
DIY Personalized Wooden Bathroom Caddy: Boost Your Storage with Style

Short on bathroom storage? Don’t fret! At Robert Kline Art, we believe in maximizing space with style. This DIY wooden bathroom caddy is the perfect way to add a personalized touch and get organized at the same time. Follow this step-by-step guide to craft your own, turning your bathroom into a haven of organization.
Assessing the Space and Gathering Materials:
Before diving in, carefully measure your bathroom space. Consider what you’ll be storing – towels, toiletries, or decorative items? This will dictate the size and design of your caddy.
Here’s what you’ll need:
- Wood: Choose a sturdy wood like pine or cedar. The amount will depend on your caddy’s desired size.
- Saw: A hand saw or circular saw will do the trick.
- Sandpaper: Different grits for a smooth finish.
- Wood Glue: For secure bonding.
- Nails or Screws: Choose the appropriate size.
- Drill: If using screws.
- Measuring Tape and Pencil: Precision is key!
- Wood Stain (Optional): Personalize with your favorite shade.
- Polyurethane (Optional): Adds durability and a polished look.
- Paint Brushes or Rags: For applying stain and polyurethane.
Building the Caddy Frame:
- Cut the Wood: Using your measurements, cut the wood into the desired pieces for the caddy’s top, bottom, and sides.
- Expert Tip: Remember to account for the thickness of the wood when calculating dimensions.
- Assemble the Frame: Apply wood glue to the edges of the pieces and secure them together using nails or screws. Use clamps to hold the pieces in place while the glue dries, if needed.
Adding Shelves and Customization:
- Create Shelves: Measure and cut additional pieces of wood for the shelves. You can customize the number and spacing based on your storage needs.
- Secure the Shelves: Attach the shelves to the caddy frame using wood glue and nails or screws. Ensure they’re level for stability.
- Robert Kline Art Tip: For a unique touch, consider using reclaimed wood or adding decorative molding to the shelves.
Finishing Touches:
- Sand and Smooth: Once the glue is dry, sand down any rough edges for a professional finish.
- Stain or Paint (Optional): Add a personal touch with your favorite wood stain or paint color. Allow it to dry completely.
- Apply Polyurethane (Optional): For added durability and moisture resistance, apply a coat or two of polyurethane.
Installation and Enjoy!
- Secure the Caddy: Once the finish is dry, determine the best way to install your caddy. You can mount it directly to the wall using screws, or use sturdy hooks for hanging.
- Organize and Admire: Arrange your toiletries, towels, and decorative items, and enjoy your newly organized and stylish bathroom space!
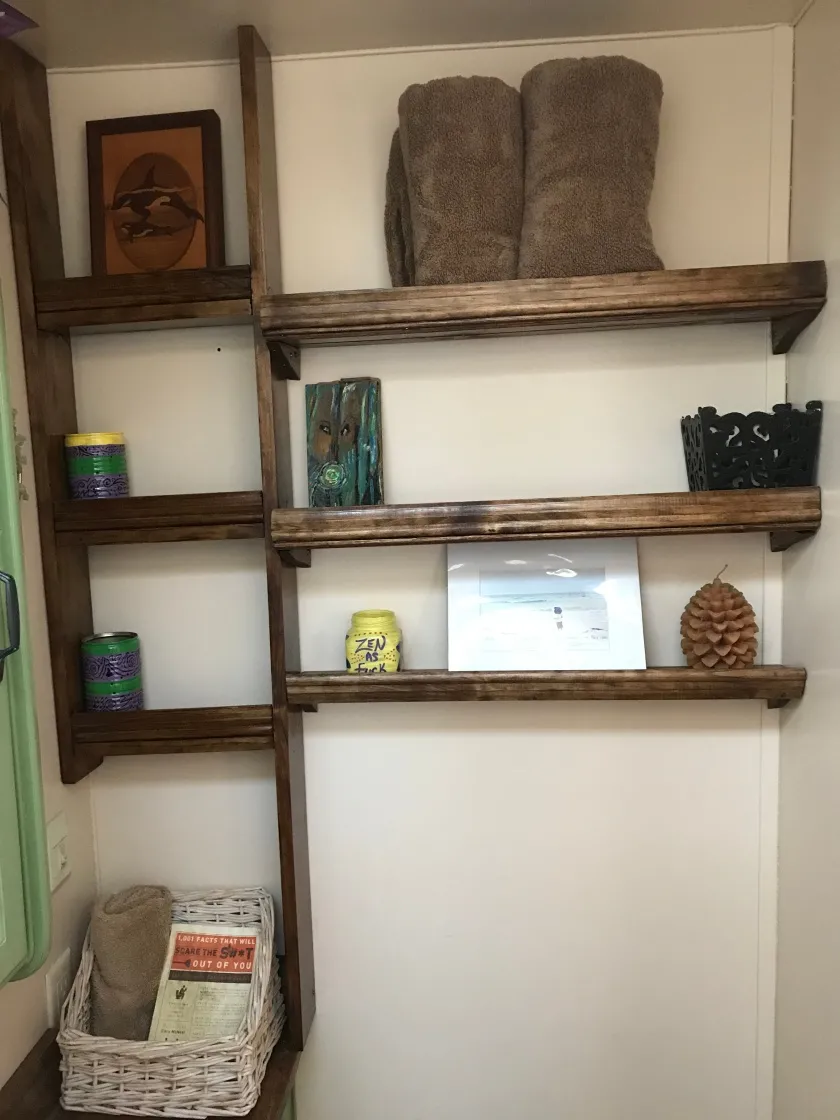
 Finished wooden shelves in a bathroom
Conclusion:
Congratulations on creating a personalized wooden bathroom caddy! This DIY project not only adds valuable storage but also infuses your bathroom with a touch of handmade charm. At Robert Kline Art, we believe that crafting is about more than just the end product; it’s about the joy of creation and the satisfaction of a job well done. Share your finished caddy with us—we’d love to see your handiwork!
Ready to explore more handcrafted treasures? Discover unique, handcrafted gifts on our website, perfect for adding a personal touch to your home or surprising someone special.
