Blog
Personalized Pillowcases: The Perfect Slumber Party Craft
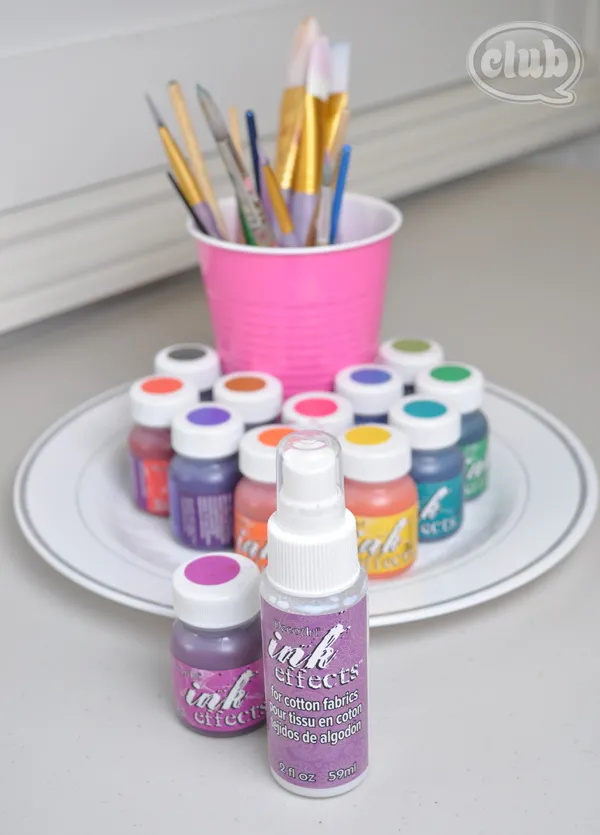
Hey there, fellow craft enthusiasts! Robert Kline here, and let me tell you, there’s nothing quite as rewarding as seeing the joy on someone’s face when they’ve created something beautiful with their own two hands. Recently, my tween had a blast designing personalized pillowcases at her slumber party, and I just had to share this fun and easy craft idea with you all.
Bringing Creativity to Life with Fabric Paint
We used DecoArt’s Ink Effects fabric paint, and let me tell you, this stuff is amazing! It comes in a rainbow of colors, each bottle conveniently marked with a color dot to show how it will look on fabric. Keep in mind, the paint in the bottle might appear darker than the final result after ironing, so don’t be afraid to experiment!
 tweens customizing pillow cases at slumber party
(Image: A group of tweens gathered around a table, excitedly personalizing their pillowcases with colorful fabric paints. The vibrant colors and their focused expressions highlight the joy of crafting.)
Easy Steps for Personalized Pillowcases
Here’s how we transformed plain white pillowcases into personalized works of art:
Preparation is Key:
- Pre-wash and Iron: Start with freshly washed and ironed cotton pillowcases for a smooth painting surface.
- Prime Your Fabric: Spray the pillowcases with DecoArt Ink Effects basecoat or primer and allow them to dry completely. This step ensures the paint adheres well and prevents bleeding.
Unleashing Creativity:
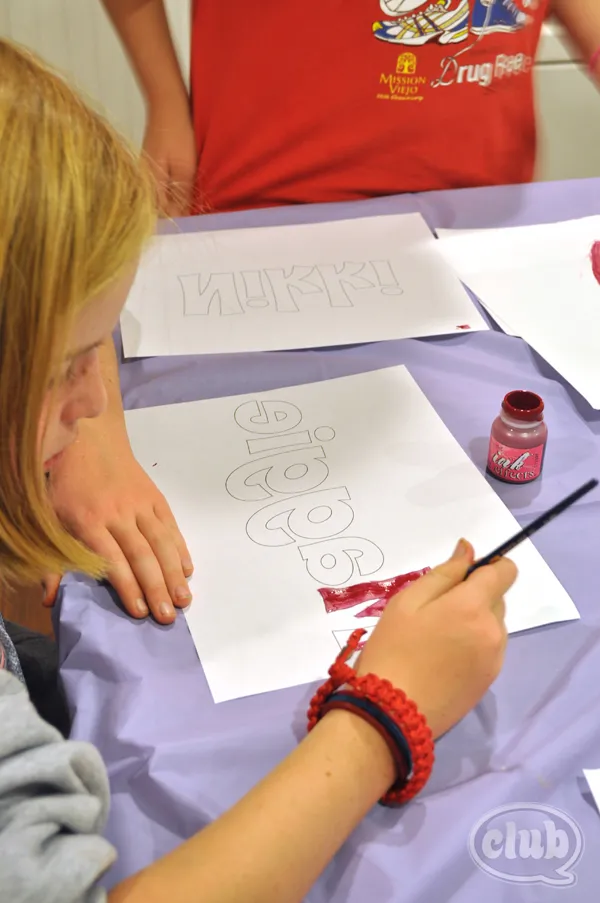
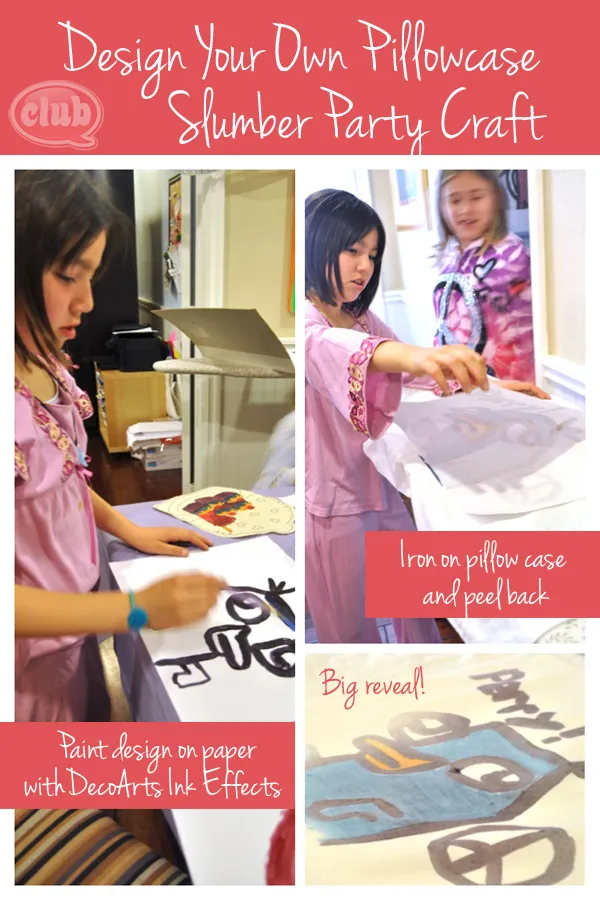
- Design on Paper: Instead of painting directly on the pillowcases, have your guests design on separate sheets of white paper. This way, they can experiment with different designs and layouts before transferring them onto the fabric.
- Reverse Thinking: Remind everyone that the iron-on process reverses the design, so any text or images need to be created in reverse. To simplify, I printed out their names in reverse as a guide.
- Let it Dry: Once the designs are complete, allow them to dry completely on the paper.
 ironing on designs on pillow cases craft
(Image: A close-up shot of an iron pressing down on a pillowcase with a design ready to be transferred. The anticipation builds as the heat works its magic.)
The Iron-On Magic:
- Cut and Arrange: Carefully cut out the designs and arrange them face down on the pillowcases.
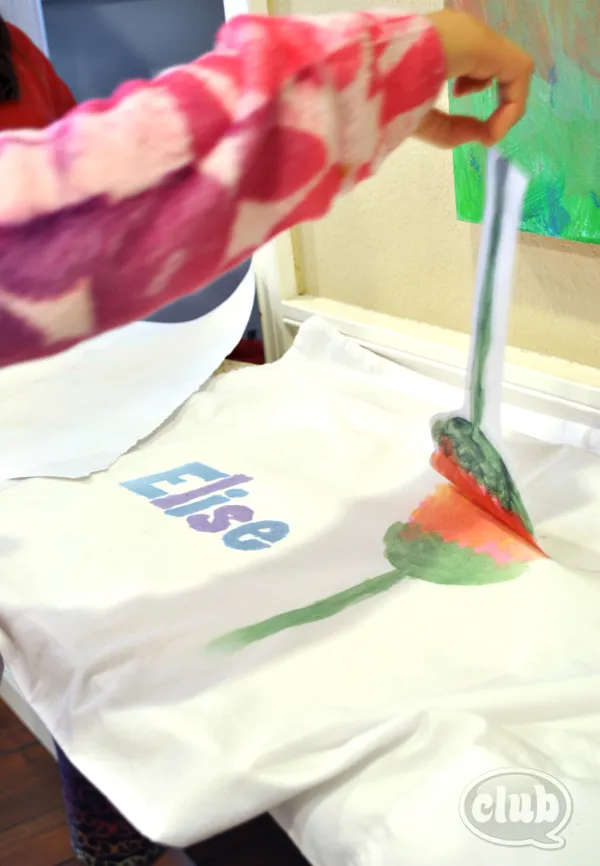
- Iron-On Time: Place a second sheet of paper on top of the designs and iron over them with even pressure for about 3 minutes, without steam. This will transfer the paint from the paper to the fabric.
 Pillow case ironed on design slumber party craft idea
(Image: A personalized pillowcase with an ironed-on design, showcasing the vibrant colors and intricate details achieved with fabric paint. The finished product is a testament to the creativity of the young artist.)
Personal Touches:
- Sharpie Power: Once the ironed-on designs have cooled, provide Sharpie markers for adding final touches, like names, dates, or doodles.
 slumber party personalized pillow cases craft @clubchicacircle
(Image: A collection of personalized pillowcases, each reflecting the unique style and personality of its creator. From bold patterns to delicate florals, the diversity of designs is a testament to the power of individual expression.)
A Memorable Party Favor
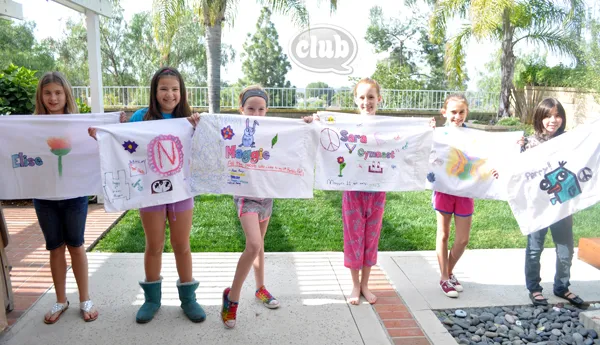
The girls were absolutely thrilled with their one-of-a-kind pillowcases! It was a fantastic way for them to express their creativity and take home a personalized memento of the party.
 pumpkin snowmen feature
(Image: A group of girls proudly displaying their personalized pillowcases. Their smiles radiate the joy and satisfaction of creating something unique and special.)
Endless Creative Possibilities
This fabric paint technique isn’t limited to pillowcases! Encourage your creative spirit and try it on t-shirts, tote bags, or any other fabric surface. The possibilities are endless!
So, gather your materials, unleash your imagination, and have a blast creating personalized masterpieces with fabric paint! And don’t forget to share your creations with me – I always love seeing the amazing things you come up with. Head over to Robert Kline Art for more inspiring craft ideas and projects. Happy crafting!
