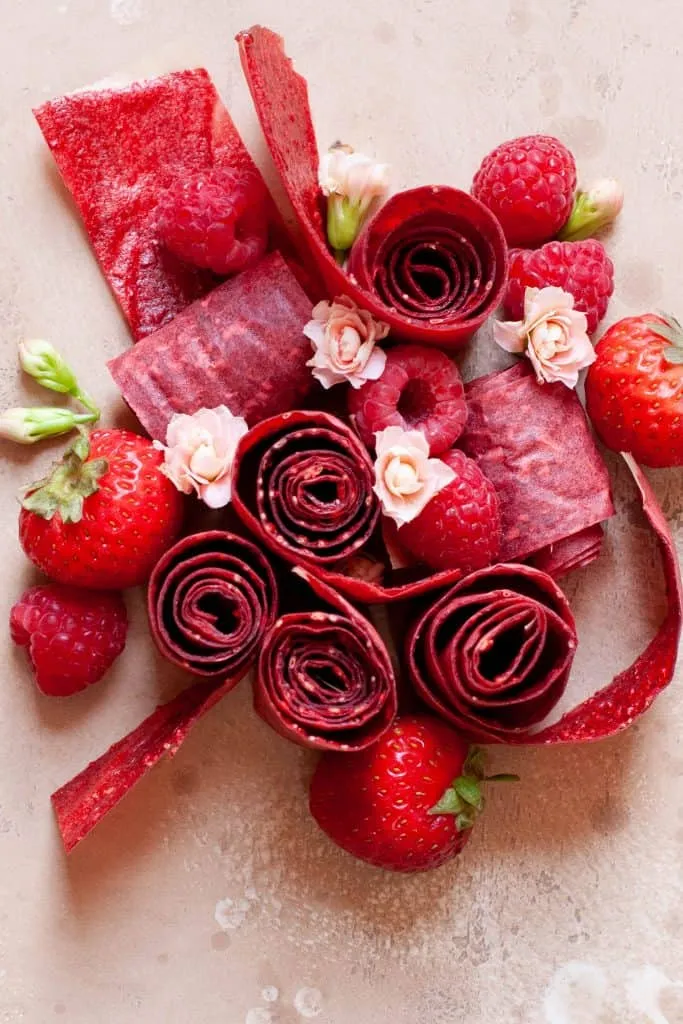
DIY Delicious: Making Healthy Homemade Fruit Roll Ups

Remember those iconic fruit roll ups from your childhood? The ones that were gone in a flash, leaving sticky fingers and a craving for more? Let’s be honest, those store-bought snacks weren’t exactly healthy. But guess what? You can recreate that sweet, chewy goodness right at home with fresh fruit and a few simple ingredients!
This isn’t just about nostalgia. It’s about taking control of what you eat, having fun in the kitchen, and enjoying a healthy snack that both kids and adults will love. As a craft and DIY enthusiast, I find immense joy in transforming simple ingredients into something truly special, and these homemade fruit roll ups are no exception!
Gathering Your Fruit Leather Supplies
Making your own fruit roll ups is surprisingly easy. Here’s what you’ll need to get started:
Ingredients:
- 3 cups of fresh fruit (Feel free to get creative with your favorite combinations! I personally love using 2 cups of strawberries and 1 cup of raspberries.)
- 2 tablespoons of honey (For those who prefer a less sweet option, you can adjust the amount of honey or use maple syrup as a substitute.)
- 1 teaspoon of lemon juice (A touch of lemon juice not only adds a bright flavor but also helps to preserve the vibrant color of your fruit roll ups.)
- 1 teaspoon of vanilla extract (Pure vanilla extract adds a warm, aromatic note that complements the sweetness of the fruit beautifully.)
Tools:
- Baking sheet
- Parchment paper
- Food processor or blender
- Small saucepan
- Cutting board
- Cutting knife
- Spoon or spatula
You’ll also need measuring spoons and cups to ensure precise measurements.
Crafting Your Fruit Roll Ups: A Step-by-Step Guide
Ready to transform fresh fruit into chewy, delicious fruit leather? Let’s get started!
-
Preheat and Prepare: Preheat your oven to 170°F (77°C). Line a baking sheet with parchment paper. This will prevent sticking and make cleanup a breeze.
-
Fruit Power: Wash and prepare your fruit by removing stems or pits. Combine your chosen fruit in a food processor or blender and process until completely smooth.
-
Simmer and Thicken: Pour your fruit puree into a small saucepan. Add the honey, lemon juice, and vanilla extract. Stir well to combine. Cook over medium heat for about 10 minutes, stirring occasionally to prevent sticking. This step helps to evaporate excess moisture and thicken the mixture.
-
Spread and Bake: Pour your fruit mixture onto the prepared baking sheet. Using the back of a spoon or a spatula, spread the mixture evenly into a thin layer. Aim for a thickness of about 1/8 inch. Remember, the thinner you spread it, the chewier your fruit roll ups will be. Bake for approximately 4 hours, or until the fruit leather is no longer sticky to the touch.
-
Cool and Cut: Once baked, allow your fruit leather to cool completely on the baking sheet. This is crucial to allow it to set properly. Once cooled, use a sharp knife or a pizza cutter to cut the fruit leather into strips.
-
Roll and Enjoy: Gently roll up each strip of fruit leather, parchment paper and all. This helps to keep them from sticking together and makes them fun to unroll and enjoy!
 healthy homemade fruit roll ups with strawberries and raspberries
Tips for Fruit Roll Up Perfection
- Experiment with Flavors: Don’t be afraid to get creative with your fruit combinations! Try mixing and matching different berries, stone fruits, or even tropical fruits.
- Adjust Sweetness: If you prefer a less sweet fruit roll up, simply reduce the amount of honey or use maple syrup as a natural sweetener.
- Test for Doneness: To ensure your fruit leather is properly dehydrated, lightly touch the surface. It should be dry to the touch and not sticky.
- Storage: Store your homemade fruit roll ups at room temperature in an airtight container for up to a week.
Beyond the Roll: Creative Fruit Leather Variations
These fruit roll ups are incredibly versatile, offering endless opportunities for fun and flavor. Here are a few ideas:
- Fruit Leather Pinwheels: Instead of cutting the fruit leather into strips, try cutting it into squares or circles. Roll each piece up from one corner or edge towards the center to create a beautiful pinwheel shape.
- Layered Flavors: Divide your fruit puree into different bowls and add a different flavor to each bowl. Layer the flavors on the baking sheet before baking for a fun, multi-colored treat.
- Fruit Leather Bites: Skip the rolling altogether and simply cut the cooled fruit leather into bite-sized squares for a quick and easy snack.
Crafting Memories, One Fruit Roll Up at a Time
These homemade fruit roll ups are so much more than just a snack. They are a testament to the joy of creating something delicious and nutritious with your own hands.
At Robert Kline Art, we believe in the power of handmade. These fruit roll ups embody that spirit, allowing you to transform simple ingredients into a delightful treat that will bring back fond memories and create new ones to cherish.
So why not gather your favorite fruits, put on your creative hat, and give this recipe a try? You’ll be amazed at how easy it is to create a healthy and delicious snack that will have everyone asking for more.
Don’t forget to share your fruit roll up creations and experiences in the comments below! We love to see your culinary masterpieces and hear your feedback. And for more unique, handcrafted gift ideas, be sure to explore the rest of our website. Happy crafting!
