Blog
Craft a Stylish DIY Fabric Wastebasket: A Budget-Friendly Guide

Ever been surprised by the high cost of decorative home goods? Let’s face it, a stylish trash can shouldn’t break the bank. That’s why I’m excited to share this step-by-step guide on how to create your own DIY fabric covered wastebasket. With a few simple materials and a touch of creativity, you can craft a piece that’s both functional and beautiful, perfectly complementing any decor. As a lifelong craft enthusiast, I’m passionate about empowering others to explore their creative side, and this project is a fantastic way to personalize your space without overspending.
Gathering Your Supplies
Before we begin, gather the following materials:
- A plain wastebasket (I found mine at a local discount store).
- Fabric of your choice (Approximately half a yard should be sufficient).
- Paper for creating a pattern.
- Scissors (fabric scissors and regular scissors).
- Spray adhesive.
- Trim (optional, for added flair).
- Hot glue gun and glue sticks (if using trim).
- Measuring tape or ruler.
- Pencil or pen for marking.
- Monogram stencil or fabric paint (optional).
Creating Your Custom Wastebasket
Step 1: Pattern Making
- Wrap the paper around your wastebasket, smoothing it to eliminate any creases.
- Fold in the top and bottom edges of the paper to create a clean line along the top and bottom of the wastebasket. Mark these folds with your pencil.
- Carefully remove the paper and lay it flat. Using your scissors, cut along the lines you’ve marked to create your pattern.
Step 2: Cutting the Fabric
- Lay your fabric flat on a clean surface.
- Place your paper pattern on top of the fabric and secure it with pins.
- Using your fabric scissors, carefully cut around the pattern to create your fabric piece.
Step 3: Attaching the Fabric
- Take your project outside or to a well-ventilated area.
- Following the manufacturer’s instructions, apply an even layer of spray adhesive to the back of your fabric. For maximum adhesion, allow the adhesive to become tacky for a few seconds before applying.
- Carefully align the fabric onto the wastebasket, smoothing out any air bubbles as you go.
Step 4: Adding the Finishing Touches
- If using trim, carefully attach it around the top or bottom edge of the wastebasket using your hot glue gun.
Step 5: Personalization (Optional)
- If desired, add a personal touch with a monogram or decorative design using your chosen method. Allow ample drying time.
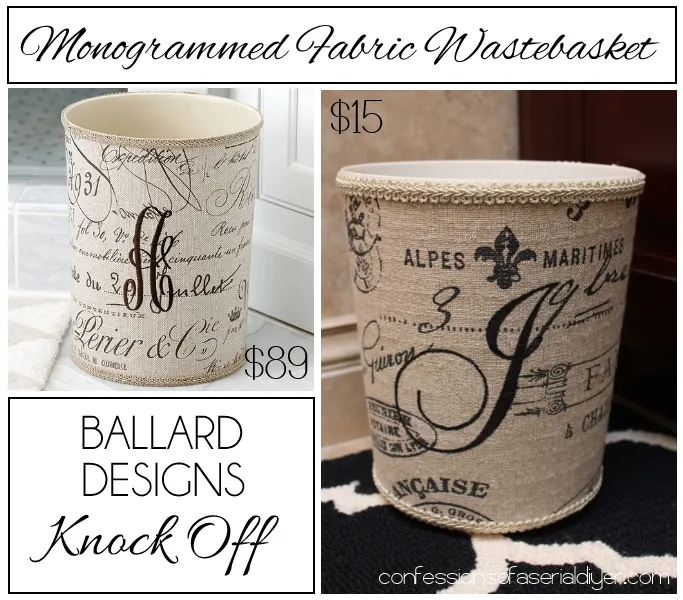
 Monogrammed Fabric Wastebasket {a Ballard Designs Knock off}
Tips and Tricks from Robert Kline Art
- Fabric Selection: Opt for a durable fabric like canvas, linen, or cotton blend that can withstand regular use.
- Pattern Placement: Consider the pattern of your fabric and how it will look when wrapped around the wastebasket.
- Alternative Adhesives: Fabric glue or double-sided tape can also be used, but spray adhesive generally offers a stronger bond.
- Embellishment Ideas: Get creative with embellishments! Consider adding ribbon, buttons, or other decorative elements to personalize your wastebasket.
Conclusion
Congratulations on creating your own stylish and affordable fabric wastebasket! This DIY project is a testament to the fact that beautiful home decor doesn’t have to come with a hefty price tag. I encourage you to experiment with different fabrics, trims, and embellishments to create a piece that reflects your unique style. Remember, the most important ingredient in any crafting endeavor is to have fun and let your creativity shine through. Share your finished wastebasket creations with me on social media, I can’t wait to see what you make!
Looking for more unique, handcrafted items? Explore our website for one-of-a-kind gifts for every occasion!
Let me know in the comments below what you think of this project or if you have any creative spins on this DIY. Happy crafting!
