Craft a Colorful Paracord Dog Leash: A Step-by-Step Guide

Hey there, fellow craft enthusiasts! Robert Kline here, your guide to the wonderful world of handmade creations. Today, we’re diving into a project that’s both stylish and practical: crafting a vibrant paracord dog leash.
Paracord projects are a blast! They’re surprisingly easy once you get the hang of the knots and braiding techniques. Plus, they’re a fantastic way to engage kids, especially those with an adventurous spirit. After all, paracord is often associated with military gear, and the use of a lighter adds a touch of excitement (though always with adult supervision, of course!).
This time around, I was inspired to make a rainbow-hued dog leash – a perfect way to celebrate creativity and add a pop of color to our daily walks. And guess what? The same technique can be used to make a matching paracord bracelet for yourself. So, let’s gather our supplies and embark on this colorful crafting adventure!
Gathering Your Crafting Supplies
Before we begin, let’s make sure we have everything we need:
- Rainbow 550 Paracord: The star of the show! Choose a color combination that speaks to you.
- Side Release Buckle: This will be the clasp for your leash.
- Lighter: Essential for sealing the ends of the paracord.
- Scissors: For cutting the paracord to size.
- Small Key Ring (optional): For attaching dog tags to the leash.
- Measuring Tape (optional): For precise measurements.
- Painter’s Tape (optional): For securing the paracord while you work.
Step-by-Step Guide: Crafting Your Paracord Leash
Now, let’s get down to the heart of our crafting project:
Step 1: Securing the Buckle
- Fold your paracord in half.
- Thread the folded end through one end of the slide release buckle.
- Flip the folded end over the buckle and pull it snug. You’ve just created the base for your leash!
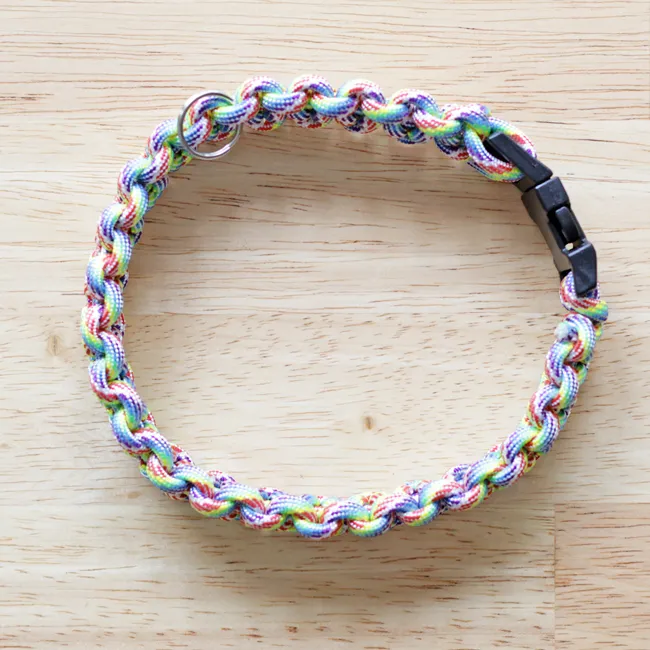
 Paracord Dog Collar – Tutorial at HandsOccupied.com
Step 2: Measuring and Preparing the Leash
- Grab your dog’s existing leash or a measuring tape. Determine the desired length for your new leash.
- Thread the other end of the buckle onto the open ends of the paracord. Position the buckle so that the leash will be the correct length when finished.
 Paracord Dog Collar – Tutorial at HandsOccupied.com
Step 3: The Art of Knotting
- (Optional) Use painter’s tape to temporarily secure the buckle and the middle of the leash. This helps maintain the desired length while you work.
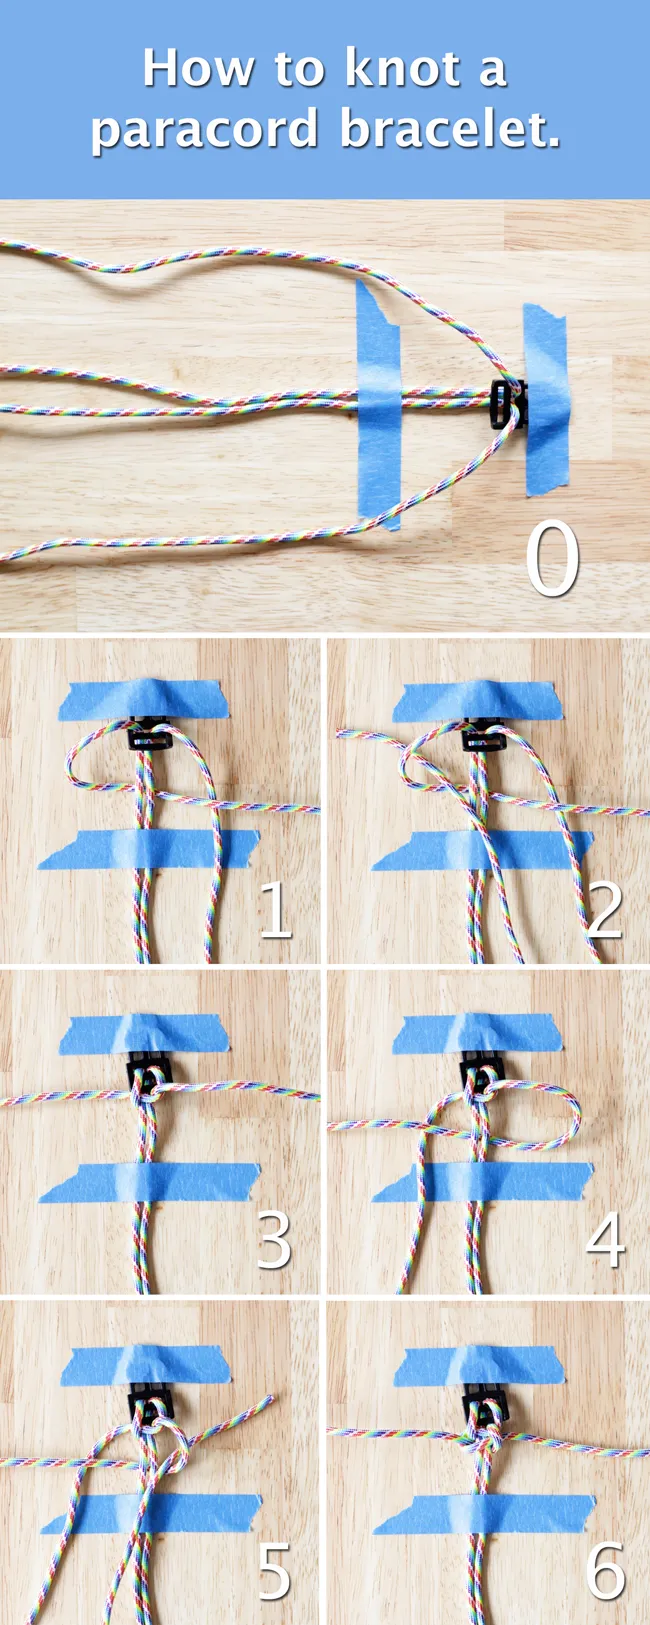
- Choose your desired knotting or braiding technique. There are many resources available online, and experimentation is encouraged! A simple cobra stitch or a spiral stitch can create stunning results.
- As you knot, remember to add the key ring to one of the knots if you’re planning to attach dog tags.
- Tighten each knot securely before moving on to the next. This ensures a durable and long-lasting leash.
 Paracord Dog Collar – Tutorial at HandsOccupied.com
 How to Knot a Paracord Bracelet or Collar – Tutorial at HandsOccupied.com
Step 4: Finishing Touches
- Once you’ve knotted to the end of your leash, carefully trim any excess paracord.
- Use the lighter to melt and seal the raw ends of the paracord, preventing fraying.
 Paracord Dog Collar – Tutorial at HandsOccupied.com
 Paracord Dog Collar – Tutorial at HandsOccupied.com
 Paracord Dog Collar – Tutorial at HandsOccupied.com
Step 5: Admire Your Handiwork!
- Attach your dog’s tags to the key ring (if added), and your vibrant, handmade leash is ready for action!
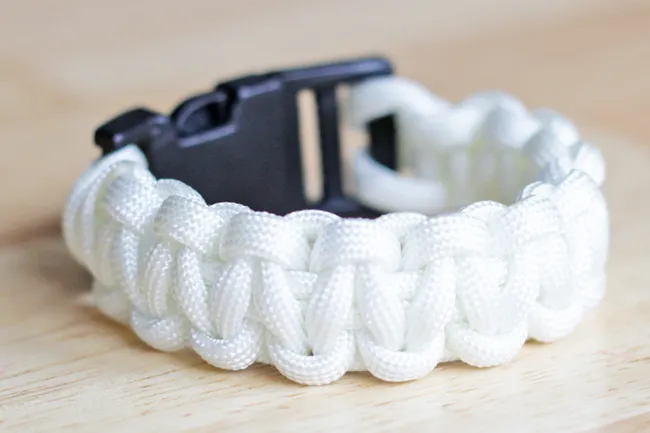
 Paracord Bracelet – Tutorial at HandsOccupied.com
Conclusion
Congratulations on crafting a one-of-a-kind paracord leash! Not only is it a stylish accessory for your furry friend, but it’s also a testament to your creativity and craftsmanship. Remember, this is just the beginning. Experiment with different colors, knots, and braiding techniques to create a whole collection of leashes and bracelets.
Expert Tip: Sarah Jones, a seasoned crafter and DIY enthusiast, suggests starting with a basic cobra stitch for beginners. “It’s easy to learn and creates a beautiful, textured look,” says Sarah. “Once you feel comfortable, you can explore more intricate patterns and designs.”
Now it’s your turn! Share your creations and experiences in the comments below. And for those looking for unique, handcrafted gifts, be sure to explore the wonderful selection of handmade treasures on Robert Kline Art. Happy crafting!
