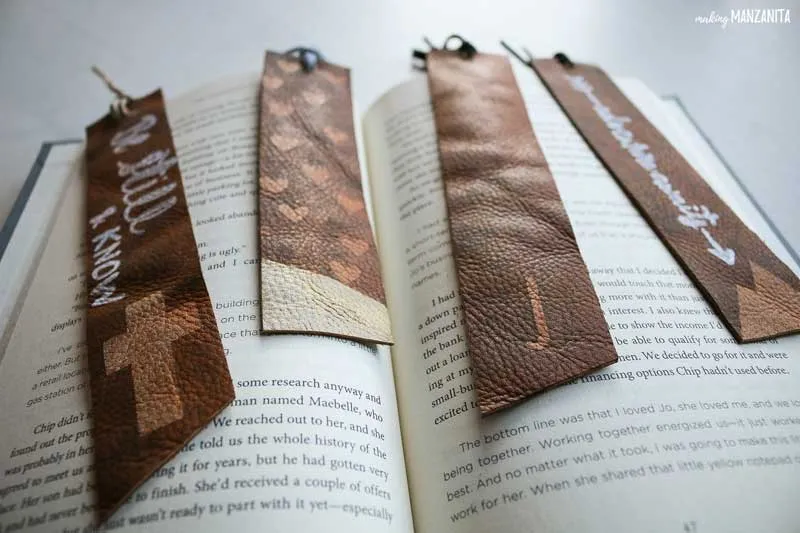
Handcrafted Leather Bookmarks: The Perfect Personalized Gift

Looking for a heartfelt and unique gift idea that won’t break the bank? Ditch the generic store-bought presents and dive into the world of handcrafted leather bookmarks! These little treasures are surprisingly easy to make and offer endless opportunities for personalization. Imagine the joy on your loved ones’ faces when they unwrap a gift that’s not only beautiful but also infused with your personal touch.
Why Leather Bookmarks Make the Perfect Gift
- Unique and Thoughtful: Unlike mass-produced gifts, handcrafted bookmarks show that you put time and effort into creating something special.
- Personalization: The possibilities are endless! Engrave their initials, a favorite quote, or even a meaningful date.
- Versatile: Perfect for bookworms, students, or anyone who appreciates a touch of handmade elegance.
Crafting Your Own Leather Bookmarks: A Step-by-Step Guide
Ready to unleash your inner artist? Let’s gather our supplies and embark on this rewarding crafting journey.
Materials You’ll Need:
- Leather pieces (approximately 1.5″ wide and 6-7″ long)
- Dark wax
- Clean cloth or staining rag
- Stickers or adhesive shelf liner (for creating stencils)
- Paint pen
- Leather cording
- Scissors
- Rotary tool, cutting mat, and ruler (optional, for precise cutting)
Step 1: Preparing the Leather Canvas
- Cutting: Using a rotary tool or scissors, cut your leather pieces into the desired bookmark size (around 1.5″ x 6-7″). If you prefer angled edges, mark the shape on the back of the leather before cutting.
Step 2: Adding Your Personal Touch
- Stenciling: Get creative! Use stickers, adhesive shelf liner cutouts, or even hand-drawn designs as stencils. Apply them firmly to the leather surface.
Step 3: Infusing Color with Dark Wax
- Wax Application: Gently rub dark wax over the entire bookmark, ensuring even coverage over the stencils. This will stain the exposed leather while leaving the areas beneath the stencils untouched.
Step 4: Revealing the Design
- Stencil Removal: Carefully peel off the stickers or stencils to reveal the lighter design against the darker background. Allow the wax to dry completely.
Step 5: Embellishing Your Masterpiece
- Decorative Touches: Now comes the fun part! Use a paint pen to add personalized messages, initials, or intricate details. You can even experiment with acrylic paint for bolder accents.
Step 6: The Finishing Touch
- Creating the Hanger: Using a leather hole punch or sharp scissors, create a small hole at the top center of the bookmark.
- Threading the Cord: Cut a piece of leather cording about 10 inches long. Fold it in half and loop it through the hole, securing it with a knot.
Tips and Tricks from a Seasoned Crafter
- Leather Selection: Experiment with different types of leather! Each variety offers a unique texture and finish.
- Color Play: Don’t limit yourself to dark wax! Explore lighter shades or even metallics for a unique aesthetic.
- Distressing for Vintage Charm: Lightly sand the edges of the bookmark for a rustic, vintage look.
Beyond Bookmarks: Exploring the World of Leather Crafting
Leather crafting opens up a world of creative possibilities. From personalized keychains to stylish jewelry, the only limit is your imagination! Embrace the art of working with leather, and you’ll discover a rewarding hobby that results in truly special, handcrafted treasures.
So, what will your leather story be? Head over to Robert Kline Art for more inspiring ideas and discover a curated collection of handcrafted gifts that celebrate the beauty of handmade artistry.
 diy leather bookmarks made with dark wax stain and different sticker decor
