Blog
Unleash Your Inner Artist: Crafting a Stunning DIY Clay Decanter

Hey there, fellow art enthusiasts! Robert Kline here, your guide to all things handmade. Today, we’re diving headfirst into the exciting world of clay crafting with a project that’s as stylish as it is satisfying – a DIY clay decanter.
Why a Clay Decanter?
Picture this: you’re hosting a gathering, and your guests’ eyes are drawn to a unique, eye-catching decanter on your bar cart – a testament to your creativity and craftsmanship. That’s the magic of a DIY clay decanter; it’s not just a vessel for your favorite beverages, but a statement piece that reflects your personality. Plus, who doesn’t love impressing their friends with a touch of homemade elegance?
Gather Your Artistic Arsenal
Before we embark on this creative journey, let’s gather our supplies:
Materials:
- Air-dry clay
- Foam brush
- Cup of water
- Clean glass bottle (like a Patron bottle)
- Gloss shellac
- Wax paper
- Acrylic paints (optional)
- Petite four cutters (optional)
Tools:
- Your hands! (Our most essential tools)
Shaping Your Masterpiece: Step-by-Step Guide
Ready to unleash your inner sculptor? Let’s get crafting:
Step 1: The Clay Foundation
Starting at the base of your clean, empty glass bottle, apply thick layers of air-dry clay. Work in sections, pressing firmly to blend the clay and create a seamless look. Remember to leave the top of the bottle uncovered for now – you’ll need something to grip!
Pro Tip: For a smoother finish, dampen your foam brush and gently smooth out the clay surface.
Step 2: Adding a Touch of Flair
Now, let’s add some personality! You can leave the clay surface with its natural texture, or for an extra touch, grab your petite four cutters and create unique shapes to adorn your decanter.
Step 3: The Art of Patience
Once you’re happy with the design, it’s drying time! Allow the clay to dry for at least 24 hours, ensuring it dries slowly to prevent cracks. Here’s a handy trick – wrap the decanter in plastic wrap to slow down moisture evaporation.
Remember: Patience is key in the world of crafting. Trust the process, and you’ll be rewarded with a stunning piece.
Step 4: A Splash of Color (Optional)
Once the clay is completely dry, unleash your inner artist and add pops of color using acrylic paints. Whether you prefer a minimalist monochrome look or a vibrant, multi-colored design, let your creativity guide you.
Step 5: Sealing the Deal
To protect your masterpiece and ensure it’s food-safe, apply a coat of gloss shellac to the entire decanter.
Important: Avoid spraying the inside of the bottle. A simple trick is to stuff a ball of paper towels into the opening.
Congratulations, Artist!
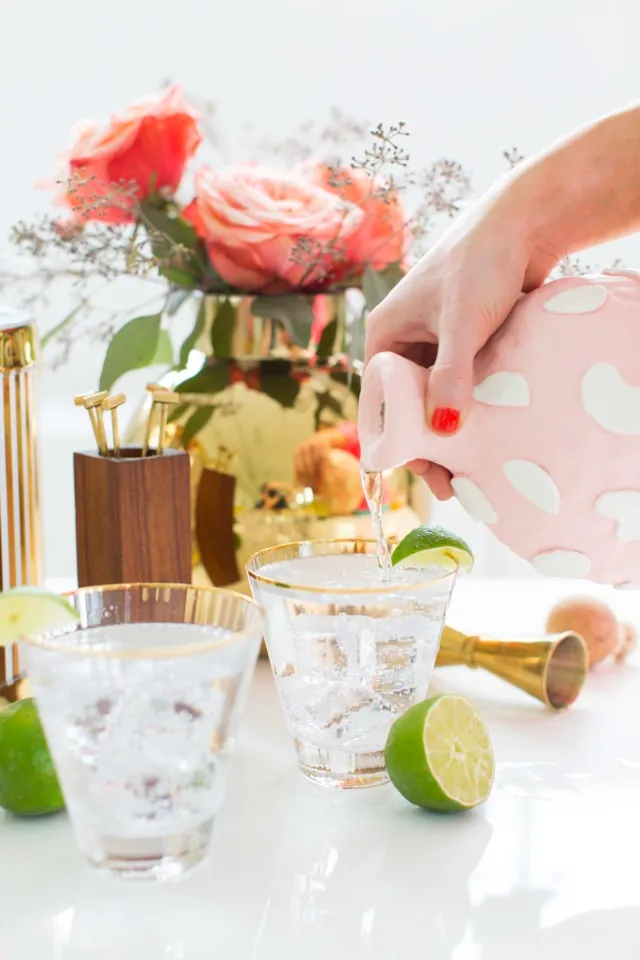
Voila! You’ve transformed an ordinary glass bottle into a one-of-a-kind clay decanter. Fill it with your favorite beverage and let the compliments flow.
Remember, crafting is all about experimentation and self-expression. Don’t be afraid to deviate from the instructions, embrace imperfections, and most importantly, have fun!
Show off Your Creations!
We’d love to see your artistic creations! Share photos of your finished DIY clay decanters on social media and tag Robert Kline Art. Happy crafting!
 A cute statement DIY clay decanter made from an old Patron bottle! – sugar and cloth – Best DIY blog 2015 – houston – ashley rose
