Blog
DIY Photo Puzzle: A Heartfelt Handmade Gift

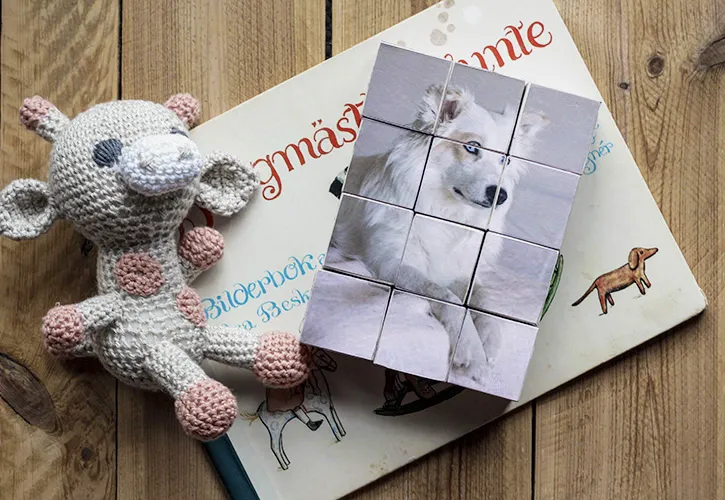
Hey there, fellow craft enthusiasts! Can you believe the holidays are just around the corner? As the air gets crisper and the aroma of cinnamon fills our homes, I find myself, like many of you, searching for unique and personalized gift ideas. This year, I’m excited to share a project that’s close to my heart – a DIY photo puzzle crafted from wood.
This isn’t just any puzzle; it’s a labor of love, a tangible memory transformed into a playful and engaging gift. Imagine the delight on your loved ones’ faces as they piece together cherished moments captured in time. And the best part? It’s surprisingly easy to make!
Gathering Your Supplies
Before we embark on this creative journey, let’s gather our crafting essentials:
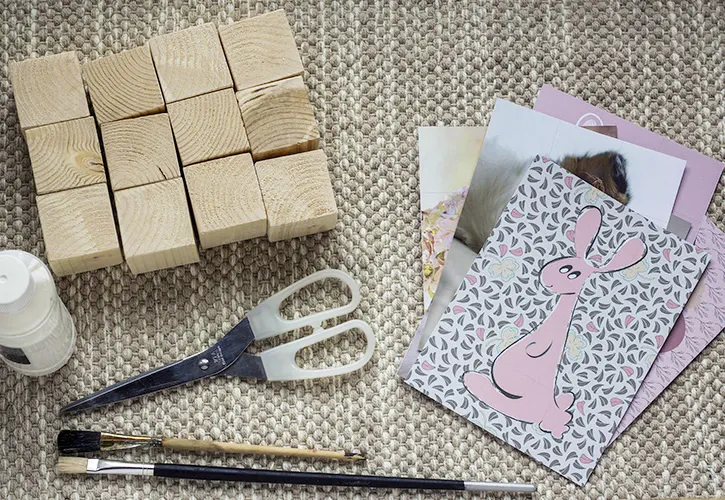
- Wooden Blocks: I recommend 12 square blocks measuring 2x2x2 inches for a 4×3 puzzle. You can either source these from a local hobby store or, if you’re feeling adventurous, craft your own from scrap wood like I did!
- Images: Choose six images that resonate with your gift recipient. Consider using family photos, vacation memories, or even patterns from leftover wallpaper. Remember to size them according to your puzzle dimensions (in this case, 8×6 inches).
- Decoupage Glue: Mod Podge or any similar all-in-one glue will work perfectly.
- Scissors: For precise image cutting.
- Brushes: For smooth glue application.
- Pen and Ruler: To create a grid on your images.
Creating Your Masterpiece
Now, let’s dive into the heart of the project:
Step 1: Preparing Your Images
- Using a pen and ruler, draw a grid on your images, dividing them into 12 equal squares to match your puzzle blocks. If you’re comfortable with graphic design software, you can create the grid digitally and print it directly onto your photos.
Step 2: Assembling the Puzzle
- Carefully cut your images along the gridlines, creating 12 individual squares from each image.
- Lay out your wooden blocks and arrange the image squares on top to visualize the finished puzzle.
- Apply decoupage glue directly onto a wooden block and adhere one image square. Repeat this process for each block and image square.
Step 3: Sealing and Drying
- Once all the images are attached, allow the glue to dry completely.
- Apply a final coat of decoupage glue over the entire surface of each block, sealing the images. Again, allow ample drying time between coats.
- Pro Tip: When drying, place the blocks on a non-stick surface like plastic wrap to prevent sticking.
 Wooden blocks with photos glued to them
Alt: Wooden blocks in various stages of completion for a photo puzzle project
Adding a Personal Touch: Packaging Your Gift
A beautifully presented gift enhances the joy of giving. For my photo puzzle, I opted for a handmade cardboard box adorned with a custom-designed cover.
- Cardboard Box: Websites like TemplateMaker offer a variety of box templates. I chose a simple design, printed it out, and traced it onto cardboard to create my box. Secure the edges with staples for a clean finish.
- Decorative Cover: To elevate the presentation, I designed a cover graphic and printed it onto cardstock. You can also use patterned paper, fabric scraps, or even a printed photo for a personalized touch.
 Finished photo puzzle box tied with a ribbon
Alt: A finished DIY photo puzzle box tied with a red ribbon
Finally, tie a ribbon around your creation, and voila! You’ve transformed a simple craft project into a thoughtful and heartfelt gift.
Unleash Your Creativity
The beauty of this project lies in its versatility. Consider these variations:
- Theme It: Tailor the images and box design to specific interests, hobbies, or occasions.
- Engraved Messages: Personalize the blocks further by engraving names, dates, or short messages.
- Interactive Learning: Create puzzles featuring letters, numbers, or animals for a fun and educational gift for children.
Remember, crafting is a journey of self-expression. Don’t hesitate to experiment, add your personal flair, and most importantly, have fun! Head over to Robert Kline Art for more inspiring DIY gift ideas. Let’s spread joy one handmade creation at a time.
