Blog
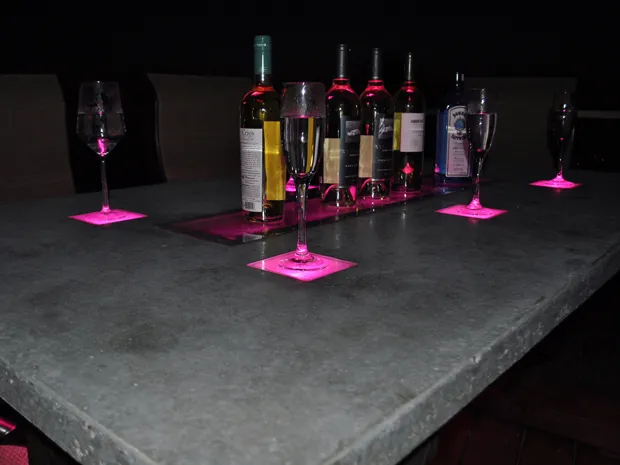
Build a Show-Stopping LED Concrete Table for Your Patio

Hey there, fellow DIY enthusiasts! Are you ready to take your outdoor space from basic to breathtaking? Let me introduce you to one of my all-time favorite projects: an LED concrete table with a built-in cooler. This showpiece isn’t just a table—it’s a conversation starter, a party essential, and a testament to your creative DIY skills.
Why Concrete?
You might be wondering, “Why concrete?” Well, let me tell you, this versatile material is a DIYer’s dream. Imagine crafting a high-end table with any thickness, color, or shape your heart desires—that’s the beauty of concrete. Plus, it’s incredibly budget-friendly. When you compare the cost of a professionally made concrete countertop (around $75 to $125 per square foot!), the savings are massive.
Project Inspiration
My journey to creating this LED concrete table started with a simple desire for a unique patio centerpiece. I wanted something that would “wow” guests and provide a functional space for entertaining. After some brainstorming, the idea struck me: a concrete table with embedded LED lights and a built-in cooler. I was instantly hooked on the concept and eager to bring it to life.
Crafting Your Own LED Concrete Table
While the detailed instructions for this project can be found on Makezine.com, I’m thrilled to share the overall process with you here.
1. Molding Your Vision
The first step is constructing a mold for your table using melamine. This will determine the shape and size of your masterpiece.
2. Assembling the Mold
Once your mold pieces are cut, it’s time to assemble them securely. This step is crucial for preventing leaks and ensuring a smooth, even surface for your concrete.
3. Pouring the Concrete
Now comes the fun part—pouring the concrete! Over the years, I’ve experimented with various concrete finishing techniques, which you can explore in my other videos.
4. Curing Time
Patience is key! Allow the concrete to cure for approximately four days. This ensures optimal strength and durability for your table.
5. Unveiling Your Creation
After the curing period, carefully remove the mold and flip your table over to reveal its stunning surface.
6. Polishing to Perfection
Using a concrete wet polisher, smooth out any imperfections and achieve a polished, professional finish.
7. Sealing for Protection
Protect your table from the elements and potential stains by applying a high-quality concrete sealer.
8. Building a Sturdy Base
For this project, I opted for a beautiful and functional table base using free plans from the talented Ana White at Ana-White.com. You can easily modify these plans to accommodate the LED lights and cooler.
9. Illuminating the Night
Now for the magic touch—installing the LED lights! Carefully insert your LED strip light kit into the pre-determined trough in the tabletop, ensuring even illumination.
10. Chilling Out
Fill the built-in cooler with ice and your favorite beverages. With a 36-inch by 6-inch trough, you’ll have plenty of space to keep drinks cold all night long.
11. Let the Party Begin
Your stunning LED concrete table is ready to shine! Invite friends over, fire up the grill, and bask in the glow of your DIY accomplishment.
Share Your Masterpiece
I always say, “The best projects are meant to be shared.” Showcase your creativity and inspire others by sharing photos of your LED concrete table.
This project is more than just building a table; it’s about creating an experience. So, gather your materials, put on your DIY hat, and let’s build something extraordinary together. Remember, the possibilities with concrete are endless!
 LED Concrete Table
This content is for informational purposes only. Consult with a qualified professional before undertaking any DIY projects. Always follow safety guidelines and manufacturer instructions.
