Blog
Build Your Own DIY Vertical Herb Garden: A Step-by-Step Guide

Hey there, fellow craft enthusiasts! Robert Kline here, and I’m thrilled to share a project that’s close to my heart – building a stunning DIY vertical herb garden. Picture this: fresh, aromatic herbs right at your fingertips, whether you have a sprawling backyard or a cozy balcony. Sounds amazing, right? Let’s dive into this rewarding project that’s perfect for all skill levels.
Why You’ll Love a Vertical Herb Garden
I’ve always been drawn to the charm of handmade crafts, and this vertical herb garden is no exception. Not only does it add a touch of rustic elegance to your space, but it’s also incredibly practical. It’s perfect for small spaces, apartments, and anyone looking to maximize their gardening potential.
Plus, imagine the joy of snipping fresh basil for your pasta or rosemary for your roasted potatoes – all from your very own creation!
Gathering Your Materials
Before we begin, let’s gather our tools and materials.
For the Frame:
- (2) 2x4s .. cut to 42″
- (3) 2x4s .. cut to 41″
For the Planter Box:
- (1) 2×6 .. cut to 55″ (front)
- (1) 1×6 .. cut to 55″ (back)
- (2) 2×6 .. cut to 5.5″ (sides)
- (1) 2×6 .. cut to 52″ (bottom)
For the Shelves:
- (1) 2×6 .. cut to 13.5″
- (1) 2×6 .. cut to 32.5″
Additional Materials:
- Miter Saw
- Square
- Drill
- Screws for assembly
- Screws for mounting
- 7 Corner Brackets
- Screws for Corner Brackets
- Stain
- Water Sealer
- Spade Bit
- 7 Plant Pots
- Spray Paint (I recommend matte black)
- Potting Soil and your favorite herbs!
- Weed block landscaping fabric
- Hanging Wood Bead Planter (get creative with wood beads and string!)
- Eye Hook
Building Your Vertical Herb Garden: A Step-by-Step Guide
Now, let’s bring this garden to life!
Step 1: Cut the Wood
Using a miter saw, cut all the wood pieces to the lengths specified above. Embrace the rustic charm – I chose not to sand my wood!
Step 2: Stain & Seal
Apply two coats of your favorite wood stain. Once dry, seal it with a coat of water sealer – a little goes a long way!
Step 3: Prep Your Metal Accents
Spray paint your brackets, bracket screws, and plant pots in a matte black finish. This will add a modern touch to your garden. Allow ample drying time.
Step 4: Assemble the Frame
This is where an extra pair of hands comes in handy! Line up your frame pieces using a square. Drill pilot holes to prevent splitting and secure the pieces with deck screws at a 45-degree angle. Remember to countersink the screw heads!
Step 5: Center Beam Magic
Measure carefully to ensure your center beam is perfectly positioned. Use a scrap piece of wood and a clamp to secure the beam as you drill pilot holes and attach it with angled screws.
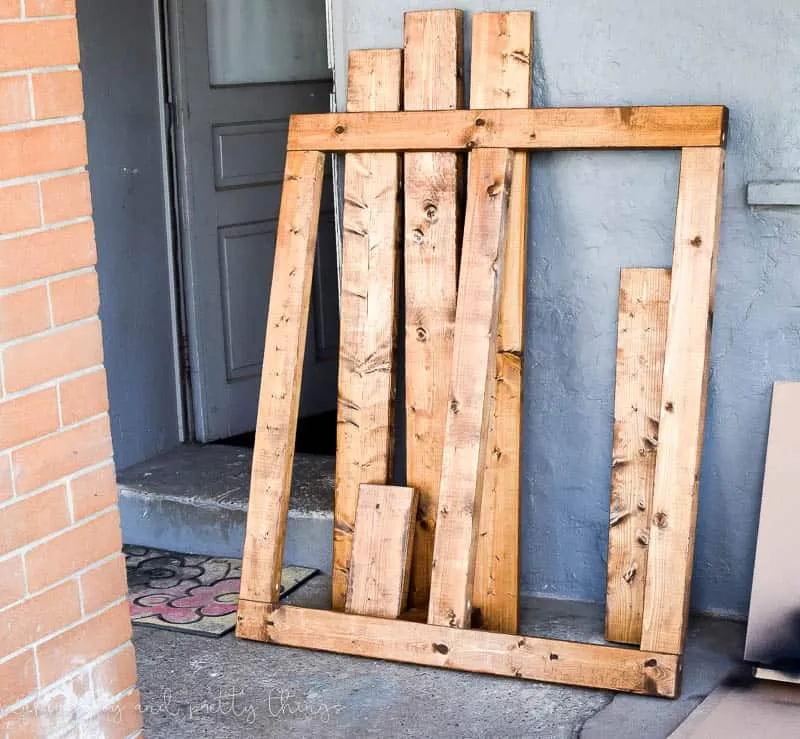
 Assembled and stained wooden frame ready for planter box and shelving to be added
Step 6: Craft the Planter Box
Create the planter box by attaching the front, back, and sides to the bottom piece using pilot holes and deck screws.
Step 7: Drainage is Key
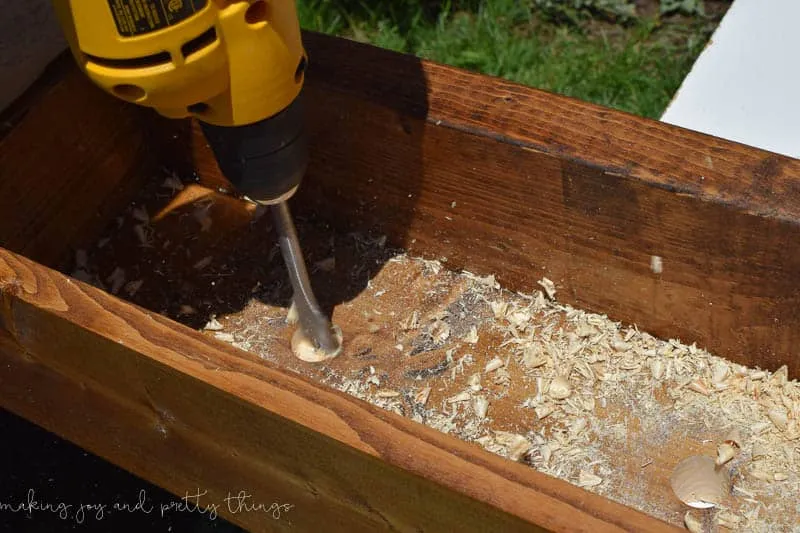
Drill six drainage holes across the bottom center of your planter box using a spade bit. Line the box with weed block landscaping fabric to prevent soil from escaping.
 When making a planter box be sure to drill drainage holes for any water to prevent your wood from rotting
Step 8: Attaching the Planter Box & Shelves
Measure carefully and attach the brackets to your frame using the spray-painted screws. Do a “dry-fit” to make sure everything aligns perfectly. Remember, the smallest shelf only needs two screws!
Step 9: Mounting Your Garden
Determine the best way to anchor your frame securely to your wall, using appropriate screws for your siding material. Remember to check your level frequently for perfect alignment!
Step 10: Final Touches
Attach the planter box and shelves to the frame using the galvanized screws. Now, for the fun part – planting your herbs!
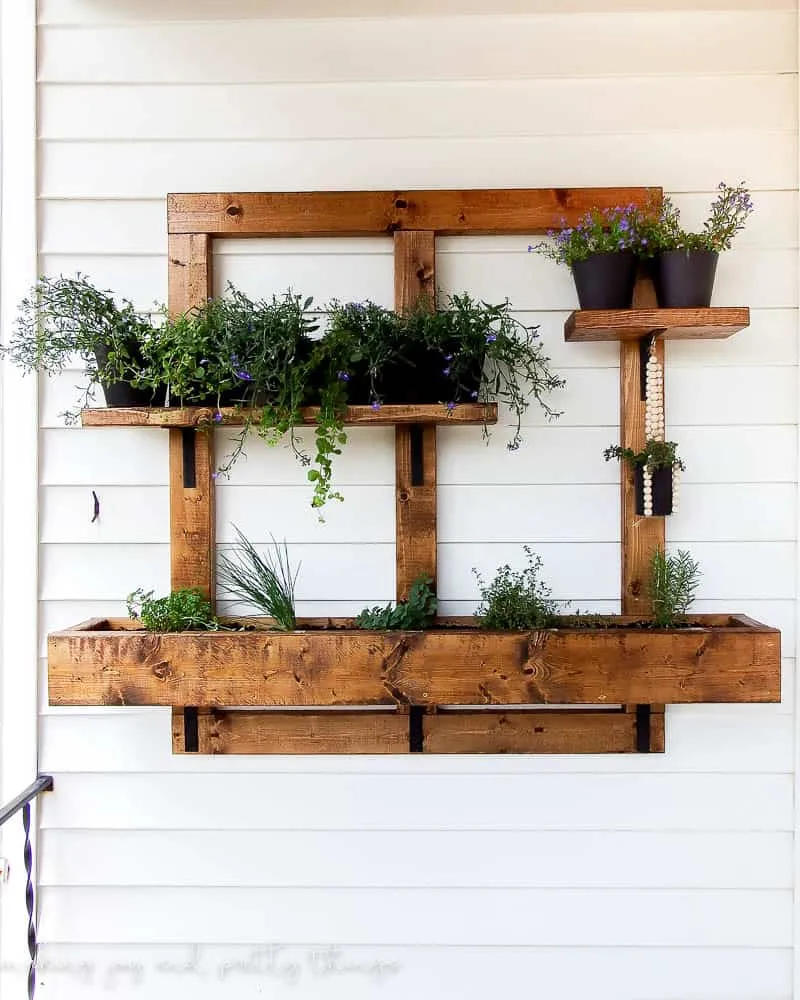
 Complete DIY vertical herb garden hung on exterior siding that provides a lot of options for plants in pots and planter
Bask in the Beauty of Your Creation!
Congratulations! You’ve just crafted a stunning and functional piece of garden art. Personalize it further with handmade herb markers and decorative elements. I encourage you to explore different stain colors, planter designs, and herb combinations to create a garden that reflects your unique style.
Share Your Green Thumb Triumphs
I’d love to see your creations! Share photos of your DIY vertical herb gardens on social media and tag Robert Kline Art. Happy crafting!
