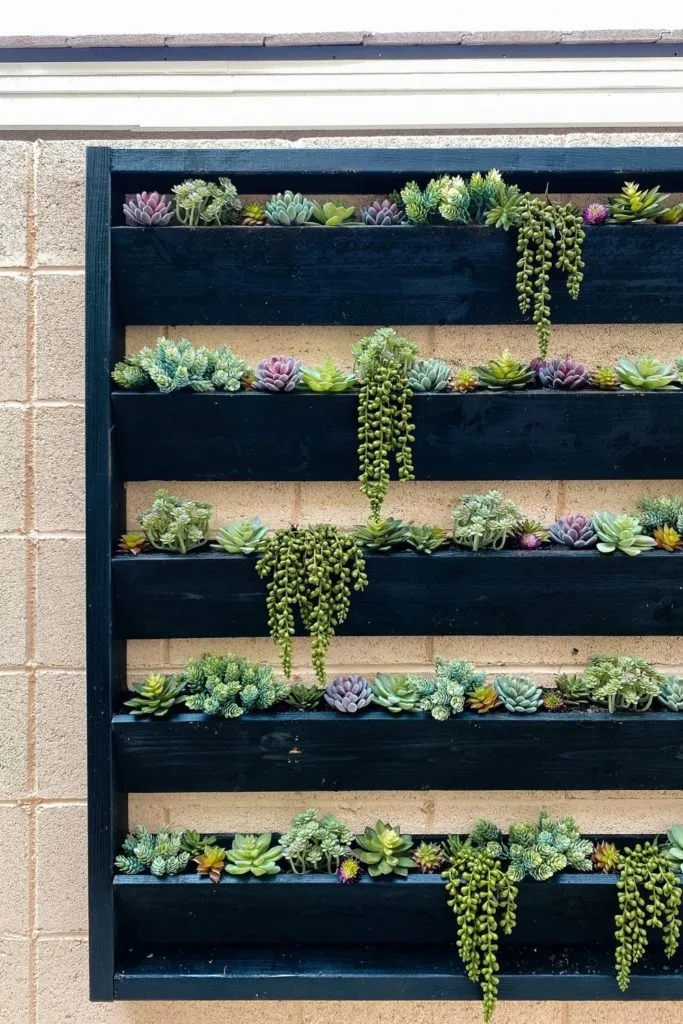
DIY Planter Wall: Transform Your View with This Easy Project

Ever gaze out your window and wish for a more inspiring view? We’ve all been there. Staring at a drab wall can be a real mood-killer. That’s why I decided to take matters into my own hands and create a stunning DIY planter wall! Now, instead of concrete, I’m greeted by a vibrant burst of greenery. Let me show you how you can achieve this easy and rewarding transformation in your own space.
Visualizing Your Dream Planter Wall
Before diving into any DIY project, it’s crucial to have a clear vision. I like to use painter’s tape to outline the desired size and placement. This helps visualize the final look and ensures it complements the surroundings. For my planter, I wanted it to be prominently visible from my living room window, so I opted for a six-foot-long design.
Pro Tip: When selecting wood for your planter, always inspect the boards for straightness. Lift one end and sight down its length – this will save you potential headaches during assembly.
Building a Sturdy Foundation
With my vision in place, I headed to the hardware store and picked up redwood cedar planks. Using a miter saw, I cut them to the desired size.
Helpful Hint: If you’re unsure about measurements, sketching it out can be incredibly helpful.
Once my planks were ready, I laid out the framing pieces on the floor, followed by the inner boards. After confirming the arrangement, I used an impact driver to secure the frame.
Confession: The satisfying whir of an impact driver never gets old!
To hold the planks within the frame, I opted for a combination of wood glue and a nail gun for extra sturdiness. Pre-drilling pilot holes before inserting screws provides an even more secure hold. Remember, DIY is all about creative problem-solving! Feel free to experiment and find what works best for you.
To create the troughs for my plants, I attached three triangular support pieces to each plank – one on each side and one in the middle. These pieces not only enhance stability but also simplify the process of attaching the front of the trough later. Again, I relied on my trusty wood glue and nail gun for this step.
Painting and Mounting Your Masterpiece
I find that a fresh coat of paint can instantly elevate any project. While some of my Instagram followers suggested staining the planter, I went with my gut and chose a classic black spray paint. You can use a paint sprayer or brush depending on your preference.
Pro Tip: Protect your work area from paint splatters by working outdoors or covering surrounding surfaces.
Hanging anything on cinderblock walls can be challenging. To overcome this, I used a masonry bit to drill holes through the planter’s wood planks and into the wall. Barrel anchors, inserted into the holes, provide a secure grip for the screws, preventing them from loosening over time.
Important Note: Enlisting a helping hand is crucial for this step, as you’ll need someone to hold the planter steady while you secure it to the wall.
Once the planter was securely mounted, I attached the pre-painted front pieces of the troughs using the same wood glue and nail gun method.
Adding Life with Succulents
Now comes the most exciting part – bringing your planter to life with plants! For this project, I opted for low-maintenance faux succulents. To enhance their realism, I used real dirt, filling each trough with my hands. It might get a little messy, but trust me, the result is worth it.
Design Tip: For a natural look, vary the height, color, and placement of your plants. Spread out similar-looking succulents and don’t hesitate to remove any that appear artificial.
 DIY planter wall
Enjoy Your DIY Oasis
And there you have it – a stunning DIY planter wall that instantly transforms any space. It’s a testament to the power of creativity and the joy of bringing your vision to life.
Remember, if you’re ever unhappy with your view, change it! Explore the endless possibilities of DIY and create a home that reflects your unique style and passions.
For more inspiring DIY projects and home décor ideas, browse through the Robert Kline Art website. And don’t forget to share your creations with us – we can’t wait to see what you come up with!
