Blog
DIY Wall-Mounted Guitar Holders: Show Off Your Instruments in Style

As an artist, I love finding creative ways to display my instruments. It not only keeps them safe and organized, but also adds a personal touch to my workspace. Recently, I decided to tackle a project that had been on my mind for ages – building DIY wall-mounted guitar holders. Trust me, if you’re tired of tripping over guitars or just want to elevate your music corner, this project is for you!
Why Wall-Mounted Guitar Holders?
For years, my guitars were relegated to their cases, tucked away in a closet. Sure, it kept them protected, but it also meant I rarely played them. I wanted my instruments to be accessible, inspiring, and a visible part of my creative space. Wall-mounting seemed like the perfect solution.
Plus, let’s be honest, a beautifully crafted guitar deserves to be admired! These DIY holders are not only functional but also act as unique, artistic pieces that enhance the overall aesthetic of your room.
Crafting Your Own Guitar Holders: A Step-by-Step Guide
This project is surprisingly simple, even if you’re new to woodworking. Here’s what you’ll need:
Materials:
- 1×4 board (12″ per holder, I recommend maple for its strength and beauty)
- Miter Saw
- Jigsaw or Scroll Saw
- Drill
- Kreg Jig
- 1 1/4″ Kreg screws
- Fine grit sandpaper
- Ebony Stain (or your preferred color)
- Satin Poly
- 2 Black Screws (2″ or so)
Instructions:
-
Cut Your Wood: Begin by cutting your 1×4 board into the required sizes. Each holder consists of two pieces: a 5 1/2″ piece for the wall mount and a 4 1/2″ piece that cradles the guitar.
-
Create the Pocket Holes: Using your Kreg Jig, drill pocket holes into the pieces you just cut. Remember to adjust the stopper on your drill bit to match the thickness of your wood. Pocket holes create secure and discreet joints, giving your holders a professional finish.
-
Shape the Guitar Neck Rest: Now for the fun part! Using your jigsaw or scroll saw, carefully cut out the shape for your guitar neck. This is where you can get creative and customize the design to fit your style and the type of guitar you have.
Pro Tip: Measure the neck of your guitar to ensure a snug fit. The slot for the headstock should be smaller than the base of the headstock, but larger than the top of the neck. The ‘entrance’ for the guitar holder should be slightly larger than the depth of the neck.
-
Assemble the Holder: With your pieces cut and shaped, it’s time to assemble! Secure the two pieces of wood together using the pocket holes you drilled earlier. If you’re using a hardwood like maple, I recommend using fine thread pocket hole screws for extra strength.
-
Sand and Finish: Smooth out any rough edges by sanding the entire surface of your holders with fine-grit sandpaper. This step is crucial for achieving a professional-looking finish and ensuring the stain absorbs evenly.
-
Stain and Seal: Apply your chosen stain, following the manufacturer’s instructions. I opted for a classic ebony stain, but feel free to experiment with different colors to match your aesthetic. Once the stain dries, apply a protective coat of satin poly to seal the wood and enhance its durability.
-
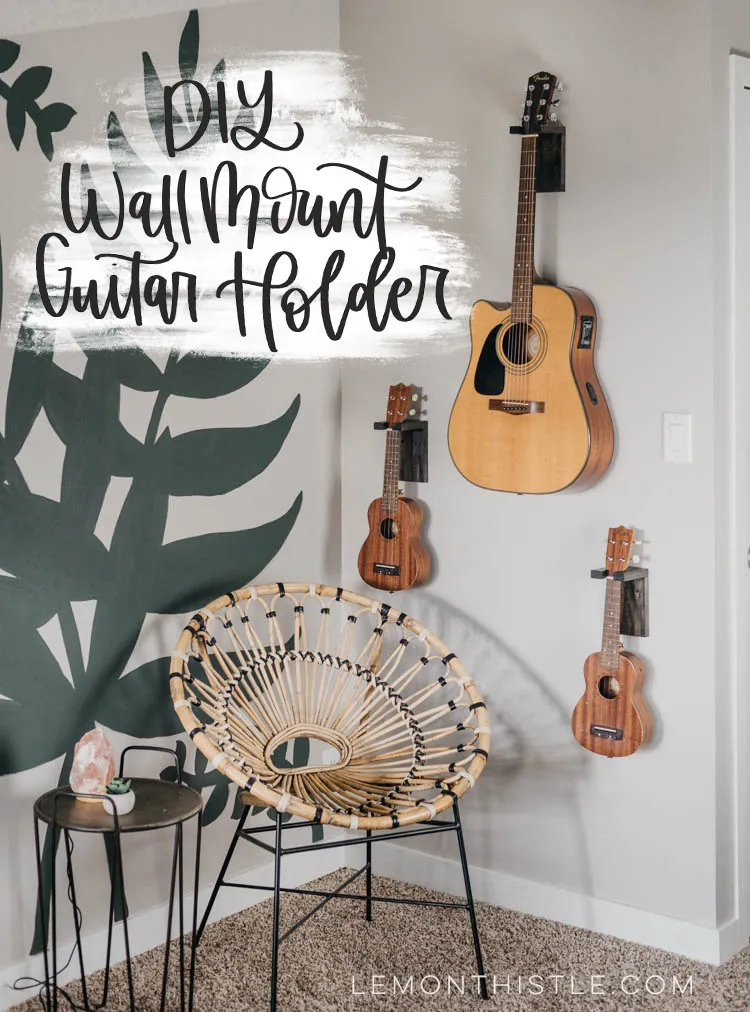
Mount Your Holders: Using two black screws for each holder, mount them securely to the wall. Always remember to drill pilot holes to prevent splitting the wood, especially if you’re working with hardwood.
Safety First: Make sure to mount the holders into studs for maximum support and to ensure they can safely hold the weight of your guitars.
 DIY Wall Mount Guitar Holders- Tutorial and plans
The Joy of Displaying Your Creations
And there you have it – your very own DIY wall-mounted guitar holders! Not only will they keep your instruments organized and accessible, but they’ll also add a touch of personalized style to your space. I encourage you to get creative with the design, explore different wood finishes, and make it your own.
At Robert Kline Art, we believe that handmade creations hold a special kind of magic. They tell a story, reflect your personality, and bring warmth to your surroundings. What better way to celebrate your love for music than by displaying your instruments with pride?
Share your creations and inspire others! Have you tackled a DIY project recently? What are some of your favorite ways to display your musical instruments or art pieces? I’d love to hear your thoughts in the comments below! And don’t forget to explore the Robert Kline Art website for more unique, handcrafted treasures.
