Blog
DIY Photo Backdrop Ideas: Create Stunning Backgrounds on a Budget

Hey there, fellow art enthusiasts! Robert Kline here, and let me tell you, nothing elevates a photograph like the perfect backdrop. It’s the artistic foundation upon which your subject shines. Today, we’re diving into the world of DIY photo backdrops – an easy and affordable way to add a touch of magic to your pictures, whether you’re a seasoned pro or just starting your photography journey.
Why DIY Backdrops?
Remember that time you stumbled upon a breathtaking photo online and thought, “Wow, what a backdrop!”? Well, chances are, it was probably a DIY project!
DIY backdrops are more than just pretty backgrounds; they’re a testament to your creativity and resourcefulness. They allow you to:
- Personalize your shoots: Tailor your backdrop to match the theme, mood, or personality of your subject.
- Save money: Professional backdrops can be expensive, but DIY allows you to create stunning visuals on a budget.
- Unleash your creativity: The possibilities are endless! Experiment with different materials, colors, and textures to bring your unique vision to life.
Pro Tip:“Don’t be afraid to think outside the box! The beauty of DIY lies in its flexibility. Repurpose everyday items into extraordinary backdrops. Let your imagination run wild!” – Sarah M., Event Stylist
Simple DIY Photo Backdrop Ideas
Let’s kick things off with some easy-to-create backdrops perfect for those last-minute photoshoots or when you want to enhance a natural setting:
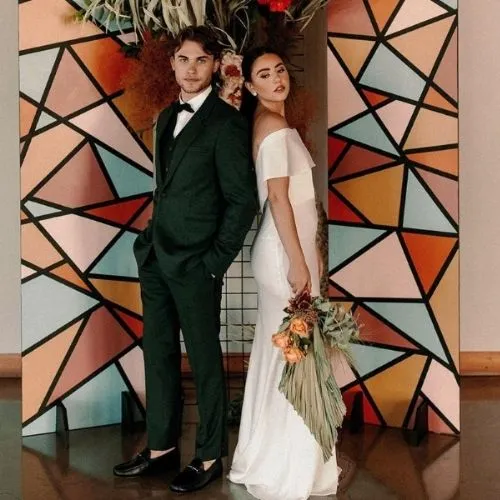
1. Geometric DIY Backdrop
Geometric patterns add a modern and chic touch to any photo.
Materials: Cardboard, geometric patterned paper, paint, tape/glue, cutting tool
Instructions:
- Cut the cardboard to your desired size.
- Attach the patterned paper to the cardboard using glue or tape.
- Use paint to accentuate the geometric shapes and add depth.
 a couple is taking photo with Geometric DIY Backdrop
Pro Tip: Use metallic paint for a touch of glam!
2. DIY Plate Photo Backdrop
This playful backdrop is perfect for birthday parties or quirky portraits.
Materials: Paper or plastic plates in various colors, tape
Instructions:
- Arrange the plates in a visually appealing pattern on the wall.
- Secure the plates using tape.
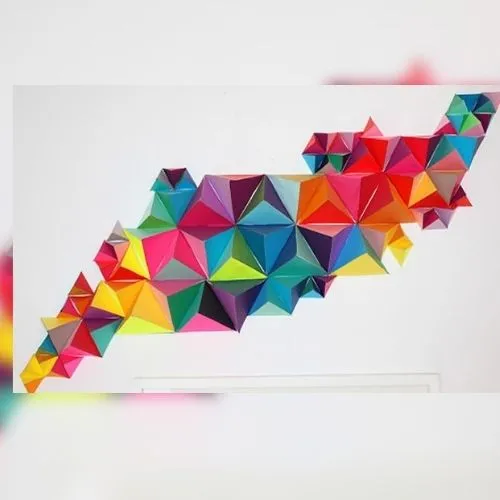
 a photo of 3D Triangles DIY Photo Backdrop
3. 3D Triangles DIY Photo Backdrop
Add dimension and visual interest with this eye-catching backdrop.
Materials: Foam board, ruler, pencil, scissors, hot glue gun, hot glue sticks
Instructions:
- Draw and cut out triangle shapes from the foam board.
- Use the hot glue gun to assemble the triangles in your desired pattern.
 a photo of a woman in front of Scalloped Paper DIY Backdrop
4. Scalloped Paper DIY Backdrop
Create a whimsical and elegant backdrop with this simple technique.
Materials: Colored paper, scissors, tape, removable adhesive hooks
Instructions:
- Cut small triangles from the top corners of each sheet of paper to create a scalloped edge.
- Fold each sheet in half lengthwise and tape the sides together.
- Use adhesive hooks to hang the scalloped paper panels on the wall.
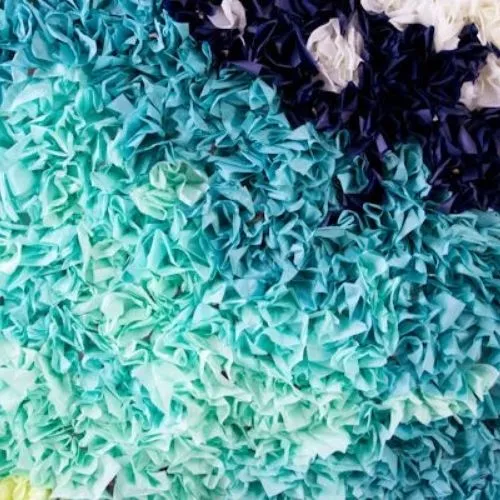
 Ombre Tissue Paper backdrop
5. Ombre Tissue Paper Backdrop
This dreamy backdrop is perfect for adding a soft and romantic touch.
Materials: Tissue paper in varying shades of the same color, scissors, string, tape
Instructions:
- Cut the tissue paper into equal-sized strips.
- Layer and fold the strips, securing the center with string.
- Fan out the tissue paper to create a tassel effect and attach it to the wall with tape.
Pro Tip: Experiment with different color combinations to create a unique ombre effect.
… and more!
Stay tuned for Part 2, where I’ll share more crafty and unique DIY backdrop ideas to take your photography to the next level. We’ll explore everything from whimsical streamers to elegant fabric drapes. Remember, the only limit is your imagination!
In the meantime, head over to [link to relevant page on your website] to discover unique handmade gifts that complement your creative spirit.
