Blog
Building a Simple and Sturdy 36″ Corner Kitchen Cabinet

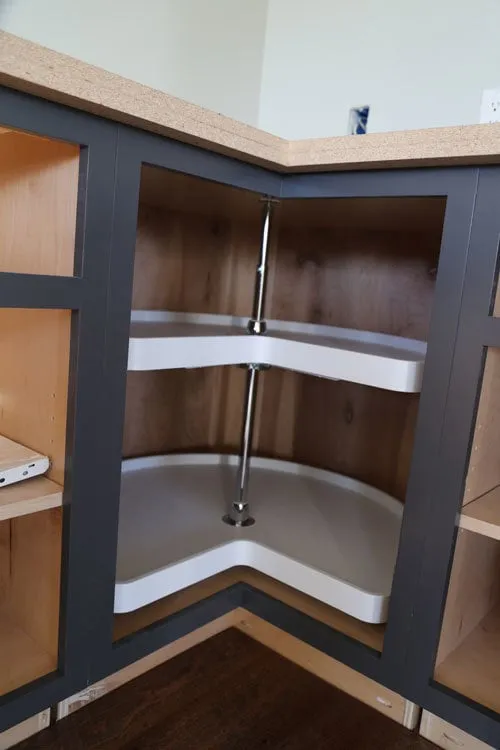
Here at Robert Kline Art, we love it when DIY projects are approachable and rewarding. That’s why I’m excited to share a simplified approach to building a 36″ corner base kitchen cabinet. This design is perfect for those who want a functional and robust cabinet without the complexity of overly complicated joinery. As someone who has built and used countless cabinets over the years, I can attest to the importance of striking a balance between durability and ease of construction. This design does just that.
Planning Your Cabinet Build
Before diving in, let’s gather our materials and tools. Accurate measurements and a comprehensive list are crucial for a smooth building process.
Materials You’ll Need:
- Plywood:
- 1 sheet of ¾” plywood (I recommend prefinished maple for a clean look)
- 1 sheet of ¼” plywood (again, prefinished maple complements the cabinet)
- Scrap pieces of ¾” plywood for support structures
- Hardwood: 10 feet of 1x2s (poplar is a great choice for a paintable finish)
- Fasteners:
- ¾” finish nails
- 1-¼” Pocket Hole Screws
- Adhesive: Elmer’s Wood Glue
- Wood Filler
Essential Tools:
- Measuring Tape
- Pencil
- Jigsaw
- Circular Saw
- Drill
- Pocket Hole Jig (optional but helpful)
- Hammer
- Sandpaper (various grits)
- Level
- Safety Glasses
Step-by-Step Construction Guide
Step 1: Precise Plywood Cuts
 style=
- Begin by cutting the two side pieces from your ¾” plywood. They should measure 34-½” x 22-¼”.
- Next, cut the top and bottom pieces, each measuring 34-¾” x 34-¾”. You’ll need to use your jigsaw to create the toekicks and the inside corner cutout on these pieces. Refer to Steps 2 and 3 for guidance on the exact dimensions.
- Pro Tip: Maximize your plywood by carefully planning your cuts. You can get all the necessary pieces from a single sheet.
Step 2: Notching for Back Supports
- The back corners of both the top and bottom pieces require notches to accommodate the back supports.
- Using a jigsaw, carefully cut out these notches to fit the support pieces snugly.
Step 3: Assembling the Cabinet Body
 style=
- Before assembling the cabinet, take a moment to drill ¾” pocket holes into the outsides of the side pieces, top, and bottom. This preparation will streamline the process of attaching the face frame later.
- Attach the top and bottom pieces to the sides using glue and finish nails. Ensure a secure bond for a sturdy cabinet. Remember to maintain a 5″ gap below the bottom shelf for toekick clearance.
Step 4: Attaching the Back Panels
- Attach the ¼” plywood back panels to the top and bottom pieces, again maintaining a 5″ gap beneath the bottom shelf.
Step 5: Reinforcing the Back
 style=
- For added strength and stability, install additional ¼” plywood to the back of the cabinet, securing it with glue and finish nails.
Step 6: Crafting the Face Frame
- Now, let’s create the face frame that will provide a polished look. Cut your 1x2s to the following dimensions:
- 2 pieces @ 27″
- 2 pieces @ 13-½”
- 2 pieces @ 12-¾”
Step 7: Attaching the Face Frame
- Assemble the face frame separately, ensuring it’s square and secure.
- Attach the completed face frame to the front of the cabinet box using glue and finish nails. Note: The face frame should extend about ¼” beyond the cabinet sides on each side for a seamless look.
Step 8: Doors and Finishing Touches
 style=
- For full overlay doors (recommended for a modern aesthetic), order doors that measure 11-⅝” x 28-½”. Install them using appropriate hinges.
- Finally, fill any nail holes with wood filler, sand the entire cabinet smooth, and apply your chosen finish—paint or stain—to match your kitchen décor.
Conclusion
Building your own kitchen cabinets can be an incredibly satisfying endeavor. This simplified approach to a 36″ corner cabinet provides a solid foundation for even novice DIYers. By breaking down the process into manageable steps and offering helpful tips, I hope you feel empowered to tackle this project.
Don’t forget to check out our other DIY projects and handcrafted treasures on Robert Kline Art. And if you give this cabinet a try, we’d love to hear about it in the comments below. Happy building!
