Building Budget-Friendly Garage Storage Cabinets: A Step-by-Step Guide

As any DIY enthusiast knows, a well-organized workspace is essential. And what better place to set up shop than the heart of any handyman: the garage! However, with more space often comes the irresistible urge to fill every nook and cranny with tools, equipment, and those “I’ll use it someday” materials. Sound familiar?
Well, fellow makers, I recently embarked on a mission to tame the chaos in my own garage workshop by building functional and affordable storage cabinets. Join me as I share my step-by-step process, sprinkled with personal anecdotes and expert tips, so you too can reclaim your workspace and unleash your creativity!
From Clutter to Clarity: Planning Your Garage Transformation
Let’s be honest, we’ve all been there – staring at a mountain of clutter, wondering where to even begin. That was me, staring at my garage, a mixture of leftover building materials, inherited treasures (or were they?), and a healthy dose of “how did this get here?”.
 Image of a cluttered garage
The first step? A clean slate. Out with the old, the unused, and the “I’ll deal with it later.” This cathartic purge allowed me to assess the space and dream up a plan.
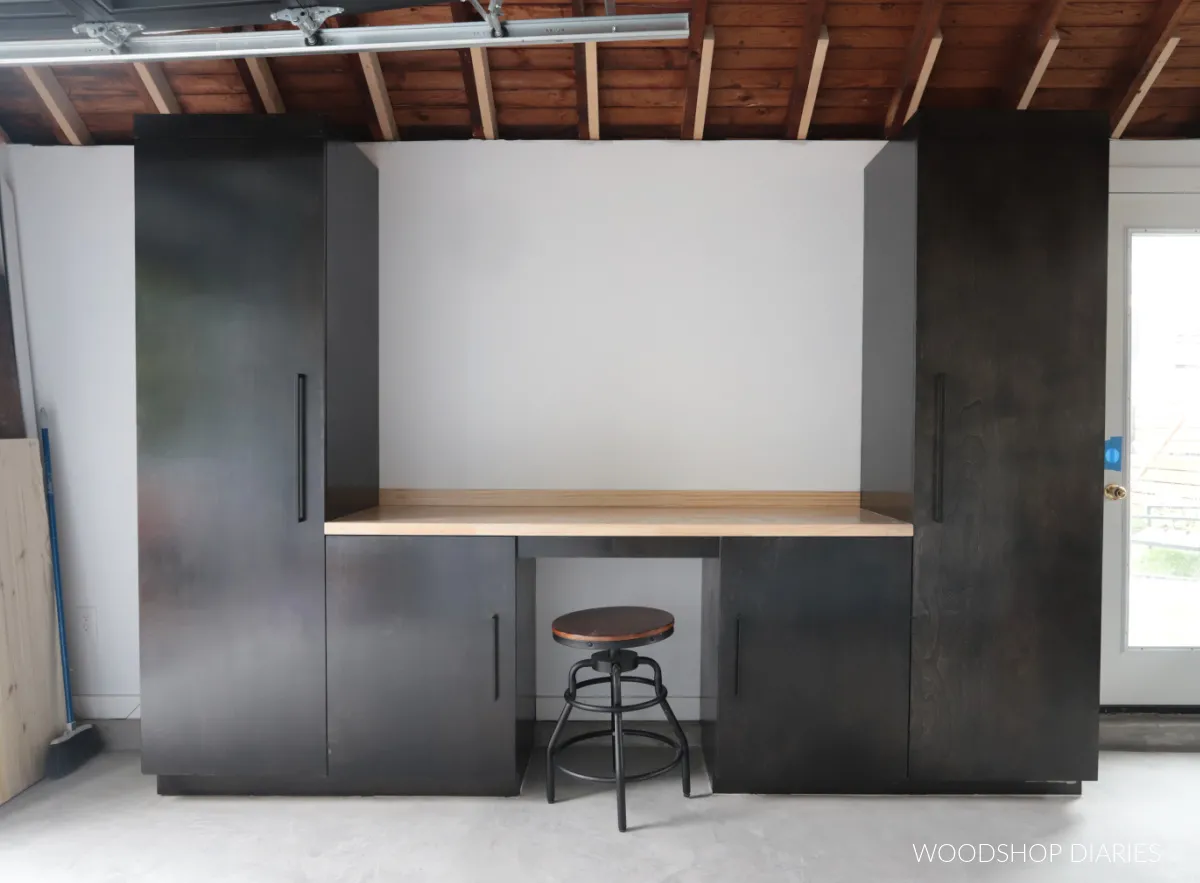
My vision? Maximize storage without breaking the bank. A large, budget-friendly cabinet in the corner became the cornerstone of my plan, strategically placed to accommodate my trusty workbench and existing material rack.
Building the Foundation: A Sturdy Cabinet Frame
With a clear vision in mind, I rolled up my sleeves and got to work building the backbone of my storage solution – the cabinet frame.
To keep costs down, I opted for a straightforward design using 2x4s and plywood. Here’s how it unfolded:
- Base First: Using 2x4s, I constructed a rectangular base, the depth determined by both the size of my storage needs and the plywood I had on hand for the countertop.
- Top It Off: Mirroring the base, I built an identical frame for the top of the cabinet.
- Vertical Support: Next, I cut vertical 2x4s to match the height of the base and secured them to the front of the bottom frame. These would provide support and double as the framework for my overlay cabinet doors.
- Frame Assembly: With the vertical supports in place, I attached the top frame, creating a sturdy skeleton for my cabinet.
Countertops, Cabinet Ends, and a Splash of Color
With the frame complete, it was time to add some personality and functionality.
Countertop Time: I chose a piece of ¾” whitewood plywood for the countertop, a happy leftover from a previous bathroom project. Cutting it slightly larger than the frame provided a nice ½” overhang. Since my cabinet was L-shaped, I created two separate countertop pieces.
Finishing Touches: Before securing the countertops, I painted the exposed OSB above them white for a clean look. I also added ¼” plywood panels to each end of the cabinet frame, enclosing the structure.
A Touch of Black: To add a touch of sophistication and protect the wood, I painted the entire cabinet frame with black semi-gloss paint. I opted to paint before installing the doors to avoid any awkward maneuvering later.
Crafting the Doors: Overlay Style for a Polished Look
For a touch of warmth and visual interest, I chose ½” birch plywood for the cabinet doors. This affordable option takes stain beautifully, masking those inevitable workshop dust marks!
I opted for an overlay design, where the doors extend slightly beyond the frame opening. This forgiving style helps conceal any imperfections in the frame while adding a touch of polish.
To ensure a perfect fit, I measured and cut each door individually. Trust me, it’s better to be safe than sorry!
Staining and Sealing for a Durable Finish
Remember that whitewood plywood countertop? Well, curiosity got the better of me, and I tried staining it. Let’s just say it didn’t go as planned. The result was blotchy and uneven – not exactly the look I was going for.
After a valiant attempt to embrace the “rustic charm,” I surrendered and repainted the countertop black. Lesson learned: some plywood is best left unstained.
Thankfully, the birch plywood doors were a staining dream! I applied a rich stain, instantly transforming them into elegant focal points.
Finally, I sealed both the cabinet frame and doors with two coats of polycrylic for lasting protection against wear and tear.
From Chaos to Calm: A Garage Transformed
 Image of a cluttered garage
Stepping back to admire my handiwork, I felt an overwhelming sense of accomplishment. My once chaotic garage corner had transformed into an organized and inviting workspace, ready to inspire countless DIY adventures.
But this was just the beginning. The completion of my storage cabinets ignited a chain reaction, inspiring a complete garage workshop makeover. Stay tuned for my next project reveal!
Now it’s your turn! Don’t let clutter stifle your creativity. Embrace the power of DIY and build your own garage storage cabinets. And while you’re at it, hop on over to Robert Kline Art for more inspiring craft ideas and unique handmade gifts for your loved ones!
