DIY Overhead Garage Storage System: Reclaim Your Space
Is your garage overflowing with bins and boxes, leaving you yearning for a parking spot? Don’t worry, Robert Kline Art is here to help! We’ve all been there, staring at a mountain of stuff, wishing for a magic storage solution. Today, we’re diving into a simple yet effective DIY project: building an overhead garage storage system.
This system is designed to utilize that often-overlooked space near the ceiling, getting your belongings up and out of the way. It’s easy to build, incredibly practical, and best of all, budget-friendly. Let’s roll up our sleeves and get started!
Gathering Your Tools and Materials
Before we embark on our construction adventure, let’s gather everything we’ll need:
Tools:
- Circular saw
- Cordless drill
- Drill bit set
- Hammer
- Level
- Miter saw
- Safety glasses
- Socket/ratchet set
- Stepladder
- Stud finder
Materials:
- (1) 1/2″ x 1″ x 8′ pine stop strip
- (1 box) 1/4″ x 2″ wood screws
- (6) 23-1/2″ x 19-1/2″ x 13″ plastic totes (or similar size)
- (2) 2×4 x 8″
- (16) 3-1/2″ lag screws and washers
- (1 box) 3″ wood screws
- 4′ x 8′ sheet of 3/4″ plywood
- (1 pint) Carpenter’s glue
Remember, the size of the totes will influence the dimensions of your storage system. Measure your space and choose totes that fit your needs and available clearance.
Building the Overhead Garage Storage Carriages
The carriages are the backbone of our system, supporting the totes and attaching securely to the ceiling joists.
Step 1: Measure Twice, Cut Once
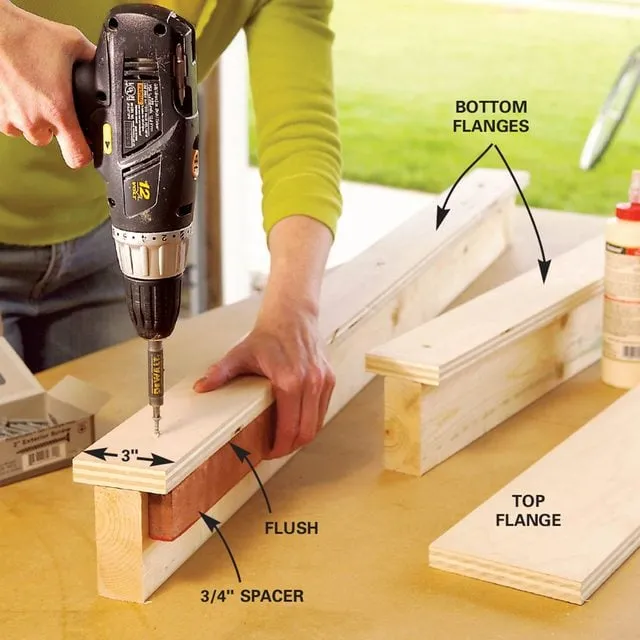
- Measure the width of your tote rims. This measurement will determine the width of the plywood strips used for the bottom flanges of the carriages.
Step 2: Crafting the Bottom Flanges
- Cut 3/4-inch plywood strips for the bottom flanges, using the measurement you took in step 1.
- Center the plywood strips on the 2x4s and secure them using glue and 2-inch screws, spacing the screws approximately every 10 inches.
 bottom flange for storage
Alt: Plywood bottom flange attached to a 2×4
Step 3: Completing the Carriages
- Flip the carriage assemblies over.
- Cut and center 5-inch-wide plywood strips for the top flanges.
- Glue and screw the top flanges to the 2x4s, completing the carriage assemblies.
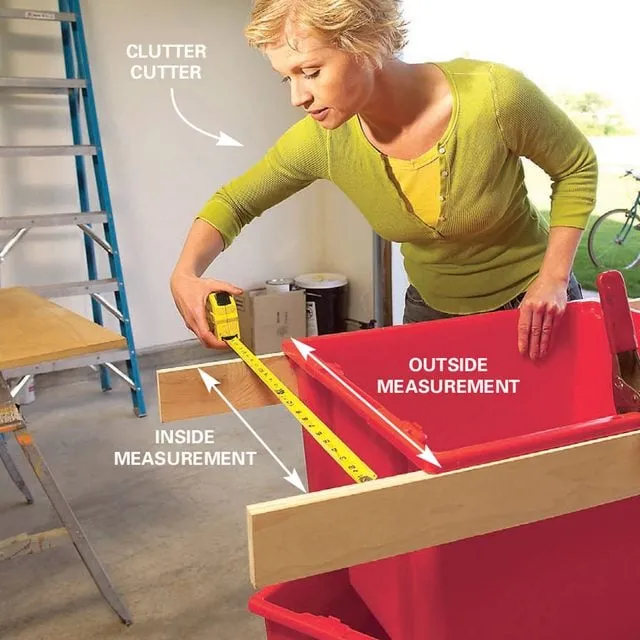 measure totes
Alt: Measuring a tote to determine the dimensions for the storage carriage.
Installing the Storage System
Now that our sturdy carriages are ready, it’s time to install them!
Step 4: Locating the Joists
- Use a stud finder to locate the ceiling joists in your garage.
- Mark the joist locations using a chalk line.
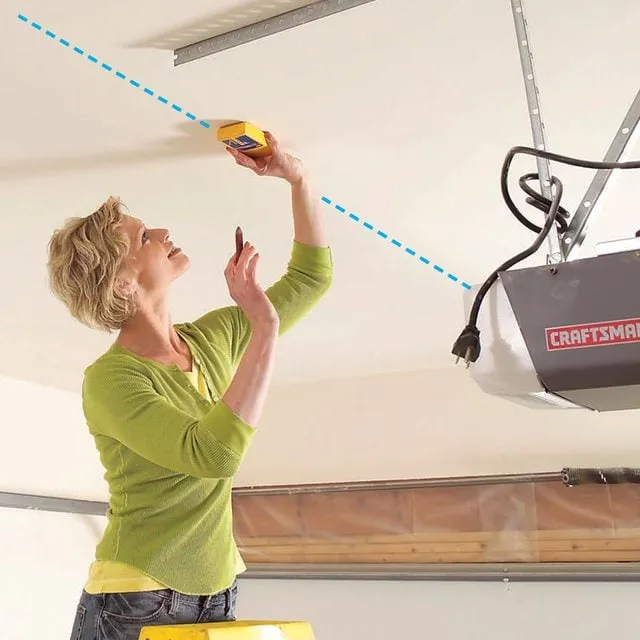 mark joists for installing shelves
Alt: Marking ceiling joists for installing garage storage
Step 5: Positioning the Carriages
- Measure and mark each carriage 12 inches from the end.
- Align the marks with your chalk lines, ensuring the carriages are perpendicular to the joists.
- Temporarily screw one side of each carriage to a joist using 3-inch screws.
Step 6: Ensuring Proper Spacing
- Create a 2×4 template based on your tote dimensions. This template will help you maintain consistent spacing between the carriages.
- Use the template to mark the location of the next carriage and screw it in place, securing only one side for now.
- Repeat this process for the remaining carriages.
Step 7: Test Fitting
- Before fully securing the carriages, perform a test fit with your totes.
- Ensure the tote rims rest comfortably on the lower flanges and that you have sufficient clearance.
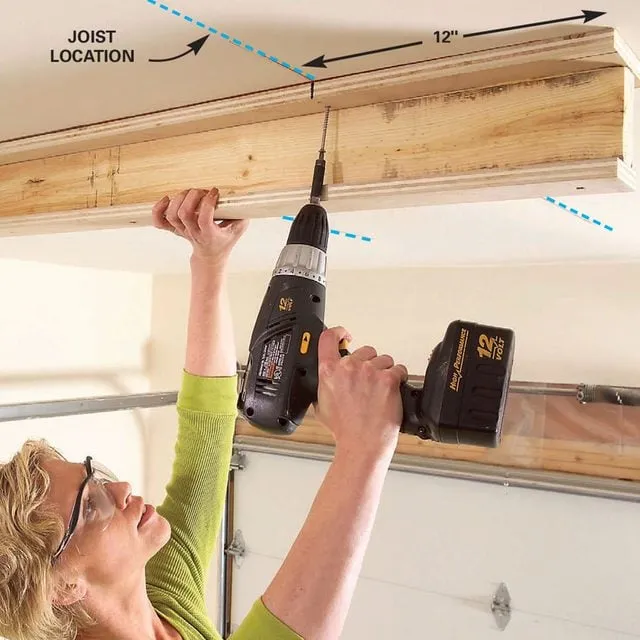 screwing sliding brackets
Alt: Securing the garage storage brackets to the ceiling.
Final Steps and Finishing Touches
We’re in the home stretch! Let’s make sure our overhead storage system is secure and functional.
Step 8: Lag Screws for Extra Strength
- Drill 3/16-inch pilot holes into the top flanges of the carriages.
- Drive 3-1/2-inch lag screws through the pilot holes and into the joists, ensuring a secure connection. Use a minimum of four lag screws per carriage.
- Remove the temporary screws as you go.
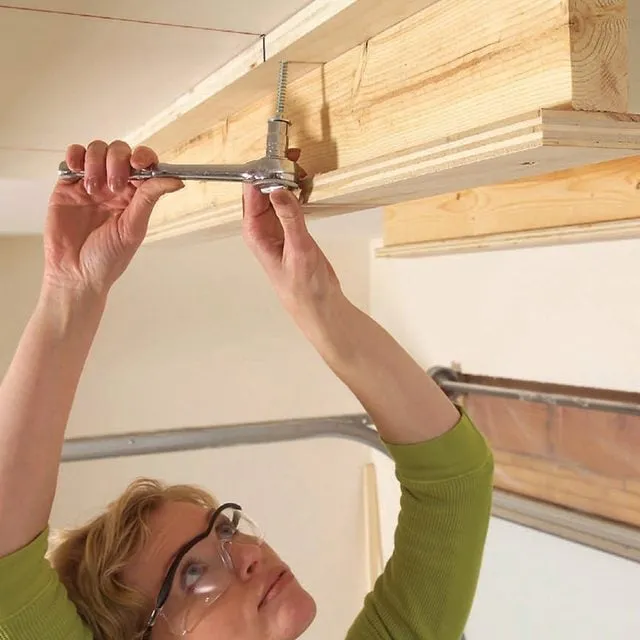 driving lags
Alt: Driving lag screws to secure the storage brackets.
Step 9: Installing the Stops
- Mark the center point of each carriage.
- Align the 1×2 stop strip along your markings and screw it in place. The stop strip prevents the totes from sliding too far back.
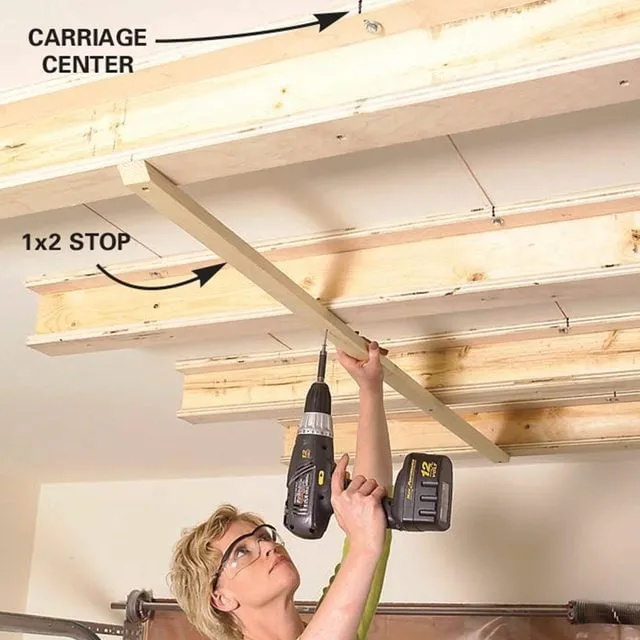 " width=
Alt: Installing the stop strip to prevent totes from sliding too far back.
Congratulations!
You’ve successfully built a sturdy and practical overhead garage storage system! Now, you can reclaim your garage floor space and bask in the glory of your organizational prowess.
Pro Tip: Label those totes! Clearly labeled totes will make finding your belongings a breeze. You can even take your organization to the next level with a color-coded system.
Beyond the Basics
Remember, this is just a basic framework. You can adapt this system to fit your needs and preferences. For instance:
- Utilize Dead Space: Don’t limit yourself to just above the garage door. Look for unused space along the sides or back of your garage to maximize storage potential.
- Consider Different Tote Sizes: If you have limited overhead clearance, opt for shorter totes.
- Heavy Items on the Wall: While this system can handle a significant amount of weight, it’s generally advisable to store heavier items on sturdy wall-mounted shelves.
 " width=
Alt: Using the overhead storage system to store totes above the garage door.
Robert Kline Art: Your Partner in Crafting Creativity
At Robert Kline Art, we believe in the power of handmade creativity. Whether you’re tackling a DIY project, exploring a new art form, or searching for unique handmade gifts, we’re here to inspire and guide you on your journey. Be sure to check out our website for more creative ideas, tips, and inspiration!
Do you have any creative garage storage solutions you’d like to share? We’d love to hear about them in the comments below!
