Blog
Building Your Own DIY Outdoor Bar with Built-in Cooler
Hey there, fellow DIY enthusiasts! Robert Kline here, your trusted guide in the world of handmade creativity. As the days get longer and the sun shines brighter, our thoughts turn to outdoor living and those unforgettable summer gatherings. And what better way to elevate your outdoor space than with a custom-built outdoor bar with a built-in cooler?
This project is closer to my heart than most, as it combines my love for woodworking with the joy of hosting friends and family. This DIY outdoor bar is not just a structure; it’s a testament to the magic we can create with our own hands, turning ordinary spaces into extraordinary ones.
This comprehensive guide will provide a step-by-step breakdown of the process, empowering you to build your own outdoor oasis. We’ll cover everything from gathering the right materials to adding those finishing touches that make it uniquely yours. Get ready to unleash your inner artisan and impress your guests with a functional and stylish outdoor bar that’s perfect for any occasion!
Gathering Your Supplies: The Building Blocks of Your Bar
Before we embark on this exciting journey of creation, let’s gather our arsenal of tools and materials. Just like a painter gathers their palette of colors, we need the right components to bring our vision to life.
Lumber:
- (Qty 7): 2″ x 3″ x 8′ Douglas fir – The backbone of your bar’s structure.
- (Qty 1): 1″ x 4″ x 10′ common pine board – For those refined trim details.
- (Qty 2): 1″ x 12″ x 12′ common pine board – Adding breadth and substance to the bar’s front and sides.
- (Qty 4): 1″ x 12″ x 8′ common pine board – Perfect for crafting sturdy shelves.
- (Qty 1): 72″ x 25″ x 3/4″ pressure-treated plywood – The heart of your bar top, designed to weather the elements.
Hardware and Other Essentials:
- (Qty 1): 48-quart cooler – Keeping your beverages refreshingly cold.
- (Qty 1): Quart of outdoor wood stain (Your choice of color) – Protection and a touch of personality for your masterpiece.
- Screws: Various sizes for securing the structure.
- Saw: For precise cuts that bring your vision to life.
- Drill: Your trusty sidekick for creating pilot holes and driving screws.
- Measuring Tape: Precision is key in the world of woodworking.
- Level: Ensuring a perfectly balanced and aesthetically pleasing bar.
- Safety Glasses: Protecting your eyes, your most valuable tools.
- Work Gloves: Safeguarding those hardworking hands.
Building the Foundation: Step-by-Step Guide
Now that we have our tools and materials at the ready, it’s time to roll up our sleeves and dive into the construction process.
Step 1: Building the Bar’s Skeleton
- Cut two of the 8-foot 2″x3″ pieces down to 56 1/2″.
- From the remaining wood of those same boards, cut two 38 1/2″ sections.
- Take two more of your 8-foot 2″x3″s and cut two more 38 1/2″ sections.
- Using the remaining wood from that step, cut four 20″ sections.
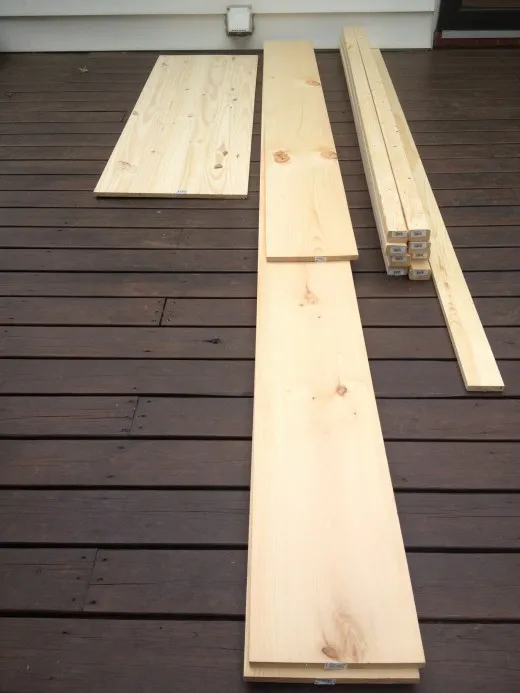
- Now, it’s assembly time! Screw your cut sections together at 90-degree angles, as shown in the photo below, to create the initial frame of your bar.
 Supplies for outdoor bar
Pro Tip: “Always double-check your measurements before making any cuts. It’s much easier to adjust a measurement than it is to replace a piece of wood!” — John C., Master Carpenter
Step 2: Reinforcing the Back and Framing the Cooler Space
- Flip your frame over so you’re working on what will be the back of the bar.
- Grab the remaining wood from Step 1 and cut a 15″ section and a 16″ section.
- Take three more of your 8-foot 2″x3″s and cut them down to 53 1/2″ each.
- Place one of the 53 1/2″ pieces horizontally in front of the rear 38 1/2″ vertical sections from Step 1. Secure it in place with screws.
- Measure 14″ down from the top of the 53 1/2″ section you just installed. Affix another 53 1/2″ section horizontally to the front of the same 38 1/2″ vertical sections.
- Repeat to attach the final 53 1/2″ horizontal section to the remaining 38 1/2″ vertical supports, creating a strong, supportive back for your bar.
- Measure 27 1/4″ from the left side of the frame and install the 16″ section of 2″x3″ between the front and back top crossbars (the horizontal 53 1/2″ pieces). This forms the beginning of your cooler compartment.
- Mount the 15″ section directly below the 16″ section, creating a vertical support that connects the upper and lower horizontal crossbars.
 Slide1
Pro Tip: “When working with wood, pre-drilling your screw holes can help prevent splitting, especially near the edges of your boards.” — Maria G., Experienced Woodworker
Step 3: Enclosing the Frame for a Polished Look
- Take your two 1″ x 12″ x 12′ common pine boards and one of the 1″ x 12″ x 8′ boards and cut them into nine sections of 39 1/4″ each.
- Carefully lay your bar frame down on its back.
- Starting at one end, attach the 39 1/4″ sections to the front of your bar frame, ensuring the bottom of each panel is flush with the bottom of the frame. You should have five panels across the front and two on each side.
- The top of these panels should overhang the frame by 3/4″, creating a clean, finished look.
 Slide1
Step 4: Crafting Your Sturdy Bar Shelf
- Using the remaining 1″ x 12″ boards, cut a 21 1/2″ section to serve as your bar shelf.
- Attach this shelf to your desired height on the interior vertical supports, ensuring it’s level.
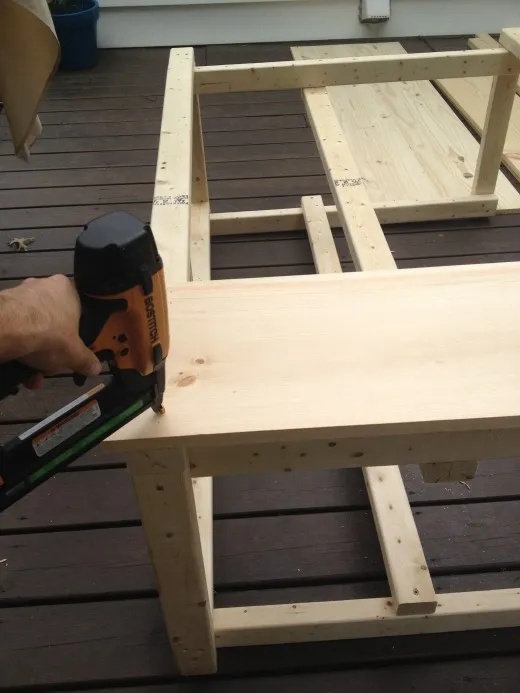 buildingsides
Step 5: Building the Cooler Door Frame
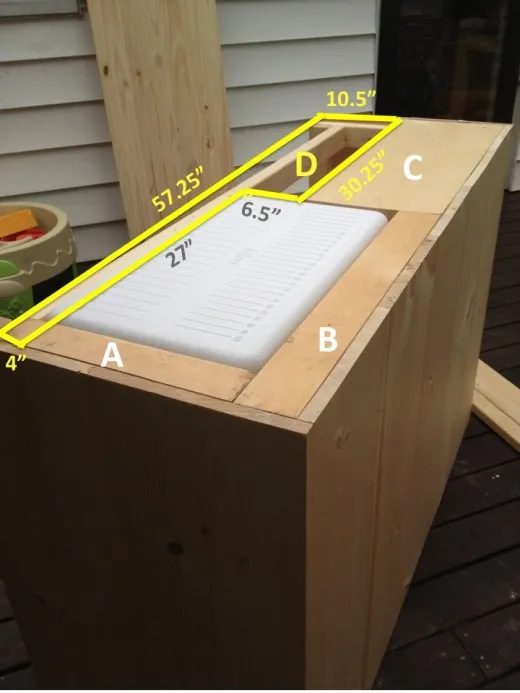
- From a piece of your 1″ x 12″ lumber, cut out four sections with the following dimensions:
- A: 14 1/2″ x 2 1/2″
- B: 26 1/2″ x 3″
- C: 30 1/4″ x 11 1/4″
- D: Refer to the photo below for the dimensions of this piece, as it will require an angled cut.
- These pieces will be assembled to create a sturdy frame around your cooler door.
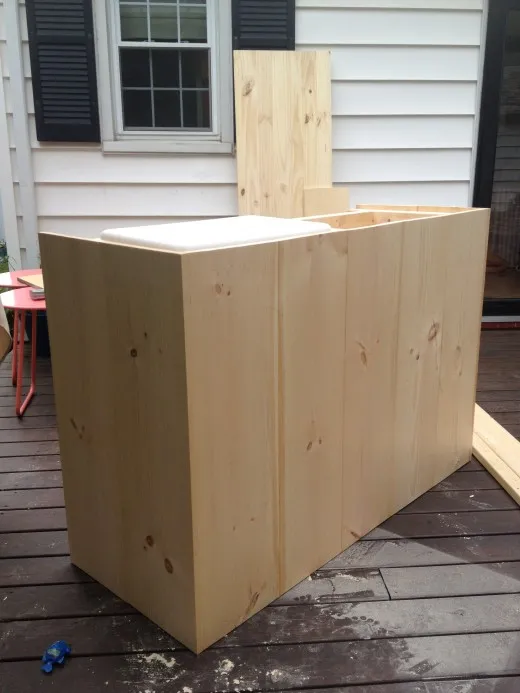 sidescompleted
Step 6: Building the Bar Top – A Two-Part Design
- This step involves creating a two-part bar top, with one side permanently fixed and the other on hinges to allow access to your cooler.
- Before you begin, unscrew the top of your cooler. We’ll attach this to the underside of the bar top later.
- Using your 72″ x 25″ x 3/4″ pressure-treated plywood, cut the following:
- Fixed Bar Top: Measure and cut this section to fit the non-cooler side of your bar.
- Hinged Bar Top: Measure and cut this section to fit over the cooler opening, leaving space for the cooler lid to open freely.
- Attach the fixed bar top to the bar frame using screws.
- For the hinged section, attach hinges to the underside, allowing it to swing upwards and provide access to the cooler.
- Screw the cooler lid you removed earlier to the underside of the hinged bar top section.
- Trim: Take your 1″ x 4″ x 10′ common pine board and cut:
- Two pieces at 22 1/2″ each (for the sides).
- One piece at 59 1/2″ (for the front).
- Attach these trim pieces to the edges of your bar top using finishing nails, creating a polished, professional look.
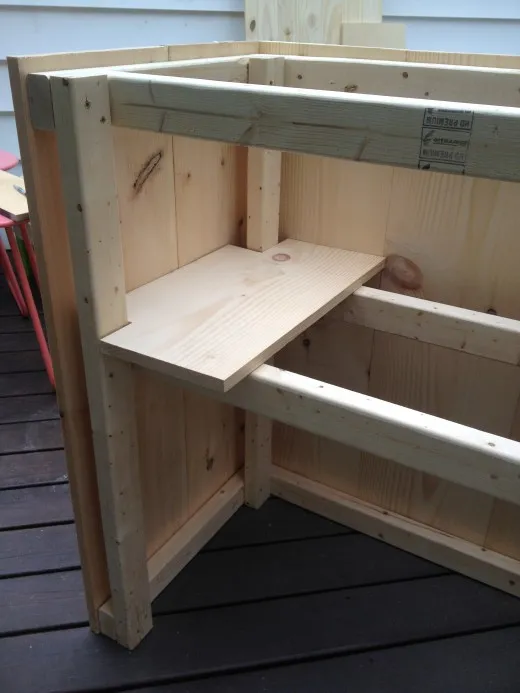 cutoutonshelf
Pro Tip: “When working with hinges, make sure to use the right size and type for the weight and movement of your door or lid.” — David S., Cabinet Maker
Step 7: Adding Protective and Stylish Stain
- Now, it’s time to infuse your bar with color and protection!
- Using a paintbrush or sprayer, apply your chosen outdoor wood stain evenly to all surfaces of your bar.
- Be sure to follow the manufacturer’s instructions for drying time.
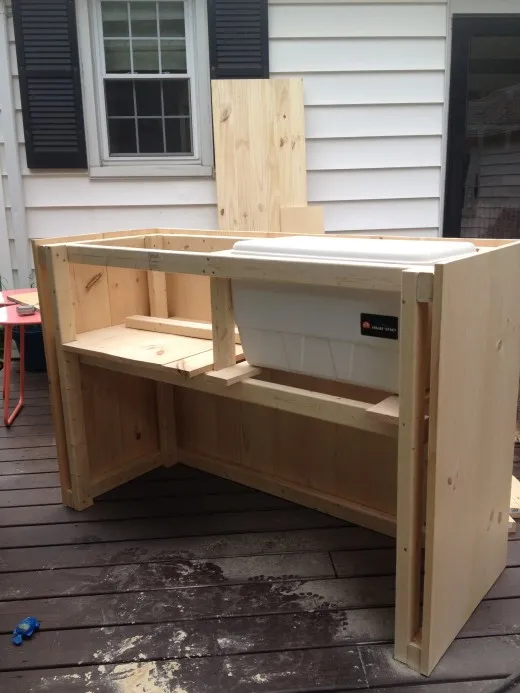 OUTDOORBARSHELF
 Slide1
Step 8: The Grand Reveal – Time to Raise a Glass
- Congratulations! You’ve successfully built your very own DIY outdoor bar with a built-in cooler. Step back and admire your craftsmanship. You’ve transformed simple materials into a hub for entertainment and relaxation.
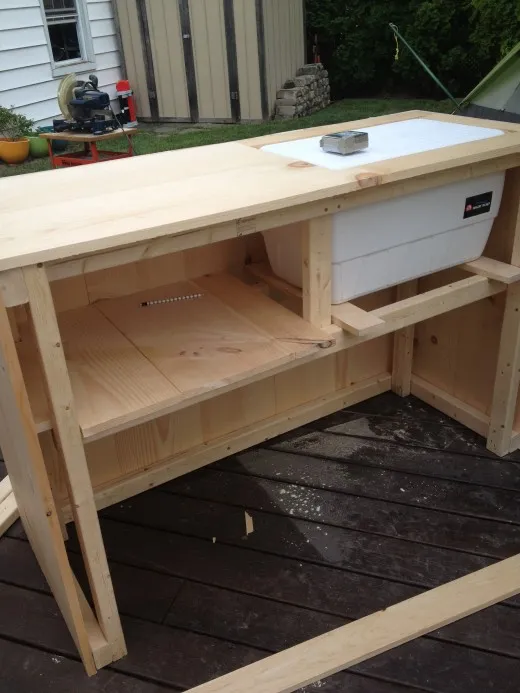 topofcooler
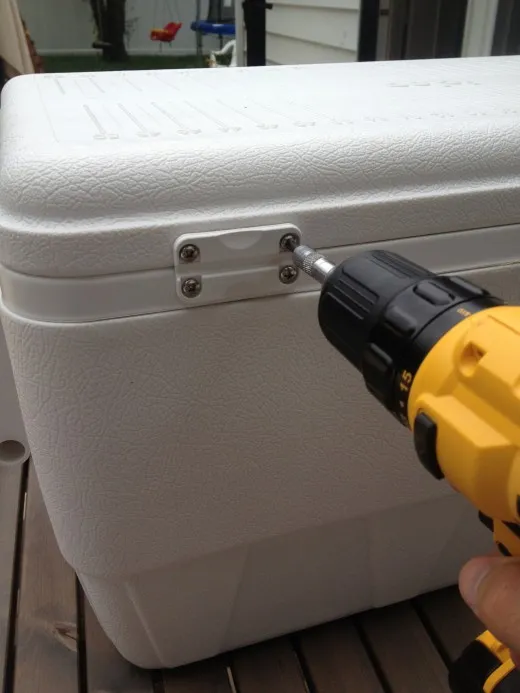 unhingecooler
Conclusion: Celebrate Your Creativity
As you gather with friends and family around your new outdoor bar, remember that you’ve accomplished something truly special. You’ve proven that with a little ingenuity and the willingness to get your hands dirty, anyone can create something extraordinary.
Here at Robert Kline Art, we believe in the power of handmade. This project is just one example of the countless ways you can infuse your world with personality and creativity through DIY endeavors.
What will you create next? Let us know in the comments below – we’d love to hear your ideas and see photos of your finished projects! And don’t forget to explore the rest of our website for more inspiring handmade crafts and DIY projects, including unique gift ideas for the craft lovers in your life.
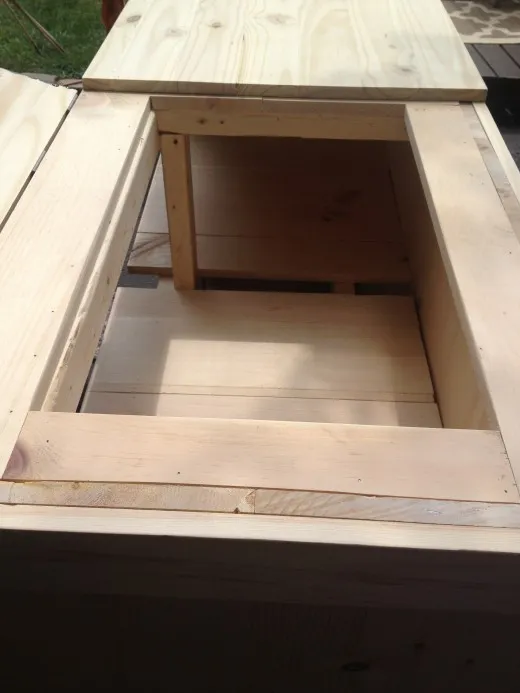 finishedtop
