Blog
Building a Stunning Floating TV Console with Storage: A DIY Project

Hey there, fellow craft enthusiasts! It’s Robert Kline, and I’m thrilled to share a project that combines sleek design with practical storage – a DIY floating TV console! This piece adds a modern touch to any living room while cleverly concealing those pesky cables. I’ve always loved how floating furniture opens up a space, and this project is no exception. It’s a favorite from my own home renovation journey, and I can’t wait to guide you through it.
Why Choose a Floating TV Stand?
Before we dive into the how-to, let’s talk about the “why.” In my years of designing and building, I’ve found that floating TV stands offer a unique blend of functionality and style:
- Visual Spaciousness: They create an airy feel, making your living room appear larger by revealing the entire floor space. Say goodbye to dust bunnies hiding under your furniture!
- Concealed Organization: Cables, gaming consoles, and other media equipment stay neatly tucked away, giving your living room a clean, uncluttered look.
- Versatile Placement: Mount it at your desired height and location, thanks to the magic of suspension rails.
- Customizable Design: Tailor the look to match your unique style, whether it’s minimalist chic or rustic charm. More on that later!
- Statement Piece: It’s not just storage; it’s an eye-catching element that elevates your living room’s design.
Gathering Your DIY Floating Sideboard Materials
This project beautifully utilizes readily available IKEA components. Here’s what you’ll need:
- IKEA Sektion Cabinets: 3 double wall-mounted cabinet frames (choose dimensions that fit your TV and media equipment)
- IKEA Cabinet Doors: 6 doors (explore different styles and finishes to personalize the look)
- IKEA Sektion Suspension Rails: 2 rails for secure wall mounting
- Wood Top Piece: Purchase a pre-cut piece from IKEA or your local hardware store (match the length to your cabinets)
- Dark Walnut Stain: (or your preferred stain color)
- Recessed Wall Cable Management Boxes: Keep those cables organized and hidden
- TV Mount: Choose a sturdy mount that suits your TV size and weight
- Basic Tools: Screwdriver, drill, level, measuring tape, nail gun
Pro Tip: Measure your TV and components carefully to determine the ideal cabinet dimensions.
Building Your IKEA Floating Sideboard: A Step-by-Step Guide

Ready to get hands-on? Let’s break down the construction process:
-
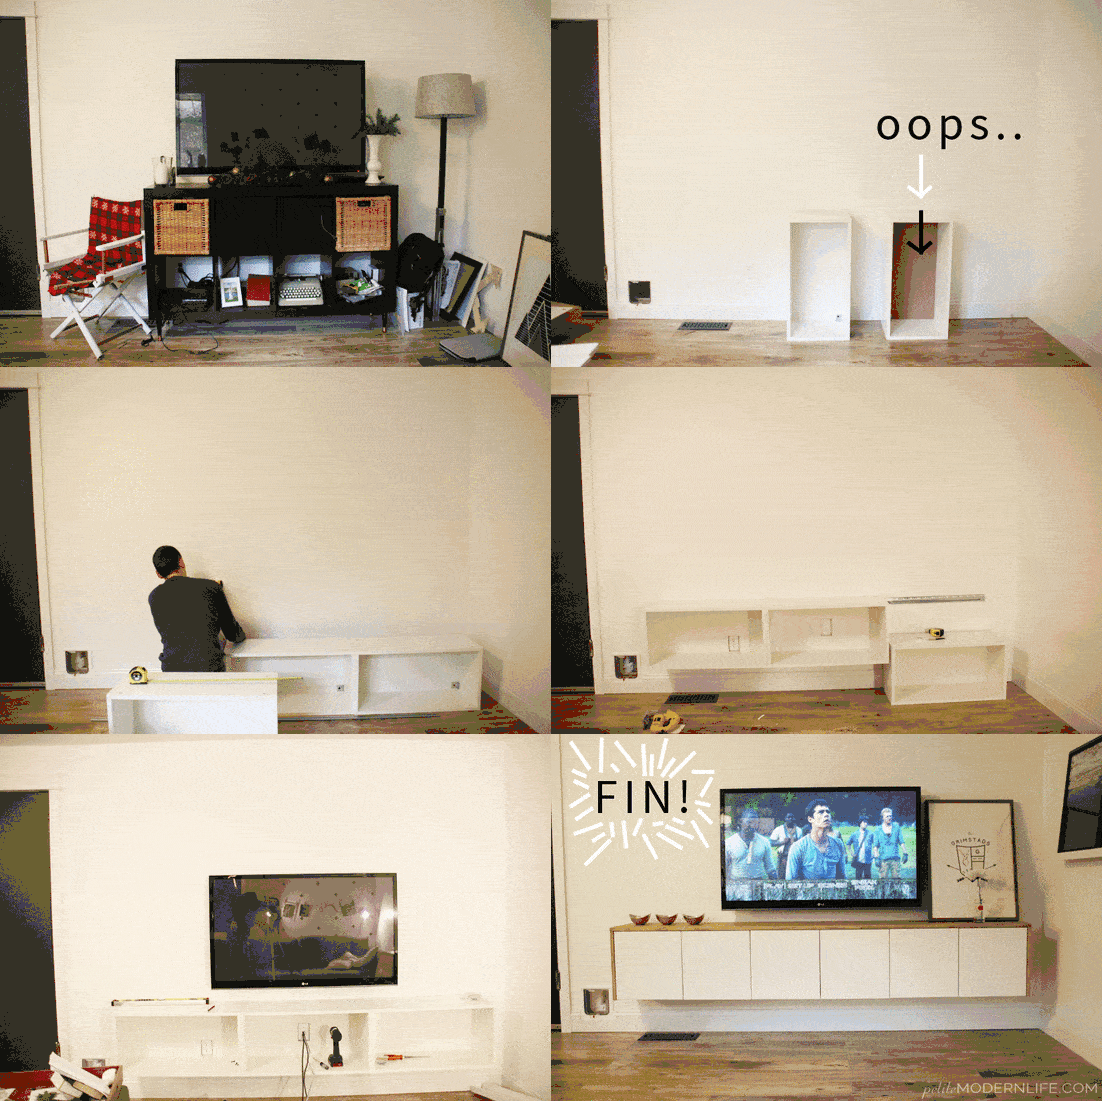
Assemble the Cabinets: Begin by assembling the IKEA Sektion cabinets according to the instructions provided.
-
Determine Mounting Height: Decide on the ideal height for your console, considering viewing comfort and overall aesthetics. Mark the wall accordingly.
-
Install Suspension Rails: Locate and mark wall studs for maximum support. Attach the suspension rails securely to the studs, ensuring they are level.
 build your own ikea floating sideboard entertainment center
 -
Mount the Cabinets: Carefully hang the assembled cabinets onto the suspension rails, using a level to ensure they are straight and secure.
 build your own ikea floating sideboard entertainment center
 -
Position the TV Mount: Attach the TV mount to the wall, ensuring it’s centered within your desired cabinet configuration. This step helps you determine cable routing.
 build your own ikea floating sideboard entertainment center
 -
Install Cable Management Boxes: Cut openings for the recessed cable management boxes near the TV mount and inside one of the cabinets.
-
Route Cables: Carefully thread cables from your media devices through the cable management boxes, keeping them concealed and organized.
 build your own ikea floating sideboard entertainment center
 -
Connect Media Equipment: Make all necessary connections between your TV, gaming consoles, sound system, etc.
-
Mount the TV: Carefully hang your TV onto the mounted bracket, ensuring it’s securely in place.
-
Attach Cabinet Doors: Affix the cabinet doors to complete the sleek, streamlined look.
 build your own ikea floating sideboard entertainment center
 -
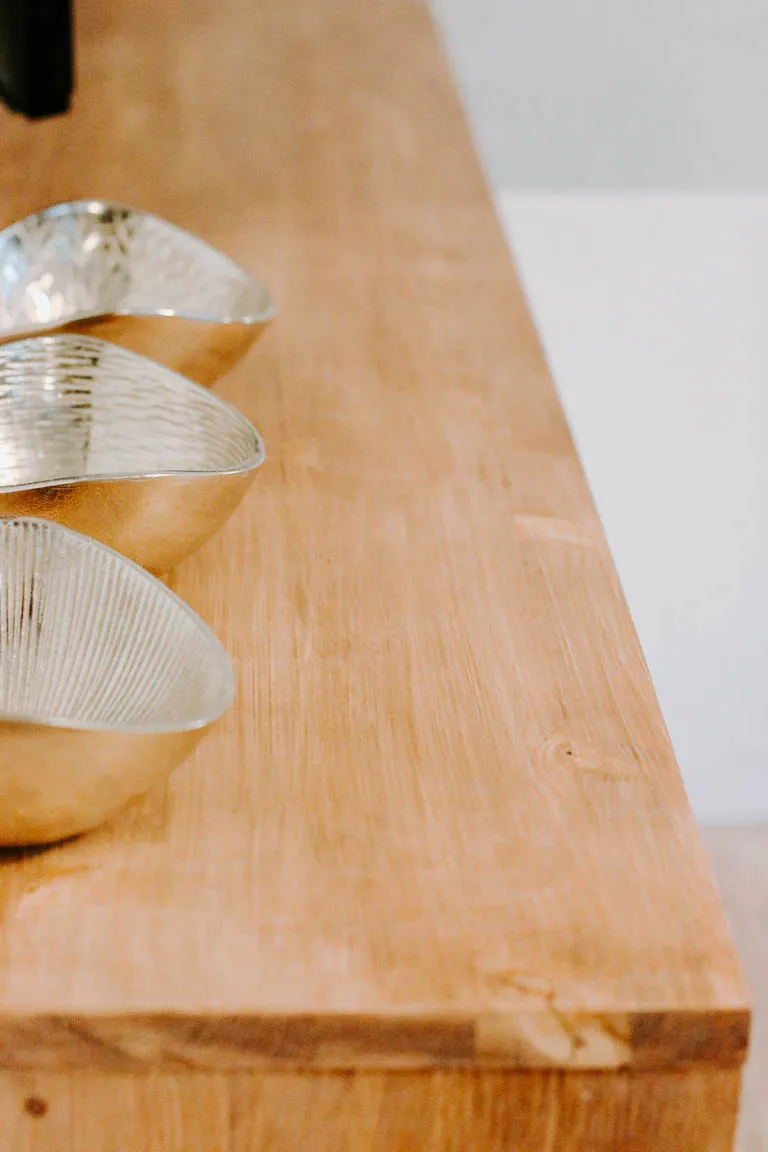
Attach the Wood Top: Using a nail gun, secure the stained wood top to the cabinets, creating a polished finish.
 build your own ikea floating sideboard entertainment center
 build your own ikea floating sideboard entertainment center
 -
Conceal and Organize: Tuck away all cables and media equipment inside the cabinets, enjoying the clean, clutter-free aesthetic.
 build your own ikea floating sideboard entertainment center
Congratulations! You’ve now built a beautiful and functional floating TV console that elevates your living room with modern style and clever storage.
 build your own ikea floating sideboard entertainment center
Personalizing Your Floating TV Stand: Design Tips from Robert Kline Art
Remember, crafting is about infusing your personality! Here’s how to customize your floating sideboard:
-
Paint the Cabinets: A fresh coat of paint in a bold hue or a subtle tone can transform the look.
Expert Insight: “Using a high-density foam roller ensures a smooth, professional-looking finish on IKEA furniture,” shares Sarah Miller, a renowned DIY furniture painter.
-
Choose Unique Cabinet Doors: Explore IKEA’s selection or get creative with custom doors! Consider chicken wire for a rustic feel, pained glass for shabby chic, or a combination of wood and white for Scandinavian modern.
-
Experiment with Stain: We love the richness of dark walnut, but don’t be afraid to try other stains or even paint the wood top for a personalized touch.
-
Decorate with Purpose: Keep the top of the console minimally decorated, showcasing a few curated items that reflect your style – picture frames, plants, or small baskets.
 build your own ikea floating sideboard entertainment center
 build your own ikea floating sideboard entertainment center
 build your own ikea floating sideboard entertainment center
Beyond the Living Room: Versatile Uses for Your Floating Sideboard
The versatility of this DIY project is something I truly admire. Consider these creative applications:
-
Wet Bar: Elevate your dining experience with a stylish floating wet bar.
-
Floating Vanity: Add a touch of elegance to your bedroom with a space-saving floating vanity.
-
Entryway Storage: Create a welcoming and organized entryway with a floating shelf for keys, mail, and accessories.
-
Playroom Organizer: Tame the toy clutter in a playroom with a floating sideboard that offers storage and a play surface.
-
Laundry Room Storage: Maximize vertical space in your laundry room with a floating sideboard for detergents and other essentials.
 build your own ikea floating sideboard entertainment center
 build your own ikea floating sideboard entertainment center
Embrace the Joy of DIY: Craft Your Dream Entertainment Center
This DIY floating TV console project is a testament to the power of creativity and resourcefulness. It’s an opportunity to personalize your space, enhance functionality, and enjoy the satisfaction of building something with your own hands. Head over to Robert Kline Art for more inspiring DIY projects and crafting tips. Now, go ahead and transform your living room with this stunning and practical centerpiece!
Let me know in the comments below if you plan to try this project. And don’t forget to share photos of your creations – I love seeing your unique takes on these DIY adventures. Happy crafting!
