Blog
Craft a Unique Wood-Burned Cutting Board: The Perfect Handmade Gift

Looking for a unique and heartfelt gift idea that’s sure to impress? Look no further than a DIY wood-burned cutting board! This project is surprisingly simple, even for beginners, and allows you to unleash your creativity with personalized designs. Whether it’s Mother’s Day, a housewarming party, or you just want to treat yourself, a handcrafted cutting board makes a statement. As a seasoned craftsman at Robert Kline Art, I’ll guide you through the process step-by-step, sharing my expert tips and tricks along the way. Let’s get started!
Gathering Your Supplies
Before we embark on this creative journey, let’s gather the essential tools and materials. Here’s what you’ll need:
- Woodburning Set: This is your artistic weapon of choice. Look for a set with various tips for different burning effects.
- Special Woodburning Tips (Optional): For more intricate designs, consider specialized tips like a leaf or calligraphy tip.
- Unfinished Cutting Board: You can purchase a pre-made board or embrace the challenge of crafting your own.
- Mineral Oil: This food-safe oil will seal and protect your masterpiece, enhancing its natural beauty.
Pro Tip: When selecting wood for your cutting board, opt for tight-grained hardwoods like maple, walnut, or bamboo. These woods resist bacteria and moisture better than their open-grained counterparts.
Crafting Your Unique Cutting Board
Step 1: Preparing the Wood Canvas
If you’re starting from scratch, begin by cutting your chosen hardwood into strips of equal width (about 1.5 inches) using a table saw. Arrange the strips in your desired pattern, alternating wood types for visual interest.
 Preparing the wood for a DIY cutting board
“When making a cutting board, I often combine different wood types for a unique, eye-catching look,” says renowned woodworker, Michael Turner. “The contrasting colors and grains add depth and character to the finished piece.”
Step 2: Gluing and Shaping
Apply wood glue to the edges of the wood strips and clamp them together tightly. Ensure the surface is as flat as possible to minimize sanding later. Allow the glue to dry thoroughly, preferably overnight. Once dry, use a miter saw to square off the edges and sand the board smooth.
Step 3: Unleashing Your Inner Artist
With your prepped cutting board ready, it’s time to bring your design to life!
- Heating Up: Attach your desired wood-burning tip to the tool, plug it in, and let it heat for at least 5 minutes.
- Sketching Your Vision: Lightly sketch your design onto the board with a pencil. Don’t be afraid to get creative!
- Burning with Precision: Gently touch the heated tip to the wood, following your pencil lines. Start with light pressure, gradually increasing it for darker marks. Experiment with different tips to achieve various effects.
Safety First: Remember, the wood-burning tool gets extremely hot. Use pliers to change tips and always unplug the tool when not in use.
Step 4: Sealing and Finishing
Once you’re satisfied with your wood-burned design, allow the tool to cool completely. Next, apply a generous coat of mineral oil to the entire surface of the cutting board. The mineral oil will penetrate the wood, sealing it and enhancing its natural beauty. Allow the oil to soak in for several hours, then wipe off any excess. Repeat this process for 2-3 coats.
Presenting Your Masterpiece
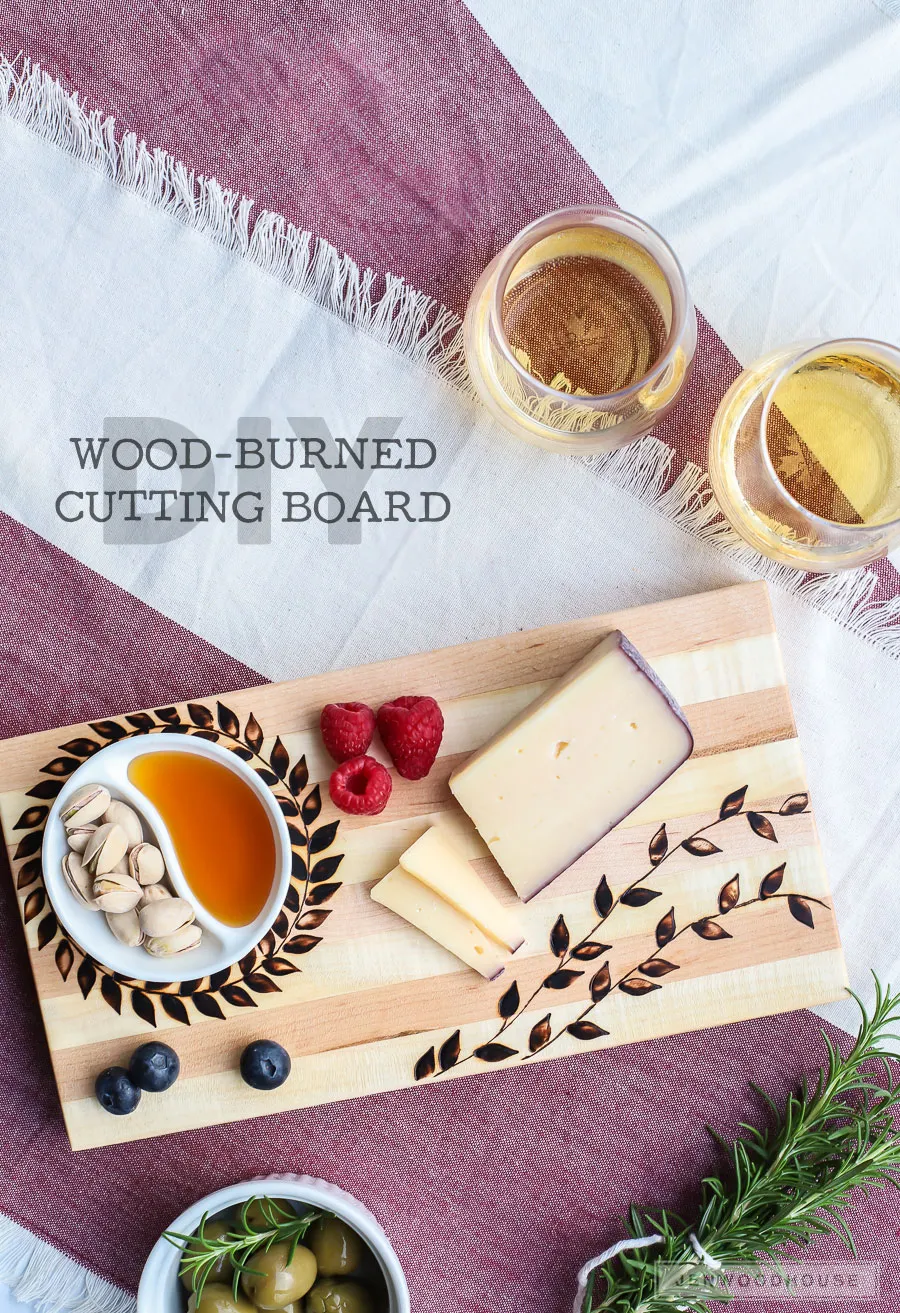
Congratulations! You’ve created a one-of-a-kind wood-burned cutting board. Wrap it with a beautiful ribbon and present it to your lucky recipient. Or, fill it with delicious treats and enjoy the fruits of your labor!
For more inspiring craft ideas and unique handmade gifts, explore the curated collection on Robert Kline Art. We’re passionate about helping you unleash your creativity and discover the joy of crafting. Don’t forget to share your own creations and connect with fellow artisans in the comments below!
