Blog
Finding Tranquility: A DIY String Art Wall Decor Tutorial

Hey there, fellow art enthusiasts! Have you ever felt the need to just…breathe? In a world that’s constantly buzzing, I find myself craving moments of peace more and more. Recently, I created a piece for my friends at Servus Magazine that speaks volumes about this very feeling: a string art wall decor piece that whispers “tranquility.”
Today, I’m excited to guide you through recreating this easy and impactful piece for your own haven. Let’s dive in!
Gathering Your Tools and Materials
Before we get started, let’s round up what we’ll need. I always find that having everything prepped and ready makes the creative process so much smoother. Here’s our checklist:
- A wooden board (I’m all about upcycling, so I used a salvaged part of a wine crate lid – resourcefulness for the win!)
- A burner (Remember that creme brulee torch? It’s surprising how many uses you find for tools!)
- Paper templates of your chosen word or design
- Double-sided adhesive tape
- Nails
- A hammer
- Thread in your desired color
Creating Your Rustic Canvas
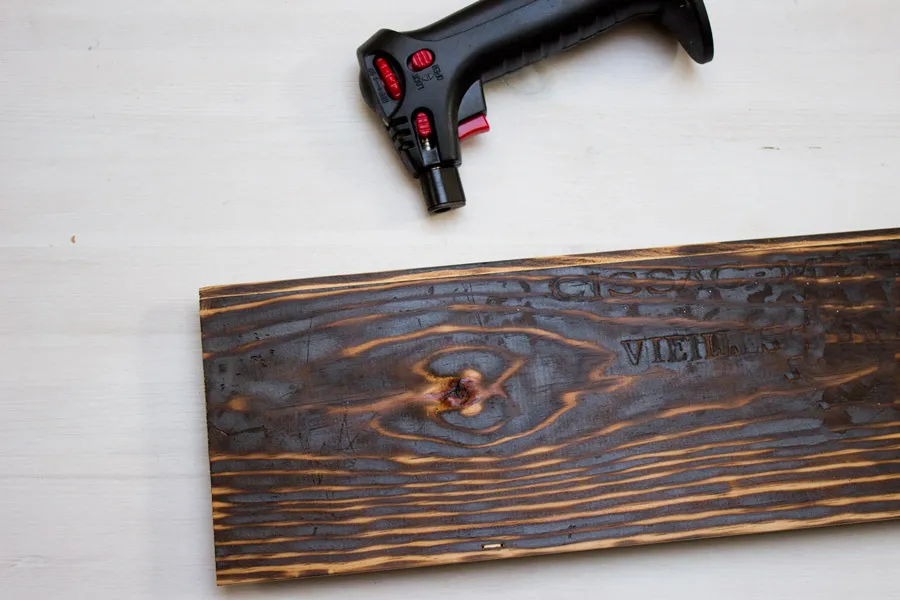
 how to torch a wooden board with household materials to get an used look.
Caption: Adding a touch of rustic charm with a burner.
For this project, I wanted a more rustic, “lived-in” look. To achieve this, I used my trusty burner to give the wood a slightly charred effect. This step is optional, of course, but it adds a beautiful depth and character to the piece.
Shaping Your Word of Peace
 Make yourself a typography inspired DIY string art sign with just a few easy steps.
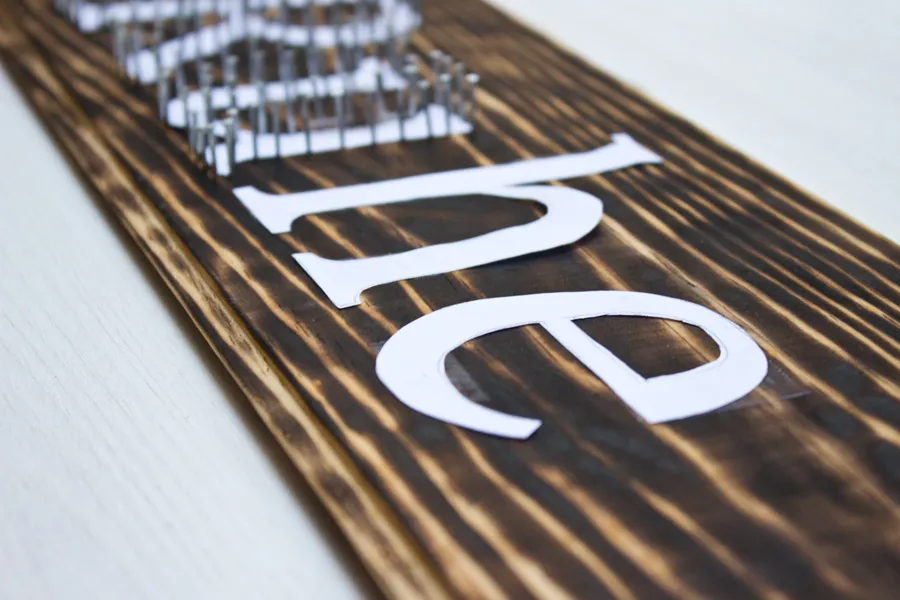
Caption: Prepping the word template for nailing.
Next, carefully cut out your chosen word or design from the paper templates. I went with the German word “Ruhe”, which embodies tranquility perfectly. Securely attach the paper template to your wood board using double-sided adhesive tape.
Hammer Time: Creating the Outline
 How to make yourself a typography inspired DIY string art sign with just a few easy steps.
Caption: Precision is key: Hammering the nails along the template.
This part is where your design starts to take shape – literally! Hammer nails along the outline of your paper template, ensuring they are spaced evenly (about 3mm apart) for a polished look. Don’t worry about perfection here – the beauty of handmade lies in its unique imperfections.
Weaving Tranquility: The String Art Magic
 Make yourself a typography inspired DIY string art sign with just a few easy steps.
Caption: Bringing the design to life with string.
And now for the most satisfying part! Take your thread and begin wrapping it around the nails. There’s no right or wrong way to do this – experiment with different patterns and densities until you achieve a look you love. I like to start from the outside and work my way in, but feel free to get creative with your technique.
Voila! Your Masterpiece Awaits
 Make yourself a typography inspired DIY string art sign with just a few easy steps.
Caption: The finished string art: A testament to patience and creativity.
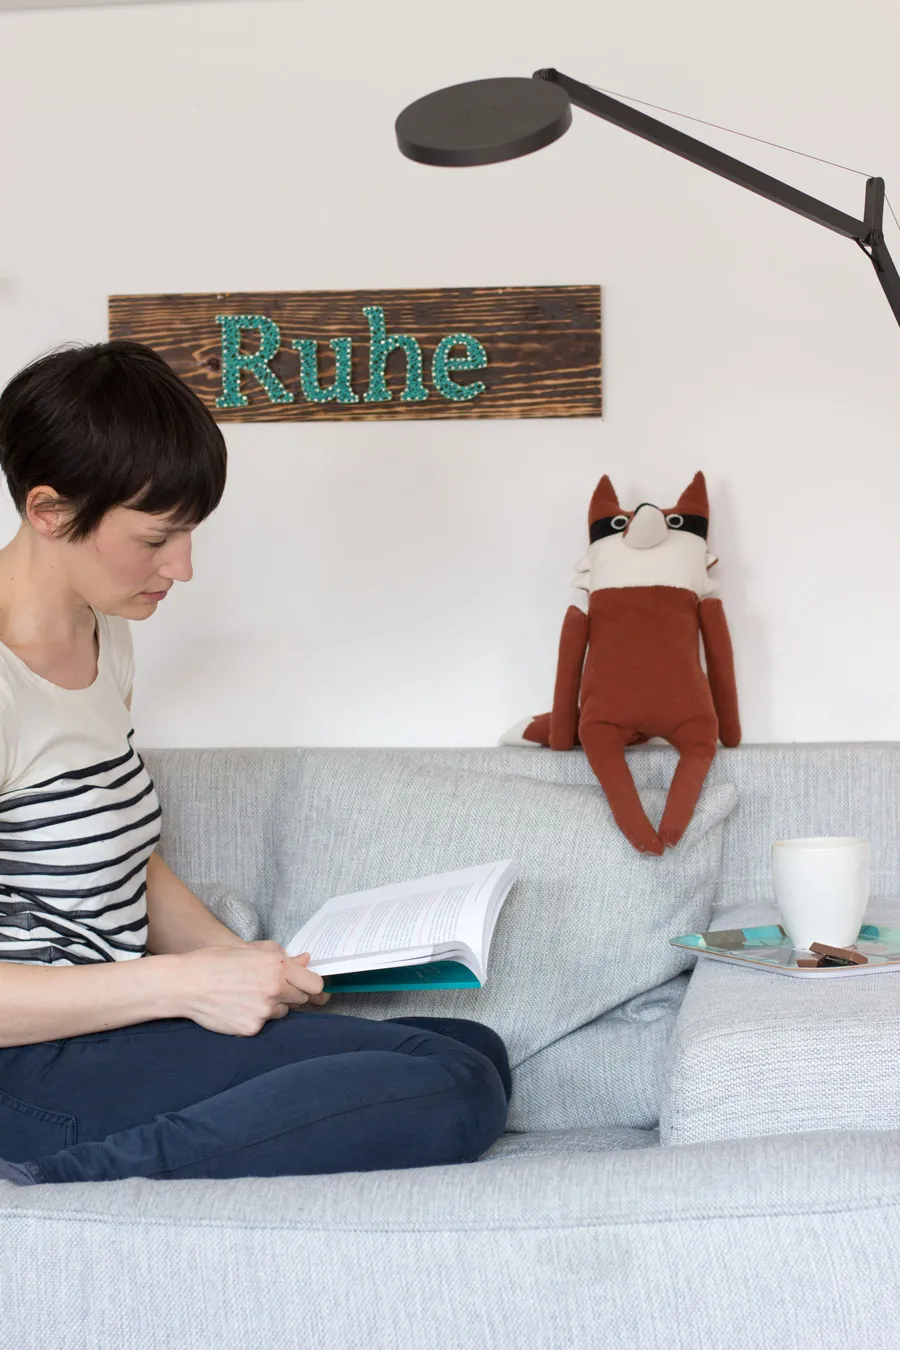
And there you have it – a beautiful, handmade reminder to seek moments of peace. I’ve hung mine above my reading nook, where it serves as a visual cue to unwind and recharge.
 Make yourself a typography inspired DIY string art sign with just a few easy steps.
Caption: Finding peace in a cozy corner with my new string art.
 Make yourself a typography inspired DIY string art sign with just a few easy steps.
Caption: Enjoying a moment of Ruhe with a good book.
Your Turn to Create
I’d love to see your take on this project! Share your creations with me at Robert Kline Art – let’s inspire each other to craft spaces that spark joy and tranquility. And remember, the most meaningful art is that which comes from the heart.
