Blog
Craft a Stunning Thanksgiving Cornucopia Centerpiece
As a craft enthusiast, I’m always drawn to pieces that bring warmth and charm to a space. One such piece is the traditional Thanksgiving cornucopia. It reminds me of holidays past, brimming with nature’s bounty and gracing the heart of my mother’s Thanksgiving table.
This year, I was inspired to recreate this beautiful symbol of abundance for my own holiday table. After exploring some design ideas on Pinterest, I gathered my materials. The best part? You might already have most of them in your kitchen!
Gather Your Cornucopia Supplies:
- Pre-made pizza dough (bread dough, breadstick dough, or fresh pizza dough work well too)
- Plenty of tinfoil (heavy-duty is ideal but regular works fine)
- 1-2 eggs beaten for an eggwash
- A rolling pin
- A pastry brush
- A pizza cutter
- Oven preheated to 350 degrees
Shaping Your Cornucopia:
Creating the cornucopia is surprisingly simple and only takes about 30 minutes.
-
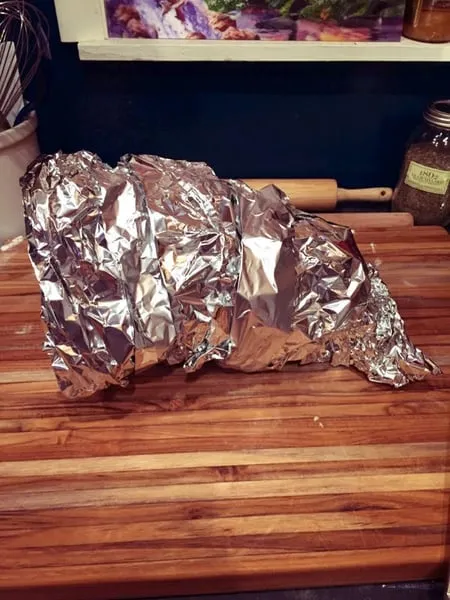
Form the Mold: Start by shaping your tinfoil into a cornucopia mold. The size is entirely up to you! You could craft one large centerpiece, several smaller ones, or even individual cornucopias to hold place cards. I created a small, medium, and large tinfoil ball, attached them, and then continued wrapping the foil until I achieved the desired size. Remember to shape the end into the classic cornucopia curve.
 cornucopia foil
 -
Apply the Dough: Roll your dough out to about ¼ inch thickness. Slice it into long strips that are 2-3 inches wide. Begin layering these strips over your tinfoil mold, using the egg wash as glue and overlapping each strip by about ½ inch. Secure the strips at the base by pinching the ends together.
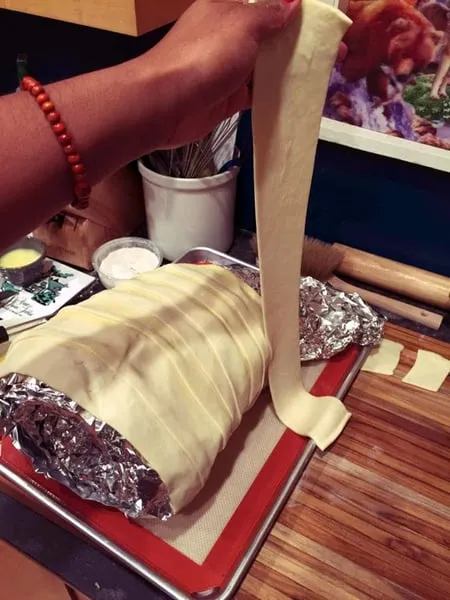 cornucopia layers
 -
Add Decorative Touches: Once the entire mold is covered, use any leftover dough to fashion decorative elements like braids, leaves, flowers, or fruits. Attach these embellishments using the egg wash. I sprinkled a few dried herbs around the opening for an extra touch of rustic charm.
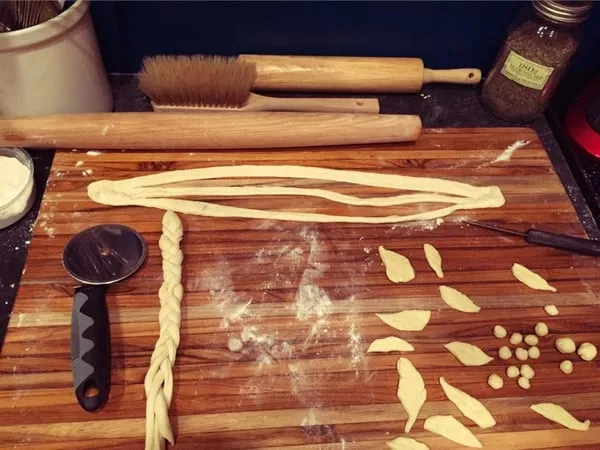 cornacopia decorations
Baking and Filling Your Masterpiece:
-
Bake to Perfection: Brush the entire cornucopia with a coat of egg wash. Bake it in your preheated 350-degree oven for 30-45 minutes, or until the dough turns a beautiful golden brown. The inside will remain paler.
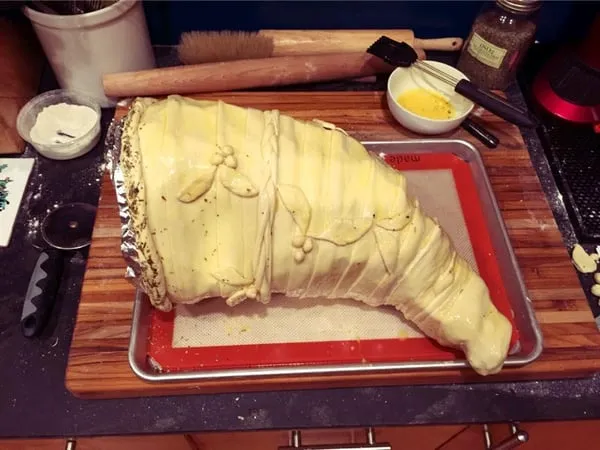 cornucopia pre-baked
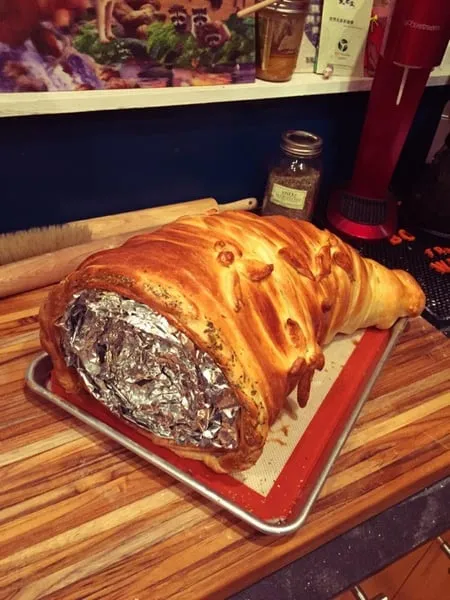 cornucopia baked
 -
Cooling and Unmolding: Remove your baked cornucopia from the oven and allow it to cool slightly. Carefully pull out the tinfoil mold.
-
Fill and Enjoy: Now comes the fun part! Fill your cornucopia with an assortment of festive treats: breads, fruits, nuts, cheeses, flowers, or anything that embodies the spirit of Thanksgiving.
A Cornucopia for All Seasons:
This cornucopia isn’t just a Thanksgiving delight. Its versatility shines through as it transitions beautifully into other seasons.
“I often recommend sealing homemade crafts like these with a clear sealant,” says expert crafter Anna Walker. “It not only adds durability but also provides a glossy finish that elevates its visual appeal.” Following this advice, I plan to shellac mine and use it as a charming breadbasket for Christmas.
Share Your Craft Journey with Robert Kline Art
I encourage you to embrace the joy of crafting this Thanksgiving. Let your creativity run wild, experiment with different doughs and decorations, and make it uniquely yours.
Share your beautiful creations and crafting experiences with us at Robert Kline Art! Leave a comment below, and be sure to explore our collection of handcrafted gifts – perfect for adding a personal touch to your holiday season.
