Blog
The Art of Homemade Strawberry Fruit Roll-Ups: A Nostalgic Treat Made Healthy

Remember those vibrant, chewy fruit roll-ups we adored as kids? Let’s recreate that magic with a healthier, homemade twist! This article guides you through crafting delicious Strawberry Fruit Roll-Ups using fresh, natural ingredients. It’s easier than you think, I promise! As a seasoned crafter at Robert Kline Art, I’m passionate about sharing simple, enjoyable DIY projects, and this one’s a surefire winner.
The Story Behind the Snack
My love for fruit roll-ups runs deep. I recall an amusing incident (let’s just say it involved a sidewalk and a moment of hypocrisy) that cemented their place in my heart. This recipe, however, transcends mere store-bought snacks. It’s about connecting with simple joys and creating something wholesome and delicious with your own hands.
Crafting Your Fruit Roll-Ups: A Step-by-Step Guide
Ingredients You’ll Need:
- 8 oz fresh strawberries (say goodbye to artificial flavors!)
- 1 tbsp freshly squeezed lemon juice (a touch of zing!)
- 3 tbsp sugar (optional, adjust to your sweetness preference)
Tools of the Trade:
- Blender or food processor
- Saucepan
- Baking sheet
- Silpat or parchment paper
- Offset spatula (a handy tool for even spreading)
- Pizza cutter
Let’s Get Rolling:
- The Puree Power-Up: Wash and trim your strawberries, then give them a whirl in your blender or food processor until smooth.
- The Saucy Simmer: Pour the vibrant puree into a saucepan, add lemon juice, and sugar (if using). Stir over medium heat for about 10 minutes, allowing the mixture to thicken into a luscious jam.
- The Artful Spread: Preheat your oven to 170 degrees F. Line a baking sheet with a Silpat or parchment paper. Now, evenly spread the strawberry jam onto the prepared sheet, aiming for a rectangle about 1/8 inch thick.
- The Patience of Dehydration: This step requires a bit of time and attention. Bake for 3-4 hours, keeping a watchful eye on your creation. It’s ready when it loses its stickiness and feels slightly tacky.
- The Roll-Up Reveal: Once cooled, carefully transfer your fruit leather onto a cutting board lined with wax paper. Use a pizza cutter to create long, tempting strips. Now, roll each strip into a beautiful fruit roll-up!
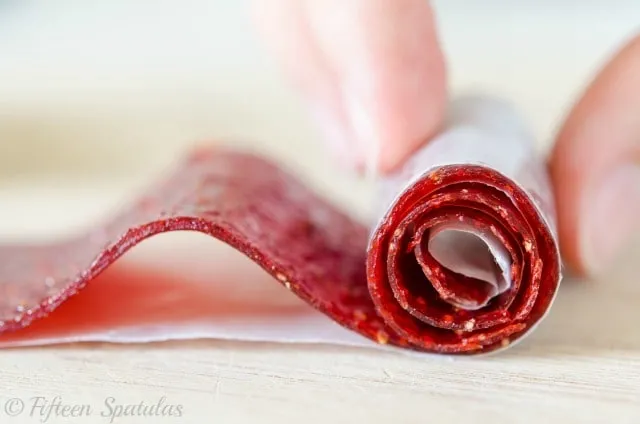
 Fruit Roll Ups – Close Up with Vivid Red Color from Strawberries
Expert Tips and FAQs
- “Can I use other fruits?” Absolutely! Experiment with different berries, keeping in mind that drying times may vary. I recommend a 50/50 blend with strawberries for optimal texture and flavor.
- “What about frozen strawberries?” Frozen berries work well too! Just thaw them completely before blending.
- “My oven doesn’t go down to 170 degrees F. What do I do?” No worries! You can slightly open the oven door to regulate the temperature.
- “How do I store these homemade delights?” Once completely cool, store your fruit roll-ups in an airtight container in the fridge for up to a week. You can also wrap them tightly in plastic wrap for on-the-go snacking.
Conclusion: Savor the Sweet Reward
Creating homemade fruit roll-ups is a rewarding experience. You’re in control of the ingredients, ensuring a healthy and delicious treat for yourself and your loved ones. So go ahead, unleash your inner artist, and enjoy the delightful process of making this nostalgic snack from scratch!
Ready to explore more creative DIY gift ideas? Browse our collection of unique handmade treasures on Robert Kline Art and discover the perfect personalized gift for any occasion. Don’t forget to share your fruit roll-up adventures and tag us on social media – we love seeing your culinary masterpieces!
