Blog
Craft Your Own Luscious Homemade Strawberry Vanilla Lip Balm

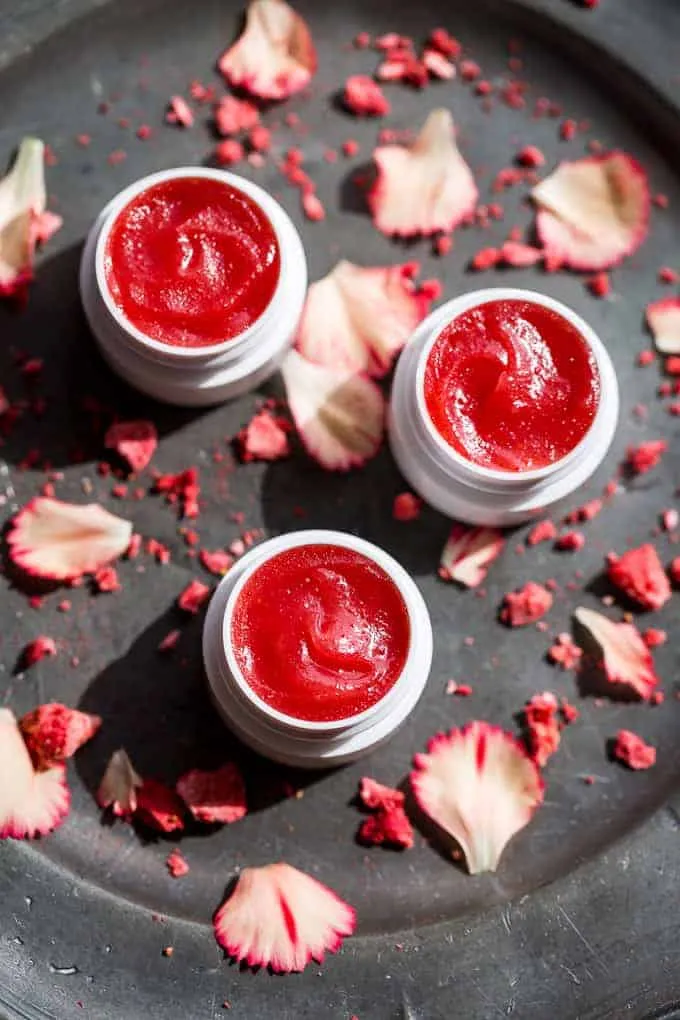
There’s a special kind of satisfaction that comes from crafting your own beauty products, and lip balm is the perfect place to start. Forget those artificial flavors and colors found in commercial lip balms. With this recipe, you’ll create a natural, vibrant, and oh-so-delicious strawberry vanilla lip balm right in your own kitchen. Let’s dive into the delightful world of DIY beauty!
Gathering Your Ingredients: A Symphony of Natural Goodness
Before we embark on this crafting journey, let’s gather our all-natural ingredients:
Star of the Show:
- 1/2 cup freeze-dried strawberries, powdered (about 1/4 ounce or 10 grams) – These little beauties provide a burst of natural color and flavor.
The Moisturizing Base:
- 2 tablespoons jojoba oil – A gentle, non-comedogenic oil that’s perfect for sensitive skin.
- 2 tablespoons coconut oil – Adds a luxurious texture and tropical touch.
The Flavor Enhancer:
- 1 teaspoon vanilla jojoba oil – Because who can resist the sweet allure of vanilla?
The Solidifying Agent:
- 1 tablespoon + 1 teaspoon grated beeswax (about 4 grams)- Provides the perfect consistency for a smooth application.
Crafting Your Lip Balm: A Step-by-Step Guide
Now that you have your ingredients assembled, let’s transform them into a luxurious lip balm:
Step 1: Unleash the Strawberry Power
Using a mortar and pestle, grind those freeze-dried strawberries into a fine powder. Alternatively, a mini food processor can do the trick. If you opt for the food processor, allow the dust to settle before opening the lid to avoid a pink cloud explosion.
Step 2: The Melting Pot
Gently melt the powdered strawberries, jojoba oil, vanilla jojoba oil, and coconut oil in a saucepan over low heat. Stir occasionally to ensure everything blends harmoniously.
Step 3: Straining for Smoothness
Using a fine-mesh sieve, strain the mixture to remove any stubborn strawberry bits. This ensures a silky smooth lip balm. Return the strained mixture to the saucepan.
Step 4: The Beeswax Blend
Add the grated beeswax to the strawberry-infused oil mixture. Continue heating and stirring until the beeswax melts completely, leaving no stubborn lumps.
Step 5: The Emulsifying Dance
Remove the pan from the heat and let it cool for a few minutes. As the mixture begins to set, grab your whisk or a spoon and stir vigorously. This crucial step emulsifies the strawberry color, preventing it from settling at the bottom and ensuring a vibrant hue throughout.
Step 6: Container Concoction
Choose your preferred lip balm containers. This recipe yields approximately four good-sized lip balms. Small containers are ideal for gifting, allowing you to share the homemade goodness.
Step 7: Time to Shine!
Pour the beautifully emulsified lip balm mixture into your containers. Allow them to cool and solidify completely. And there you have it—your very own homemade natural strawberry vanilla lip balm, ready to nourish and pamper your lips!
 Homemade Natural Strawberry Vanilla Lip Balm | Get Inspired Everyday!
Tips from Robert Kline Art:
- Color Magic: While the initial color is incredibly vibrant, it will naturally soften over time, developing a charming dusty rose hue.
- Storage Savvy: Store your homemade lip balms in a cool, dry place to preserve their freshness and fragrance. They’ll stay delightful for several months.
- Gifting Galore: These lip balms make heartfelt, personalized gifts for any occasion. Tie a ribbon around them, add a personalized label, and spread the homemade love.
Embrace the Joy of Handmade
Creating your own lip balm is an empowering and rewarding experience. It allows you to personalize your beauty routine with natural ingredients while embracing your inner artist. So, gather your supplies, put on your creative hat, and experience the joy of handcrafted self-care with Robert Kline Art.
Don’t forget to share your creations and experiences in the comments below! We love to see your artistic flair and hear about your crafting adventures. For more unique DIY projects and handmade gift ideas, explore the world of Robert Kline Art.
