Blog
Homemade Strawberry Fruit Roll-Ups: A Blast from the Past, Made Healthy!

Remember the joy of unwrapping a fruit roll-up as a kid? At Robert Kline Art, we believe in bringing back those cherished memories, but with a healthy, homemade twist. That’s why I’m thrilled to share this simple recipe for Strawberry Fruit Roll-Ups, made with just three natural ingredients!
The Story Behind the Snack
We’ve all been there – a craving for something sweet and nostalgic. I’ll never forget the day I, a self-proclaimed fruit roll-up enthusiast, chased my runaway treat down the sidewalk, only to devour it seconds later (don’t judge!). That’s when I knew I had to recreate this classic, minus the artificial ingredients.
Let’s Get Rolling: Crafting Your Own Fruit Roll-Ups
These homemade fruit roll-ups are more than just a snack; they’re a journey back to simpler times. Plus, with just a handful of ingredients and some simple steps, you’ll have a healthier version ready to enjoy.
Ingredients You’ll Need:
- 8 oz fresh strawberries (stems removed)
- 1 tbsp freshly squeezed lemon juice
- 3 tbsp sugar (optional, adjust to your sweetness preference)
Step-by-Step Guide:
-
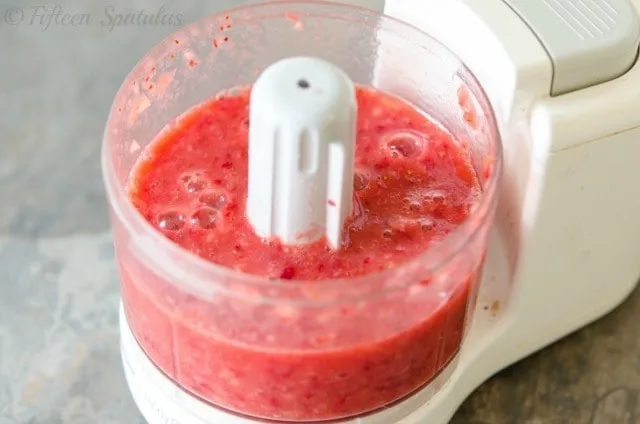
Blending the Berries: Start by pureeing those juicy strawberries in a blender or food processor. We’re aiming for a silky-smooth consistency here, no chunky bits allowed!
 Strawberry Puree in Food Processor Bowl
 -
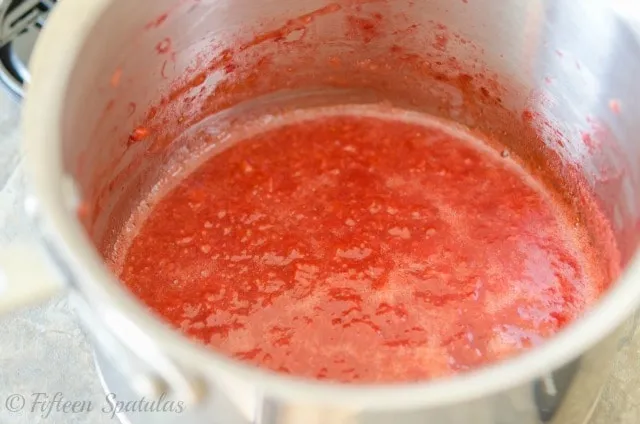
Simmering the Strawberry Goodness: Pour the vibrant puree into a saucepan. Add a splash of lemon juice for a touch of tanginess and sugar if you’d like it sweeter. Now, let this mixture simmer away for about 10 minutes, stirring regularly, until it thickens into a luscious jam.
 Simmering Strawberry Puree in Pot
 -
Prepping for Dehydration: While your strawberry mixture is bubbling, preheat your oven to its lowest setting, ideally around 170°F (no higher than 200°F). Line a baking sheet with parchment paper or a silicone baking mat.
-
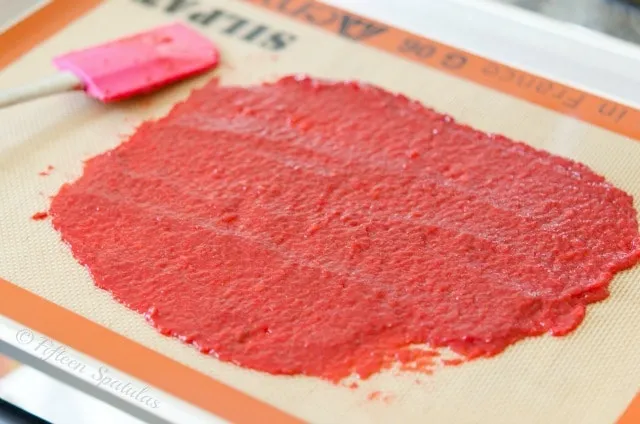
Spreading the Love: Time to transform that jam into a fruit leather canvas! Pour the thickened mixture onto your prepared baking sheet and spread it evenly into a rectangle, aiming for a thickness of about 1/8 inch. Remember, it will shrink slightly as it dehydrates.
 Spread Out Raw Fruit Leather on Silicone Mat
 -
The Waiting Game (and the Sweet Reward): Slide your baking sheet into the preheated oven and let the magic happen. It’ll take about 3-4 hours for the fruit mixture to transform into a pliable, slightly tacky sheet. Keep a close eye on it towards the end – we don’t want any crispy chips!
-
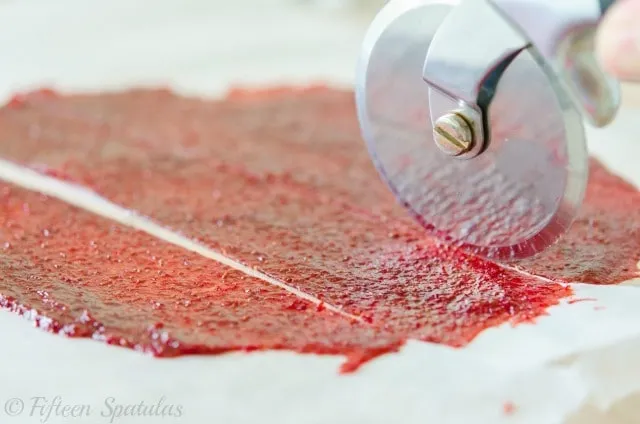
Rolling into Nostalgia: Once your fruit leather masterpiece has cooled completely, transfer it to a cutting board lined with wax paper. Using a pizza cutter, slice it into long, tempting strips.
 Using a Pizza Cutter to Slice Fruit Roll Up Recipe Batch
Now, the moment you’ve been waiting for – carefully roll each strip into a beautiful fruit roll-up.

And there you have it – a taste of childhood, crafted with your own two hands!
Expert Tips and FAQs
Let’s address some common questions and share expert insights to ensure your fruit roll-up adventure is a resounding success.
-
“Can I use other fruits?” Absolutely! While strawberries reign supreme in the fruit roll-up world, feel free to experiment. Berries are a fantastic choice, but keep in mind that some, like blackberries, can be a tad seedy. For a balanced flavor, we recommend a blend with at least 50% strawberries.
-
“What about frozen strawberries?” Frozen strawberries work like a charm! Just make sure to thaw them completely before tossing them into the blender.
-
“How do I know when it’s done?” Dehydrating times can vary, so keep a close watch. You’ll know your fruit leather is ready when it’s no longer sticky to the touch, but still slightly tacky.
-
“How do I store these homemade delights?” Once your fruit roll-ups have cooled, store them in an airtight container in the refrigerator for up to a week. For longer storage, wrap them tightly in plastic wrap.
Unleash Your Inner Artist!
At Robert Kline Art, we celebrate the joy of handmade creations. These Strawberry Fruit Roll-Ups are a testament to that – a delicious fusion of art and flavor. So, gather your ingredients, put on your creative hat, and let’s roll back the years with this wholesome and delightful treat!
Don’t forget to share your culinary masterpieces with us! Snap a photo and tag #RobertKlineArt – we can’t wait to see your colorful creations.
And remember, the world of crafting extends far beyond the kitchen. Explore our website for a curated collection of unique, handmade gifts perfect for any occasion.
