Blog
The Art of Making Delicious Homemade Fruit Leather

As an artist who works with my hands every day, I have a deep appreciation for the craft of making things from scratch. There’s a special kind of satisfaction that comes from transforming simple ingredients into something both beautiful and delicious. One of my favorite ways to do this is by making homemade fruit leather.
Imagine the sweet aroma of summer berries filling your kitchen as you transform them into chewy, flavorful fruit leather. It’s easier than you might think, and the results are incredibly rewarding.
From Garden to Pantry: A Two-Step Process for Flavorful Fruit Leather
Like many of you, my summers are filled with the bounty of my garden. Preserving this harvest is essential, and while I love making jams and preserves, sometimes my schedule calls for a more flexible approach. That’s where the magic of freezing comes in.
Freezing fruit is like hitting the pause button on freshness. It allows me to preserve the flavor of peak-season produce so I can enjoy it later, even when the garden is buried under snow.
Berries, in particular, freeze beautifully. I always spread them out on a tray for an initial freeze before transferring them to bags. This extra step prevents them from clumping together, making it easier to grab a handful for smoothies or baking.
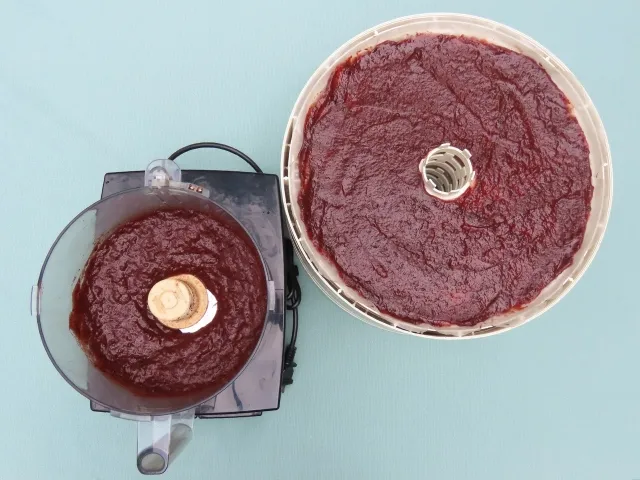
When it comes to fruit leather, frozen berries are a game-changer. They blend up smoothly and defrost quickly, especially if they haven’t frozen into a solid block. Plus, using frozen fruit means you can enjoy the flavors of summer, even in the depths of winter.
The Secrets to Perfectly Dried Fruit Leather
While using a dehydrator might seem intimidating at first, it’s surprisingly simple. Here are a few tips and tricks I’ve learned over the years:
- Start with the right consistency: I love incorporating homemade applesauce into my fruit leathers, either chunky like my grandmother made or smooth like my mom’s. If you’re using store-bought, keep in mind that runny applesauce might require a longer drying time.
- Find your perfect timing: Dehydrators vary, so it’s essential to start with the recommended drying time in your user manual. Check your fruit leather regularly to ensure it’s drying evenly. Remember, it should be leathery, not saucy, but avoid over-drying, which can cause cracking.
- Don’t be afraid to experiment: Get creative with shapes and sizes! Cut your fruit leather into squares, strips, or even “pancakes” for fun and unique snacks.
- Prevent sticking: I’ve found that food-grade plastic sheets or stiffer dehydrator sheets work equally well and minimize sticking. If your fruit leather tends to stick, a light coating of sunflower or coconut oil on the tray can help.
Beyond the Basics: Expanding Your Fruit Leather Horizons
Don’t limit yourself to the ordinary! The beauty of making your own fruit leather is the endless flavor possibilities. Experiment with different berry combinations, add a touch of spice with cinnamon or ginger, or even incorporate herbs like mint or basil for a unique twist.
 I usually make my most requested fruit leathers from homegrown and frozen berries and homemade applesauce. Learn more at TwiceasTasty.com.
Join the Creative Journey at Robert Kline Art
Making homemade fruit leather is more than just a recipe; it’s an opportunity to connect with the food we eat, explore new flavors, and create something truly special with our own hands. I encourage you to give it a try and share your creations. Tag #RobertKlineArt and let’s inspire each other with the joy of handcrafted goodness.
Want to explore more handcrafted creations? Discover a world of unique and inspiring gifts at Robert Kline Art.
