Blog
Creating Edible Art: A Guide to Making Fruit Leather Flowers

Hey there, fellow art enthusiasts! Robert Kline here, and let me tell you, I’m always on the lookout for innovative ways to blend my love for art with my passion for handcrafted creations. Today, we’re diving into the delightful world of edible art with a simple yet stunning project: fruit leather flowers.
Imagine the vibrant colors and delicate textures of real flowers, transformed into delicious, edible decorations. Not only are these fruit leather flowers visually captivating, but they also offer a burst of natural sweetness, making them perfect for adorning cakes, cupcakes, or even just a simple plate of cookies.
Gathering Your Supplies: A Symphony of Colors and Tools
Before we embark on this artistic journey, let’s gather our tools and ingredients. Don’t worry; you won’t need an easel or a paintbrush for this masterpiece!
For the Fruit Leather:
- You can use store-bought fruit leather, but I encourage you to try making your own! It’s a fun and rewarding process, and you can experiment with different fruit combinations to create unique flavors. Check out my recipe for [insert fruit leather recipe link here] to get started.
For Shaping and Assembling:
- Cookie cutters: Round cookie cutters work best for creating the flower petals. Look for ones with semi-sharp edges for a clean cut. You can experiment with different sizes to create a variety of flower sizes.
- Scissors: A good pair of kitchen shears will come in handy for freehand cutting and shaping petals.
- Small bowl of water: Dipping your fingers in water helps to slightly moisten the fruit leather, making it more pliable and easier to shape.
- Toothpicks: These will be our trusty assistants in holding the flower petals together as they set.
Optional Tools for Added Flair:
- Scalloped-edged cookie cutters: For a touch of elegance, try using cookie cutters with scalloped edges to create petals with a delicate, textured look.
- Round objects for templates: If you don’t have cookie cutters, get creative! Use water bottle caps, small bowls, or any other round objects as templates for tracing circles onto the fruit leather.
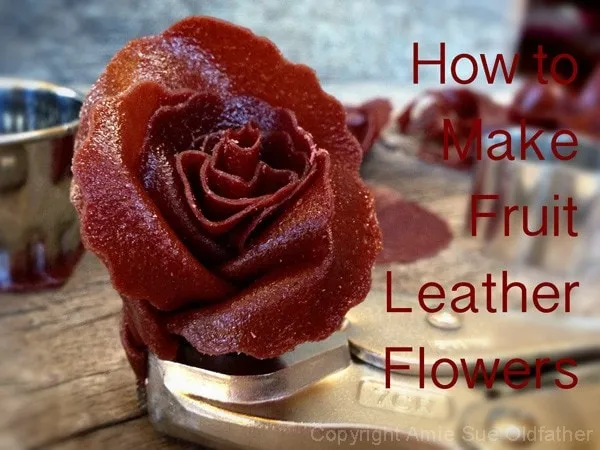
 Variety of fruit leather flowers
Crafting Your Edible Masterpieces: A Step-by-Step Guide
Now, let’s put on our artist hats and bring those fruit leather flowers to life!
Creating the Petals:
- Cut out your circles: Using your cookie cutters or templates, cut out several circles from the fruit leather. Remember, each circle will become a petal, so the number of circles you cut will determine the fullness of your flower.
- Shape the center: Take one circle and roll it into a cone shape. This will form the center of your flower.
Assembling the Flower:
- Layer the petals: Wrap a petal around the base of the center cone, slightly overlapping the previous petal. Gently pinch the base of the petal to secure it to the cone.
- Create folds: To achieve a more realistic look, gently bend the edges of the petals backward, creating soft folds.
- Repeat and layer: Continue adding petals around the center cone, layering them slightly and folding the edges until you achieve your desired flower size and fullness.
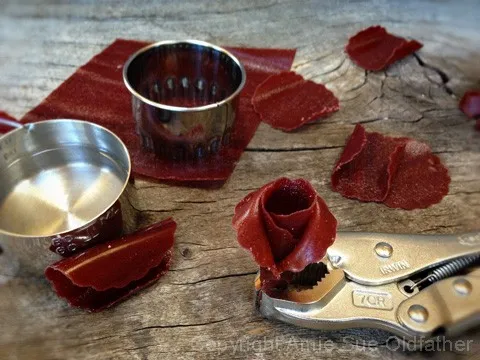
 Adding layers to create a fruit leather flower
Tips for Success:
- Start with pliable fruit leather: If your fruit leather is too dry or stiff, it will crack when you try to bend it. If this happens, try microwaving it for a few seconds to soften it up.
- Don’t be afraid to experiment: Have fun with different colors and textures! Use contrasting colors for the petals and center, or even try layering different shades of the same color to create a gradient effect.
- Embrace imperfection: Remember, no two flowers in nature are exactly alike. Don’t strive for perfection; let your creativity flow and embrace the unique character of each flower you create.
Beyond the Basics: Exploring Different Flower Designs
Once you’ve mastered the basic flower, let your imagination run wild! Here’s a simple variation to get you started:
Carnation Fruit Leather Flowers:
- Pinch and shape: Instead of folding, pinch each fruit leather circle into an “X” shape.
- Assemble and secure: Gather the pinched circles together, tucking and snugging them against one another to form the carnation shape.
- Secure with toothpicks: Use toothpicks to hold the carnation together as it sets. You can gently remove the toothpicks once the flower feels secure.
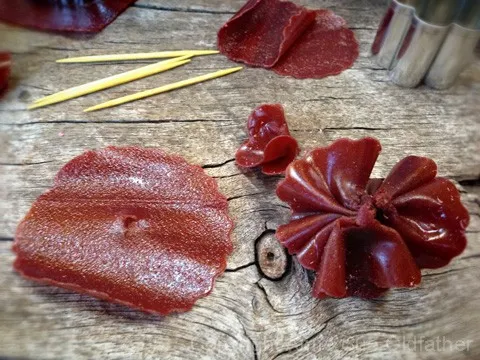
 Creating a carnation with fruit leather
Showcasing Your Edible Art: Tips for Storage and Display
Storing Your Creations:
- Airtight containers: Store your fruit leather flowers in airtight containers at room temperature to maintain their freshness.
- Layering: Avoid layering the flowers on top of each other, as they may stick together. If necessary, place a piece of parchment paper between layers.
Displaying Your Edible Art:
- Cakes and cupcakes: Gently press the flowers onto frosted cakes or cupcakes for a stunning, edible decoration.
- Dessert plates: Add a touch of elegance to a plate of cookies or other treats by placing a single fruit leather flower on the side.
- Gifting: Package a few fruit leather flowers in a small cellophane bag tied with a ribbon for a charming and unique gift.
Sharing the Joy of Handmade Creations: Your Turn to Create!
I can’t wait to see the beautiful and delicious fruit leather flowers you create! Remember, the most important ingredient in any craft is to have fun and let your creativity blossom. Share your creations with me on social media by tagging #RobertKlineArt.
And as always, keep those creative sparks flying! Head over to the Robert Kline Art website to discover more inspiring DIY projects, handcrafted treasures, and unique gift ideas.
