Blog
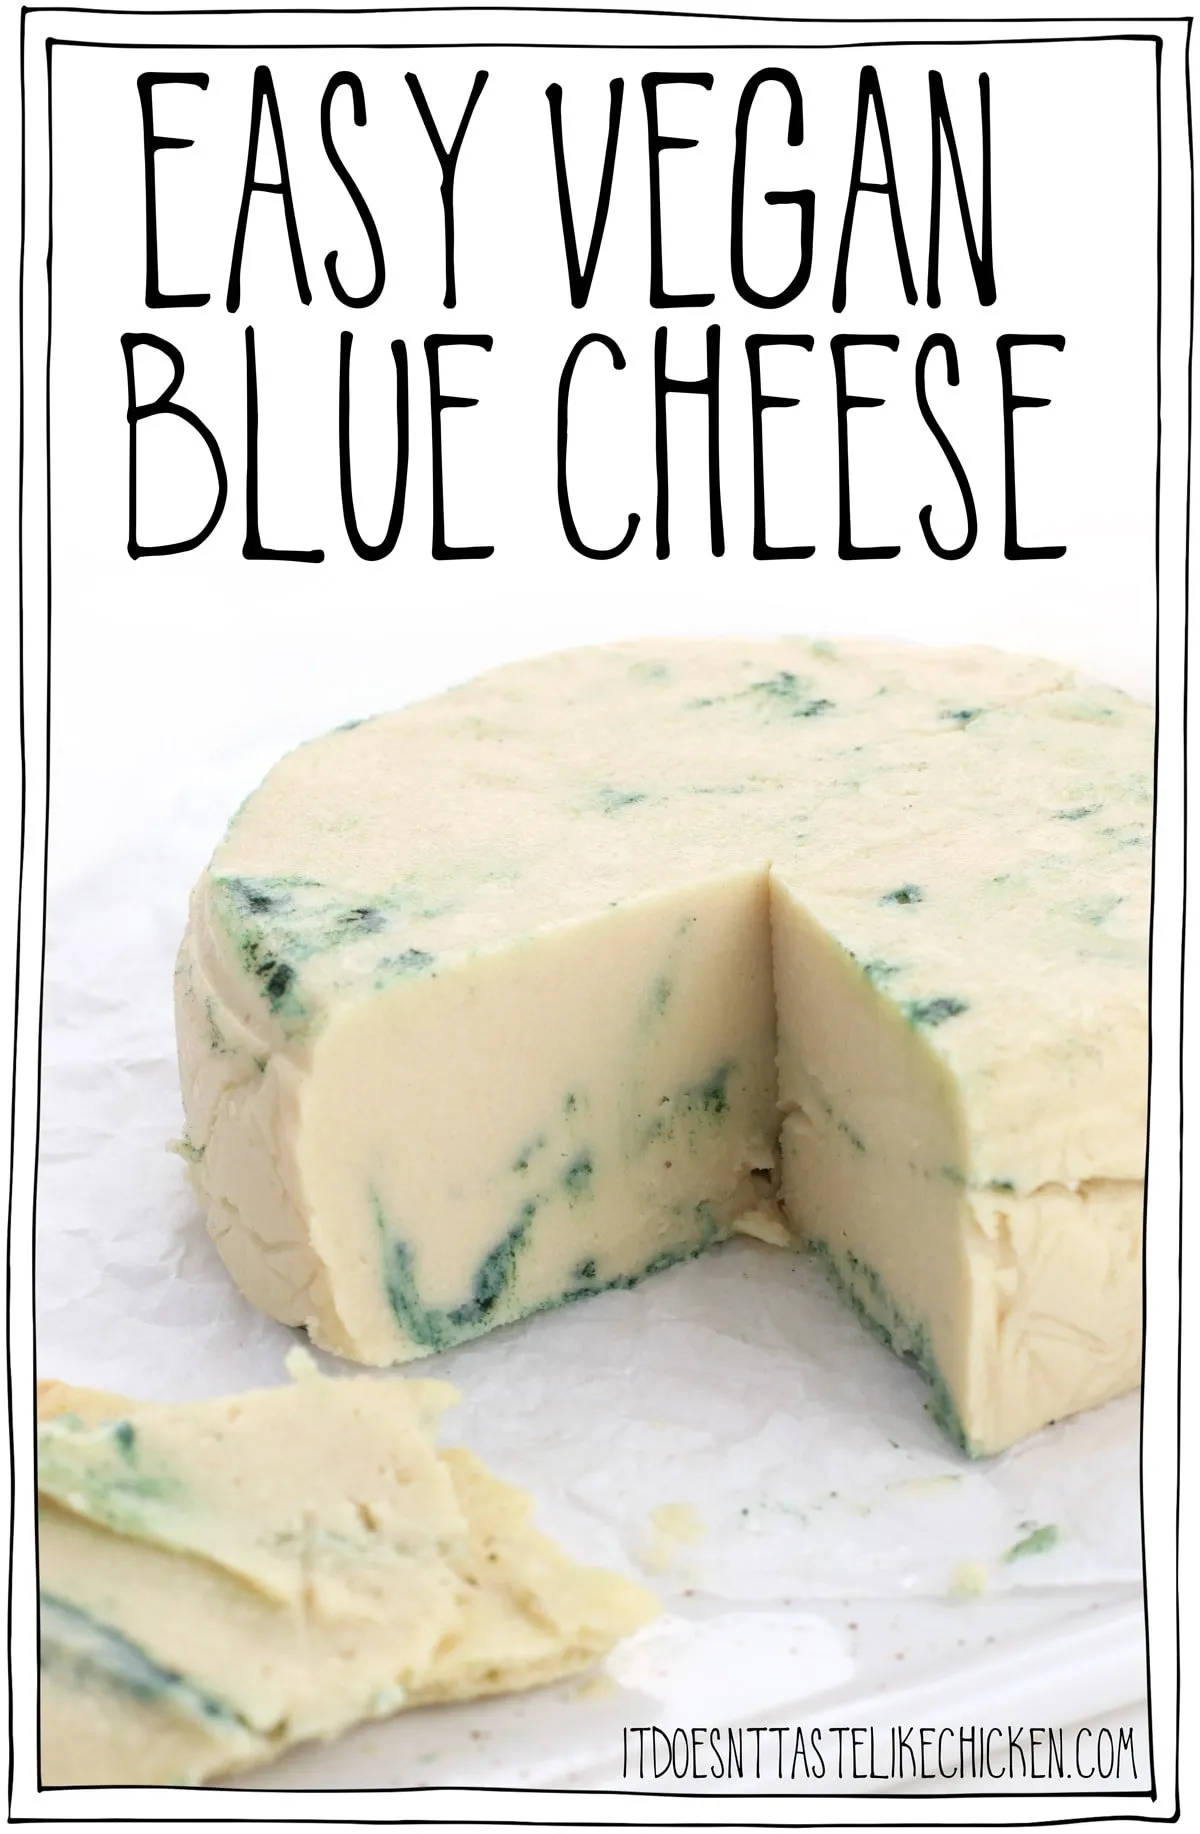
Craft Your Own Creamy Vegan Blue Cheese at Home

Hey there, fellow food crafters! Robert Kline, your friendly neighborhood art enthusiast here, and today we’re diving into the delicious world of homemade vegan cheeses – specifically, a recipe that’s near and dear to my heart (and stomach!): Vegan Blue Cheese.
You might be thinking, “Blue cheese? That pungent, veiny stuff?” Yes indeed! But fear not, my friends. This recipe takes out the weeks-long aging process and replaces it with a quick and easy method that even the busiest of bees can manage. We’re talking just 8 ingredients and 20 minutes of active prep time, followed by a bit of chilling, and bam! You’ve got yourself a creamy, tangy, and surprisingly authentic vegan blue cheese.
Gathering Your Supplies: A Vegan Blue Cheese Starter Kit
Before we get our hands deliciously messy, let’s gather our ingredients. This recipe is all about transforming simple pantry staples into gourmet goodness.
- Raw Cashews: These are our creamy foundation. If cashews aren’t your thing, blanched almonds or macadamia nuts make excellent stand-ins.
- Refined Coconut Oil: The secret to a firm, spreadable texture. Make sure it’s refined for a neutral taste.
- Apple Cider Vinegar: A dash of tanginess to mimic that classic blue cheese bite.
- White Miso Paste: Provides a depth of flavor reminiscent of aged cheese. You can usually find it in the Asian foods aisle of most grocery stores.
- Spirulina: The magic ingredient! This blue-green algae not only adds a touch of earthy flavor but also creates those iconic blue-green veins.
- Salt, Onion Powder, Garlic Powder: Rounding out the flavor profile with savory and aromatic notes.
Crafting the Cheese: A Step-by-Step Guide
-
Softening the Cashews:
- Method 1: Quick Boil: Cover cashews with water in a pot, bring to a boil, and simmer for 10 minutes until tender. Drain and rinse.
- Method 2: Overnight Soak: Cover cashews with water in a bowl and let soak for at least 6 hours or overnight. Drain and rinse.
-
Blending the Cheese Base:
- In a food processor, combine softened cashews, melted coconut oil, apple cider vinegar, miso paste, salt, onion powder, and garlic powder.
- Blend until incredibly smooth, stopping to scrape down the sides as needed. It will be thick, slightly sticky, and warm.
-
Preparing the Mold:
- Line a mold or dish (I love using mini springform pans) with plastic wrap, parchment paper, or use a silicone mold. This will prevent sticking and make unmolding a breeze.
-
Forming the Cheese:
- Scoop half of the cheese mixture into the prepared mold and spread evenly. Sprinkle half of the spirulina over the top.
- Add the remaining cheese mixture and top with the rest of the spirulina.
- Use a knife to gently swirl the spirulina into the cheese, creating those beautiful veins. Don’t overmix!
- Smooth the top, cover, and chill in the fridge for at least 6 hours or overnight to allow the cheese to firm up.
Serving and Enjoying Your Vegan Masterpiece
Straight from the fridge, your vegan blue cheese will be nice and firm. As it sits at room temperature, it will soften to a perfectly spreadable consistency. For a firmer texture, pop it in the freezer for 30 minutes before serving.
Now comes the fun part – enjoying your creation! Here are a few serving ideas to get you started:
- Classic Cheeseboard: Serve alongside crackers, crusty bread, fruits, and nuts for a sophisticated appetizer.
- Sandwiches with a Kick: Spread generously on sandwiches or wraps for a flavor-packed punch.
- Salads Elevated: Crumble over salads for a tangy, salty bite.
- Creative Culinary Explorations: The possibilities are endless! Use it as a topping for baked potatoes, pizzas, or even blend it into dips and sauces.
Tips from Robert Kline:
- Freezing for Future Delights: This vegan blue cheese freezes beautifully! Wrap it tightly or store it in an airtight container to prevent freezer burn.
- Experiment with Flavors: Feel free to get creative and add your own personal touch! Chopped walnuts, dried cranberries, or a sprinkle of fresh herbs can add delightful complexity.
Congratulations on crafting your own homemade vegan blue cheese! Remember, the most important ingredient in any recipe is passion. So go forth, experiment, and don’t be afraid to put your own unique spin on this recipe.
And as always, I’d love to hear about your culinary adventures! Share your creations and experiences in the comments below, and be sure to explore “Robert Kline Art” for more inspiring handmade crafts and DIY projects. Until next time, happy crafting!
 A close-up of a block of creamy vegan blue cheese on a plate with crackers.
