Blog
The Art of Homemade Strawberry Fruit Roll-Ups: A Nostalgic Treat

Remember the joy of unrolling a vibrant, chewy fruit roll-up as a kid? Let’s recreate that magic, but with a homemade twist that’s tastier and healthier! Join me, your resident craft enthusiast at Robert Kline Art, as we embark on a journey to craft delightful strawberry fruit roll-ups with our own hands. This isn’t just about snacking; it’s about infusing creativity and love into a treat that bursts with natural flavors.
Gathering Our Ingredients – Simple and Fresh
This recipe calls for just a handful of ingredients, proving that sometimes, simplicity is the key to deliciousness. Here’s what we’ll need:
- 8 oz fresh strawberries (say goodbye to artificial flavors!)
- 1 tbsp freshly squeezed lemon juice (a touch of zing!)
- 3 tbsp sugar (optional, adjust to your sweetness preference)
Crafting Our Masterpiece – Step by Step
Now, let’s put on our chef hats and transform these simple ingredients into edible art.
Step 1: The Strawberry Transformation
First, we’ll give our strawberries a whirl in a blender or food processor. The goal is a smooth, luscious puree, free of any chunks. It’s like creating the base for a vibrant painting!
Step 2: Simmering the Flavors
Next, we’ll transfer our strawberry puree into a saucepan, adding the lemon juice and sugar (if you’re using it). This delightful concoction will simmer for about 10 minutes over medium-high heat. Keep a close eye on it and stir frequently. We’re looking for a thick, jammy consistency, a sign that the moisture is happily bubbling away.

Step 3: Preparing for the Oven
While our mixture is simmering, let’s preheat the oven to its lowest setting, ideally around 170 degrees F. Remember, we’re aiming for a gentle dehydration, not a high-heat bake. If your oven doesn’t go this low, don’t worry! We can adjust by opening and closing the door to regulate the temperature. Just make sure it doesn’t exceed 200 degrees F.
Step 4: Creating Our Canvas
Now for the artistic part! Line a baking sheet with parchment paper or a Silpat mat. This will be the canvas for our fruit leather masterpiece. Pour the thickened strawberry mixture onto the sheet and spread it evenly into a rectangle, aiming for a thickness of about 1/8 inch. An offset spatula works wonders for this, but a regular one will do the trick too.

Step 5: The Dehydration Process
With our canvas ready, it’s time for the oven to work its magic. Pop the baking sheet in and let the fruit mixture slowly dehydrate for 3-4 hours. Remember, this isn’t an exact science; it’s about achieving the perfect texture. The roll-up is done when it’s no longer sticky and has a slightly tacky feel.
Step 6: Unveiling the Masterpiece
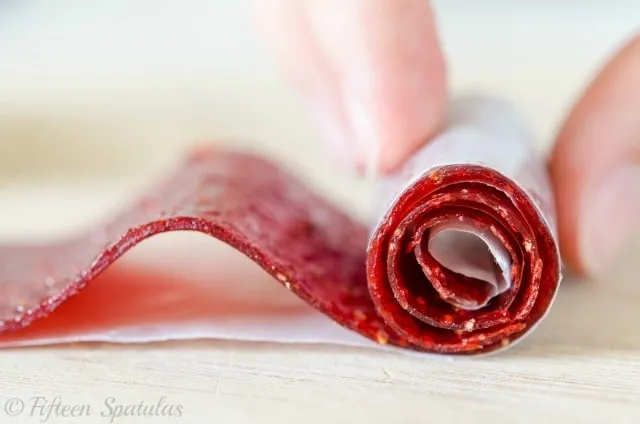
Once our fruit leather is cool, it’s time for the grand finale! Carefully transfer it to a cutting board lined with wax paper. Now, grab a pizza cutter and slice the rectangle into long, inviting strips. And finally, the moment we’ve been waiting for – roll each strip into a beautiful, homemade fruit roll-up.
 Fruit Roll Ups – Close Up with Vivid Red Color from Strawberries
Tips from Robert Kline Art
- Storage: Keep your homemade fruit roll-ups fresh and delicious! Once cooled, store them in an airtight container in the refrigerator for up to a week. You can also wrap them tightly in plastic wrap.
- Fruit Variations: Feel free to experiment with other fruits! While strawberries reign supreme in the roll-up world, you can try a blend, keeping strawberries as the base (about 50%). Just remember that different fruits have varying dehydration times.
- Frozen Fruit: Yes, you can use frozen strawberries, but make sure to thaw them completely before pureeing.
The Joy of Handmade
Creating homemade fruit roll-ups is a testament to the joy of handmade crafts. It’s about savoring the process, infusing love into each step, and enjoying the satisfaction of a treat made with your own two hands. So go ahead, gather your ingredients, and let’s roll up some fruity fun! And remember, at Robert Kline Art, we believe that the most beautiful creations are often the ones we make ourselves.
