Blog
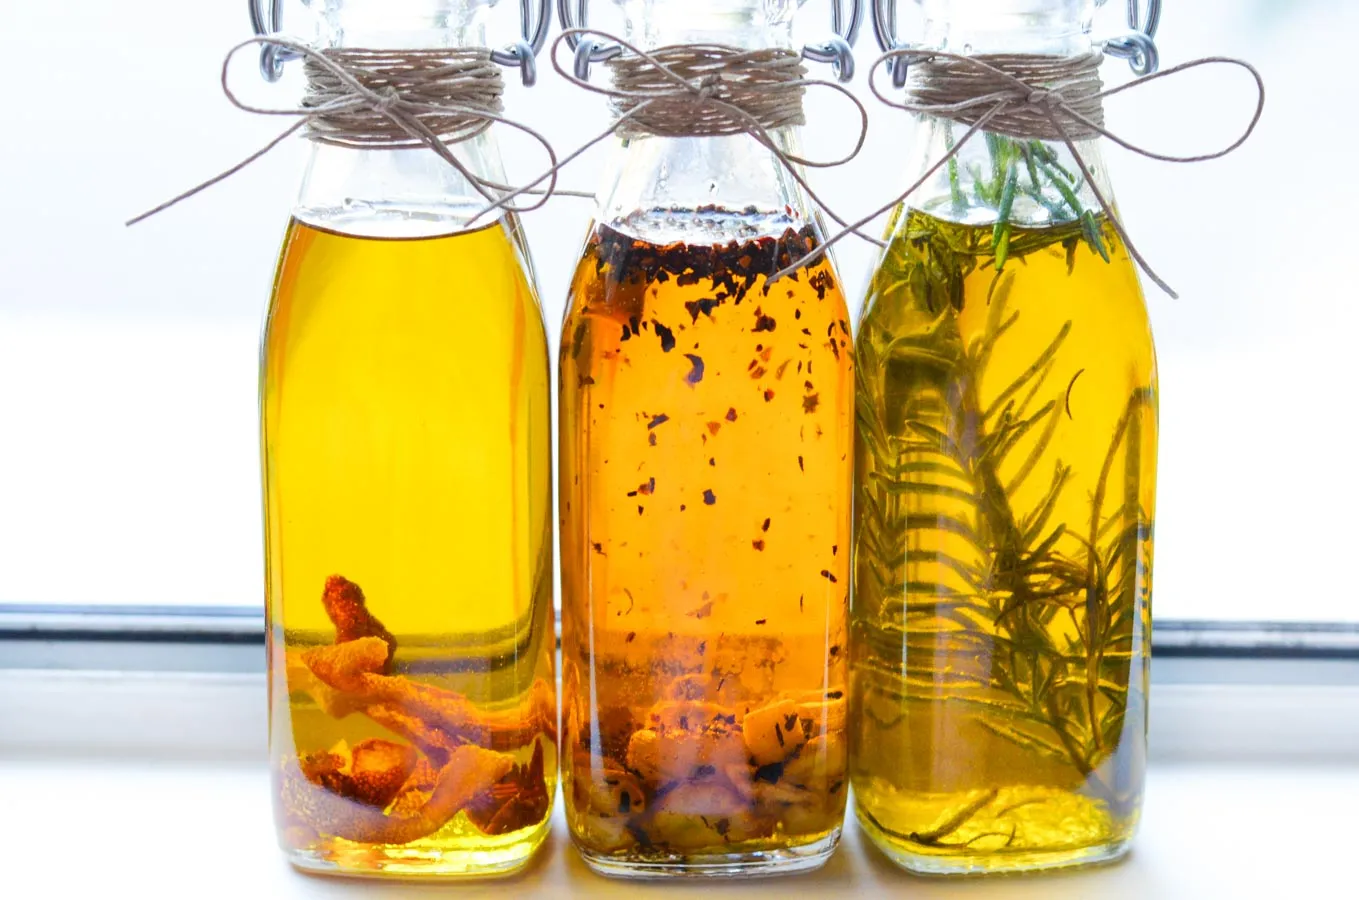
Homemade Infused Cooking Oil Set: The Perfect DIY Gift

Hey there, fellow art and craft enthusiasts! Robert Kline here, and I’m excited to share a fantastically easy and delicious DIY project with you today: homemade infused cooking oils.
These fragrant oils are not just a feast for the senses but also make incredibly thoughtful gifts. They’re perfect for the holiday season or any occasion where you want to present someone with a handmade gift from the heart.
 Homemade Gift Idea – Infused Olive Oils
Why Infused Cooking Oils Make the Perfect Gift
Think about it: who wouldn’t love to receive a beautifully bottled set of flavorful oils that elevate any dish? These aren’t your average supermarket oils; they’re crafted with love and infused with fresh, aromatic ingredients. Plus, they’re incredibly versatile, adding a gourmet touch to everything from pasta and salads to bread dipping and marinades.
Crafting Your Own Infused Oils: A Step-by-Step Guide
Now, let’s dive into the fun part – making the oils! Don’t worry; the process is surprisingly simple.
Here’s what you’ll need:
- High-Quality Olive Oil: I recommend using extra virgin olive oil for the best flavor. Look for a dark or opaque bottle to protect the oil from light.
- Fresh Ingredients: Get creative with your flavor combinations! Some classic choices include garlic, chili flakes, rosemary, and lemon peel.
- Sterilized Glass Bottles or Jars: Choose attractive bottles or jars with tight-fitting lids to store your infused oils.
- Small Saucepan
- Funnel
Instructions:
- Prepare Your Ingredients: Wash and dry your chosen ingredients thoroughly. For ingredients like garlic and lemon peel, lightly crush them to release their flavors.
- Gently Heat the Oil: In a saucepan, combine your chosen ingredients with extra virgin olive oil. Heat over very low heat for 15-20 minutes, allowing the flavors to infuse. Avoid boiling the oil.
- Cooling and Straining: Remove from heat and let the oil cool completely. This allows the flavors to deepen. Once cooled, strain the oil through a fine-mesh sieve or cheesecloth into your sterilized bottles.
- Label and Decorate: Label your bottles with the type of infused oil and the date. Get creative with your decorations! You can add a sprig of herbs, a tied ribbon, or a personalized tag.
Tips and Tricks for Infused Oil Success
- Flavor Combinations: Don’t be afraid to experiment with different flavor combinations! Try rosemary and garlic, lemon and thyme, or chili flakes and oregano.
- Storage: Store your infused oils in a cool, dark place for up to a week. For longer shelf life, consider storing them in the refrigerator.
- Gifting Ideas: Present your infused oils in a beautiful basket with a loaf of crusty bread, a recipe card for using the oils, or a set of small dipping bowls.
The Joy of Handmade Gifts
There’s something truly special about giving (and receiving) handmade gifts. They show you took the time and effort to create something unique and from the heart.
So why not surprise your loved ones with a set of homemade infused cooking oils? I guarantee they’ll be delighted with this thoughtful and delicious gift.
And don’t forget to share your own infused oil creations and gifting experiences in the comments below! I’d love to hear your ideas.
For more unique handmade gift ideas and artistic inspiration, be sure to explore the rest of the Robert Kline Art website. Happy crafting!
