Blog
Homemade Flavored Honey Sticks: A Sweet Treat Bursting with Flavor

Remember those mesmerizing honey sticks you’d see at farmers’ markets or pumpkin patches? The ones lined up like a rainbow, promising a taste of pure sweetness? I’ve always been captivated by them – simple yet brilliant. As a passionate crafter at Robert Kline Art, I’m always up for a DIY challenge, and recreating these honey sticks was an opportunity I couldn’t resist.
These vibrant treats are not just visually appealing; they’re incredibly fun to make and even more fun to enjoy. Imagine a party, kids buzzing around, and these colorful honey sticks adding an element of playful delight. Plus, starting with organic honey makes them a touch healthier than your average sugary treat. Let’s dive into how you can create these miniature wonders in your own kitchen!
Crafting Your Own Honey Sticks: A Step-by-Step Guide
This is less about precise measurements and more about a simple, enjoyable process. Think of it as an art project with delicious results!
Gathering Your Supplies:
- Acacia Honey: This honey boasts a delicate flavor that complements a variety of extracts.
- High-Quality Extracts: Vanilla, almond, orange, peppermint, strawberry—the flavor possibilities are endless! Choose your favorites and let your creativity flow.
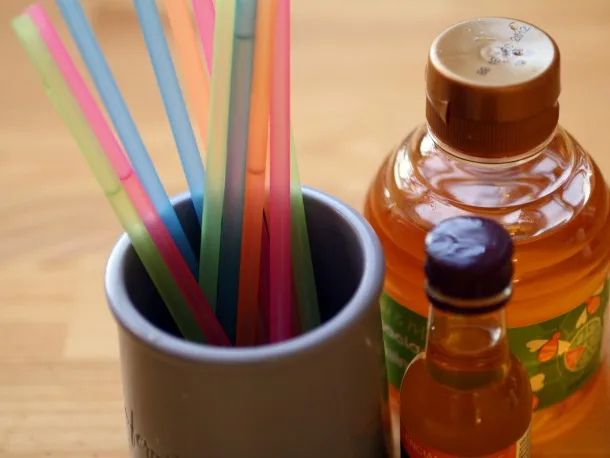
- Drinking Straws: Opt for colorful straws; they add a visual cue for the different flavors.
- Tape: To seal those honey-filled wonders.
- Pipette or Dropper: For precise extract application.
- A Squeezable Honey Bottle (Optional but Recommended): Makes the filling process a breeze.
Creating the Magic:
- Prepare Your Straws: Flatten one end of each straw and secure it with tape. This creates a sealed base for your honey stick.
- Fill ‘Em Up: If you have a squeezable honey bottle, insert the open end of the straw and fill it about 4/5 of the way. If not, carefully spoon honey into each straw.
- Infuse the Flavor: Add 4-5 drops of your chosen extract into the honey-filled straw. Gently massage the straw to distribute the flavor evenly.
- Color-Code Your Creations: Use different colored straws for different flavors – a visual treat and a helpful guide.
 Homemade Honey Sticks
Tips and Tricks for Honey Stick Success:
- Don’t Make Them Too Far in Advance: The honey can seep through the tape over time. It’s best to make these a few hours before your event.
- Experiment with Flavors: Get adventurous! Lavender, rosewater, or even a touch of spice can add unique dimensions to your honey sticks.
- Presentation Matters: Arrange your honey sticks in a charming cup, mason jar, or even a small vase. They make for a delightful centerpiece.
Unleash Your Inner Artist with Robert Kline Art:
Creating homemade flavored honey sticks is a testament to the joy of handmade creations. At Robert Kline Art, we believe in the power of crafting to spark creativity and bring people together. These honey sticks are just one example of the magic you can create with simple ingredients and a dash of imagination.
Have you ever tried making your own honey sticks? We’d love to hear about your flavor adventures in the comments below! And for more unique handmade gifts and crafting inspiration, be sure to explore the world of Robert Kline Art. Let’s keep those creative sparks flying!
