Blog
DIY Book Page Flowers: Crafting Literary Elegance

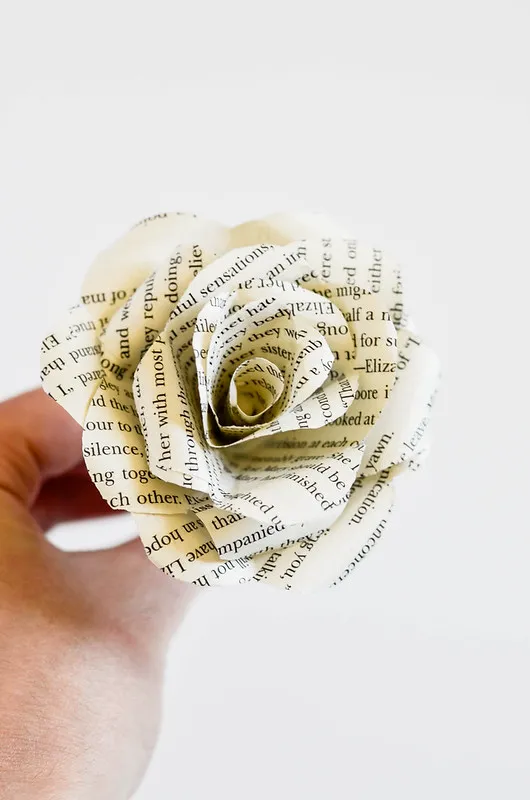
As an artisan who cherishes the fusion of creativity and sustainability, I’m always captivated by the allure of repurposed materials. Today, we’re diving into the enchanting world of DIY book page flowers – a testament to how discarded stories can bloom anew as exquisite works of art.
These ethereal creations, crafted from the delicate pages of pre-loved books, possess a timeless elegance that transcends fleeting trends. Whether you envision them gracing your wedding bouquet, adding a touch of vintage charm to your home decor, or serving as heartfelt, personalized gifts, book page flowers are as versatile as they are captivating.
Gathering Your Artistic Arsenal
Before we embark on our crafting journey, let’s assemble the tools and materials needed to bring these literary blossoms to life.
Materials:
- Book Pages: Opt for books with aged, slightly yellowed pages for an authentic vintage aesthetic. Novels like “Pride and Prejudice,” with their delicate prose and timeless romance, lend themselves beautifully to this craft.
- Scissors: Sharp scissors are crucial for precise cuts and intricate details.
- Ruler: A ruler ensures uniform petal sizes and overall symmetry in your floral creations.
- Mod Podge or Glue: A reliable adhesive like Mod Podge is essential for bonding the delicate paper petals together.
- Lollipop Sticks or Floral Wire: These will serve as the stems for your flowers. You can also use floral wire folded in half with a bead in the middle to create a more robust structure.
- Floral Tape: Floral tape adds a polished finish to the stems while also securing the wire if you choose to use it.
Step-by-Step Guide: Crafting Your Book Page Roses
Now, let’s transform these humble materials into exquisite paper roses. Each step is a brushstroke in our crafting masterpiece.
Step 1: Preparing the Petals
-
Begin by cutting your chosen book pages into squares, aiming for a size of at least 4 inches. Remember, you can always adjust the size to create larger or smaller blooms.
 DIY Book Flowers | cookingalamel.com
 -
Fold each square in half diagonally to form a triangle. Repeat this folding process twice more, resulting in a smaller triangle.
 DIY Book Flowers | cookingalamel.com
 -
Carefully snip off the pointed corner of the folded triangle, creating a small opening at the bottom. This opening will later accommodate the stem.
-
With the open end of the triangle facing you, round off the two corners to create a heart-shaped petal. Repeat this process for all your folded triangles.
 DIY Book Flowers | cookingalamel.com
Step 2: Shaping the Rose’s Heart
-
Unfold the petals to reveal the intricate folds you’ve created.
 DIY Book Flowers | cookingalamel.com
 -
Select one petal and cut out a single section along the fold lines.
-
From the second petal, cut out two sections, and from the third, remove three sections. These cut-out pieces will form the innermost layers of your rose.
-
Taking the smallest cut-out piece, roll it into a cone shape, securing the edge with a dab of glue.
-
Repeat the rolling and gluing process with the remaining two cut-out pieces, gradually increasing the cone’s size with each layer.
Step 3: Assembling the Bloom
-
Apply glue to one folded section of the smallest petal (the one with three sections removed) and adhere it to another folded section, creating a layered effect.
-
Repeat this process for the remaining two petal shapes, ensuring that each larger petal has one more visible folded section than the previous one.
 DIY Book Flowers | cookingalamel.com
 -
Gently roll the edges of the petals over a lollipop stick or your finger to give them a delicate, blossoming appearance.
Step 4: Bringing It All Together
-
Insert a lollipop stick or floral wire stem into the small opening at the base of the smallest cone. Secure it with a dab of glue.
-
Apply glue to the outer edge of the cone and carefully slide the next largest petal layer onto the stem. Gently pinch the base to secure it.
-
Repeat the layering process, adding each petal size in ascending order until you’ve created a full, layered rose.
-
Wrap floral tape around the stem, starting from the base of the flower and spiraling downwards. This step provides a polished look and extra stability.
Tips and Inspirations: Unleashing Your Creativity
-
Experiment with Color: While the natural patina of aged book pages possesses its own charm, don’t hesitate to experiment with color. Watercolors, diluted acrylic paints, or even tea staining can add unique dimensions to your floral creations.
-
Incorporate Embellishments: Enhance the elegance of your book page flowers with delicate embellishments. Pearl beads, glitter, or small rhinestones can add a touch of sparkle and glamour.
-
Explore Different Flower Types: Don’t limit yourself to roses! Explore crafting other flower varieties using the same basic techniques. Carnations, lilies, and even whimsical wildflowers can be brought to life using book pages.
Conclusion: Sharing the Beauty of Handmade Crafts
Congratulations on crafting your very own book page roses! These timeless creations are a testament to your creativity and resourcefulness. Remember, the beauty of handmade crafts lies in their imperfections and the unique stories they tell.
I encourage you to share your creations with friends and family, spreading the joy of handmade gifts and the art of repurposing. And don’t forget to explore the other exquisite handmade treasures available on Robert Kline Art for more gift-giving inspiration. Let’s continue to celebrate the art of crafting and the magic of giving!
