Blog
Craft a Custom Memo Board: Taming the Paper Chaos with Style

Do you ever feel like you’re drowning in a sea of school calendars, to-do lists, and random scraps of paper? You’re not alone! Like many of you, I used to struggle to keep track of it all. That is until I discovered the magic of memo boards. A memo board is more than just a place to pin things; it’s a visual command center, a stylish reminder system, and a source of sanity in our hectic lives.
Today, I’m excited to share my own memo board journey, guiding you through the steps to create a custom-sized, fabric-covered masterpiece that’s as unique as you are. Let’s transform that pile of papers into a personalized work of art!
Designing Your Dream Memo Board: Size Does Matter
Finding the perfect ready-made memo board can feel like searching for a needle in a haystack. Sometimes, you need a specific size to fit your space just right. That’s what happened to me when I decided to add some much-needed organization to my “mudroom” – a generous term for the small hallway off my garage.
Unable to find a store-bought option in the exact dimensions I needed, I decided to embrace my inner DIY spirit and build a custom memo board. Trust me, it’s easier than you might think, and the results are incredibly rewarding.
Gathering Your Supplies: A Trip to the Hardware Store and Your Craft Closet
Before we dive into the construction process, let’s gather our tools and materials. Here’s what you’ll need:
Materials:
- Thin plywood (2′ x 4′ is a good starting point, but adjust to your desired size)
- Fabric of your choice (choose something durable and visually appealing)
- Batting (to add a bit of padding and dimension)
- Ribbon (for creating a decorative grid)
- Trim molding (to frame your memo board)
- Caulk or spackle (for filling in any gaps or nail holes)
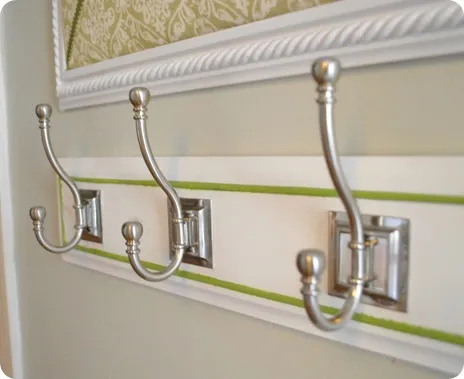
- ‘D’ Ring hooks (for hanging your memo board)
- Nail heads (for a decorative touch)
- Finish nails
Tools:
- SkilSaw (for cutting the plywood)
- Mallet
- Staple gun
- Pliers
- Hammer
- Sawhorses (optional, but helpful for supporting the plywood while cutting)
Building Your Custom Memo Board: A Step-by-Step Guide
Now, let’s roll up our sleeves and bring that memo board to life:
-
Cut It Out: Using your SkilSaw, carefully cut the plywood to your desired dimensions. Remember to measure twice and cut once!
-
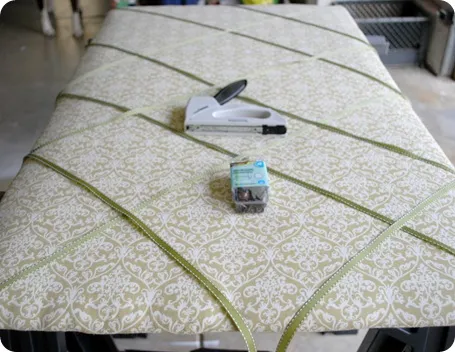
Wrap It Up: Lay your fabric face down, then place the batting on top, followed by the plywood. Pull the fabric taut and staple it securely to the back of the plywood, working your way around all four sides.
-
Add Some Flair: Now for the fun part – adding the ribbon! Measure and mark your desired grid pattern on the fabric. I opted for a classic diamond pattern, but feel free to get creative. Secure the ribbon in place with staples at the back.
-
Hammer Time: For an extra touch of elegance, add nail heads at the intersections of your ribbon grid. Use pliers to hold each nail head steady while you hammer it in place.
-
Ready to Hang: Attach the ‘D’ Ring hooks to the back of the memo board, making sure they are evenly spaced for balance.
-
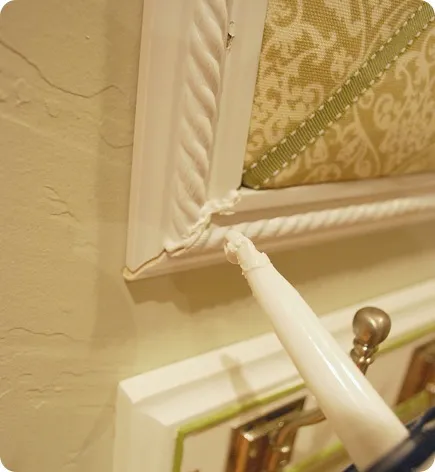
Framing Your Masterpiece: Cut the trim molding to fit the edges of your memo board. Secure it to the wall using finish nails, then carefully align your memo board within the frame and secure it.
-
Finishing Touches: Fill any visible nail holes or gaps with caulk or spackle. Allow it to dry completely, and then lightly sand it smooth for a flawless finish.
 nailheads and d rings
Adding nailheads and D rings to the memo board
 craft paint
Filling nail holes to create a smooth finish
 custom memo board
A beautiful and functional memo board is ready to be hung
Beyond the Basics: Personalizing Your Memo Board
Your custom memo board is complete, and now it’s time to make it your own!
“The beauty of a DIY project like this is that it can be tailored to your style and needs,” says renowned home décor expert, Sarah Williams. “Don’t be afraid to experiment with different fabrics, trims, and embellishments to create a piece that reflects your personality.”
Consider these ideas:
- Paint the trim molding a bold color for a pop of personality.
- Use decorative tacks or pushpins to add a touch of whimsy.
- Create a theme for your memo board, such as travel, inspiration, or family.
Conclusion: From Chaos to Calm with a Handmade Touch
Congratulations! You’ve successfully crafted a custom memo board that’s both beautiful and functional. Not only will it help you stay organized, but it also adds a unique, personal touch to your home décor.
Now, it’s your turn! We’d love to see your creations. Share photos of your finished memo boards in the comments below. And don’t forget to explore the Robert Kline Art website for more inspiring handmade gift ideas and DIY projects. Let’s keep the creativity flowing!
