Blog
Create Your Own Chic Travel Jewelry Roll: A Step-by-Step Guide

Are you tired of tangled necklaces and missing earrings when you travel? As an artist who’s always on the go, I understand the struggle! That’s why I’m excited to share my latest DIY project with you: a chic and practical travel jewelry roll that’s perfect for keeping your treasures organized on your next adventure.
This project is easier than you might think, even if you’re new to sewing. With a few simple materials and my step-by-step instructions, you’ll have a beautiful and functional jewelry roll in no time. Let’s dive in!
Gather Your Supplies
Before we begin, let’s gather everything we need. Here’s a list of materials:
- Fabrics:
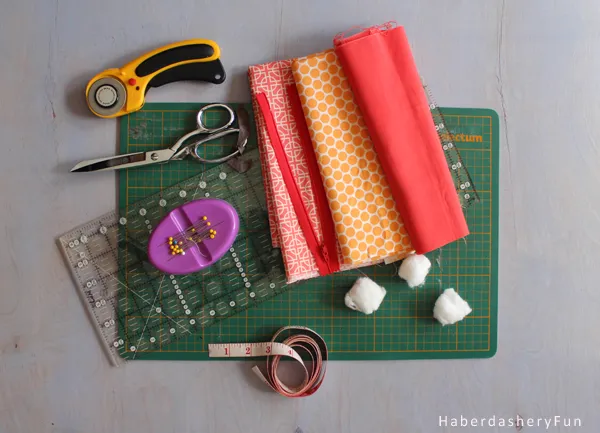
- 3-4 fat quarters of your favorite fabric for the outer and lining (choose contrasting or complementary fabrics for a stylish look)
- Clear vinyl (about 1/2 yard should be enough)
- Interfacing:
- Fusible batting (Pellon TP971 works great for this project)
- Notions:
- Double fold bias tape (homemade or store-bought)
- 3 zippers (7 inches wide)
- Tools:
- Rotary cutter, cutting mat, and quilting ruler (for accurate cutting)
- Disappearing ink pen (for marking fabric)
- Sewing machine and related supplies (thread, bobbins)
- Iron and ironing board
- Zipper foot (optional but helpful)
- Cotton balls (optional, for earring organization)
 Materials for jewelry roll
Let’s Get Crafting!
Now that we have our supplies ready, let’s start sewing:
Step 1: Preparing the Fabric
- Cutting: Cut four rectangles measuring 8 1/2 inches by 11 inches.
- Use one rectangle for the outer fabric.
- Use another rectangle for the lining fabric.
- Use two rectangles for the batting.
- Fusing: Fuse the batting to the backside of both the outer and lining fabrics using an iron following the manufacturer’s instructions. This will give your jewelry roll structure and stability.
- Rounding Corners: For a softer look, find a circular template (a small plate or a cup works well) and trace around each corner of the fabric rectangles using a disappearing ink pen.
- Cutting Corners: Carefully cut off the corners along the traced lines.
Step 2: Creating the Pockets
- Cutting the Vinyl: Cut three strips from the clear vinyl:
- Two strips should measure 3 inches by 9 inches.
- One strip should measure 2 inches by 9 inches.
- Preparing the Bottom Pocket:
- Cut a 9-inch piece of double-fold bias tape.
- Place the tape piece along one long edge of a 3-inch vinyl strip, aligning raw edges.
- Stitch down the bias tape using a sewing machine to create a neat finish for the bottom pocket of your jewelry roll.
Step 3: Attaching the Zippers
- Sewing Zippers to Vinyl:
- Using a zipper foot on your sewing machine (this is optional but helpful), sew each zipper to a vinyl strip.
- Place the vinyl on top of the zipper tape, right sides together, so that the teeth are sandwiched between the vinyl and the tape.
- Stitch as close to the zipper teeth as possible, ensuring the zipper can still open and close smoothly.
- Important: Make sure all zipper tabs pull from the same side for a consistent look.
Step 4: Assembling the Jewelry Roll
- Positioning the Vinyl Strips:
- Lay the outer fabric right side up on your work surface.
- Position the vinyl strips with attached zippers onto the outer fabric, leaving space between them to create pockets.
- Start with the bottom 3-inch vinyl strip (the one with the bias tape). Measure 3/4 inch from the bottom edge of the outer fabric and pin the vinyl strip down along the zipper tape.
- Sewing the Vinyl Strips:
- When sewing the vinyl strips, remember to always sew along the top edge of the zipper tape to ensure the pockets will be functional.
- Double-check that each pocket can be opened and closed and that you can easily place items inside before moving on to the next strip.
Step 5: Joining the Layers and Finishing
- Layering and Pinning:
- Place the lining fabric and the outer fabric wrong sides together, sandwiching the vinyl pockets in between.
- Pin the layers together securely.
- Sewing the Sides:
- Turn the fabric so that the outer fabric is facing up.
- Pin the two straps at the top edge of the jewelry roll, centering them in the middle.
- Stitch down the straps using a small 1/4-inch seam allowance.
- Adding the Binding:
- Pin the binding to the side of the jewelry roll, aligning the raw edges of the binding with the raw edges of the fabric.
- Stitch down the binding with a 1/4-inch seam allowance.
- Leave a 1-inch tail of binding at both the beginning and end.
- Finishing the Binding:
- Fold the binding over the raw edges of the fabric, encasing them neatly.
- Hand-stitch or topstitch the folded edge of the binding down to secure it.
Ta-Da! You Did It!
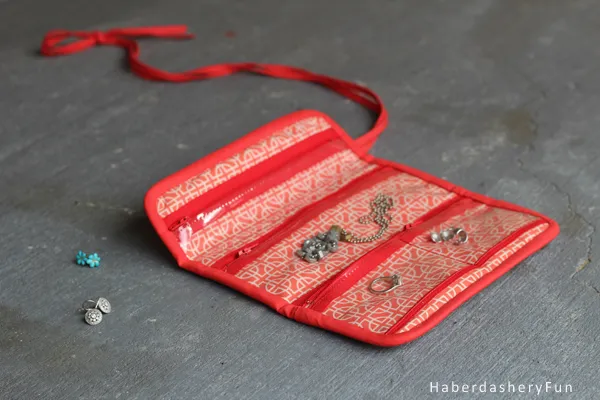
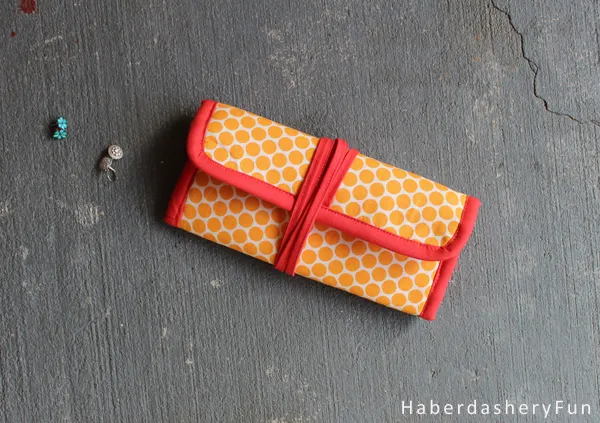
Congratulations! You’ve successfully sewn your own stylish and practical travel jewelry roll.
 Finished jewelry roll
Extra Tips for Success
Here are a few bonus tips to make your jewelry roll even better:
- Sewing with Vinyl: Don’t be intimidated by sewing with vinyl! Use a longer stitch length than usual, and hold onto the thread tail when you start sewing to help it feed through the machine smoothly. Avoid using pins directly on the vinyl as they can leave permanent holes; use clips instead. If you find the bias tape tricky to attach to the vinyl, try using a small piece of Wonder Tape underneath for extra hold.
- Cutting Binding Strips: If you’re new to cutting binding strips, you can find my easy tutorial on the Robert Kline Art website! For this project, you’ll need to cut binding strips that are 2 1/2 inches by 40 inches.
- Sewing Straps: You can also find a detailed tutorial on sewing straps on the Robert Kline Art website. For this project, you’ll need to cut a strap that is 1 inch by 70 inches.
- Organizing Earrings: Use cotton balls as placeholders for your earrings when determining the pocket size. Place them under the vinyl and topstitch straight lines to create individual compartments for each pair of earrings.
 Jewelry roll with cotton balls
I encourage you to give this project a try! It’s a fun and rewarding way to personalize your travel accessories and keep your jewelry organized. Plus, a handmade jewelry roll makes a thoughtful and unique gift. Don’t forget to share your creations and tag Robert Kline Art on social media – I can’t wait to see your beautiful work! And remember, you can find even more inspiring DIY projects and gift ideas for the crafty art enthusiast on the Robert Kline Art website.
