Blog
DIY Easter Baskets: A Fun & Festive Craft Project

Hey there, fellow craft enthusiasts! Robert Kline here, and Easter is just around the corner! This year, why not ditch the store-bought baskets and create personalized DIY Easter baskets that are sure to impress? Trust me, they’re easier to make than you might think!
This project is a blast from the past, inspired by a wonderful woman I used to babysit for. She made these charming crocheted Easter baskets every year, and now I’m excited to share my spin on her classic technique with you.
Gathering Your Supplies
Before we dive into the crafting fun, let’s gather our materials. Here’s what you’ll need:
- Crochet thread (approximately 500 yards per basket)
- Fabric stiffener (like Stiffy)
- Plastic wrap
- Tape
- Disposable bowl or cupcake tray
- Balloons (egg-shaped balloons work best)
- 1/4 yard of fabric (choose a fabric that complements your crochet thread)
- Weighty filler (like dry beans or rice)
- Glue gun and glue sticks
- Ribbon
- Scissors
- Sewing machine (optional, but helpful for the weighted base)
Creating Your Crocheted Easter Basket
Now, let’s get this crafting party started!
Step 1: Prepping Your Workspace
First things first, protect your work surface! Cover your table with a trash bag or newspaper. Line your bowl or cupcake tray with plastic wrap, securing the edges with tape. This will make cleanup a breeze!
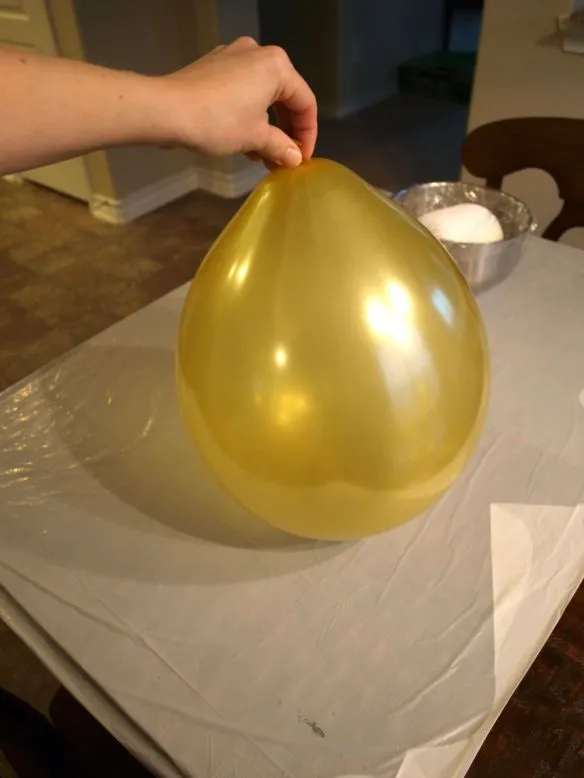
Step 2: Inflating & Wrapping Your Balloon
Inflate your balloon to your desired egg shape. Remember, you’re going for a cute and charming Easter egg, not a Thanksgiving turkey!
Pour some fabric stiffener into your lined bowl. Submerge a length of crochet thread into the stiffener, making sure it’s completely saturated.
Step 3: Creating Your Crocheted “Egg”
Wrap the end of the stiffened thread around the top of the balloon, securing it in place. Continue wrapping the thread around the balloon, adding more stiffener as needed.
Pro Tip: For a more open weave, space out your thread wraps. For a tighter weave, keep them closer together.
Step 4: Drying Your Crocheted Masterpiece
Once your balloon is completely covered, place it in your prepared bowl or cupcake tray to dry. Allow it to dry for at least 24 hours, turning it halfway through to ensure even drying.
Step 5: Popping & Prepping
Once your crocheted “egg” is completely dry, carefully pop the balloon and remove it. Don’t worry if the opening isn’t perfectly shaped, we’ll be covering it with ribbon later!
Step 6: Creating a Weighted Base
To give your basket stability, we’re going to add a weighted base. Cut two circles of fabric using a plate or bowl as a template. Sew the circles together, leaving a small opening for filling.
No-Sew Option: If you don’t have a sewing machine, you can use a small, zippered plastic bag filled with rice or beans.
Fill the fabric circles or plastic bag with your chosen weighted filler. Hand-stitch the opening closed.
Step 7: Adding the Finishing Touches
Carefully cut a larger opening in the top of your crocheted “egg” using scissors. Insert the weighted base into the bottom of the basket.
Using your glue gun, attach ribbon around the edges of the opening. Get creative! You can add a simple bow, wrap the ribbon around the entire basket, or create your own unique designs.
 " srcset=
Showcasing Your Creativity
And there you have it! You’ve created a one-of-a-kind Easter basket that’s bursting with charm and personality. Fill it with goodies and treats, and watch your loved ones’ faces light up with delight.
 " srcset=
Personalizing Your Baskets
The best part about DIY projects? You can completely customize them to match your recipient’s personality!
- Color Coordinate: Choose crochet thread and ribbon in your recipient’s favorite colors.
- Add Embellishments: Get creative and glue on buttons, beads, or other decorations.
- Monogram It: For an extra personal touch, add a monogrammed tag.
 " srcset=
Exploring More Handmade Treasures
Looking for more handmade gift ideas? Head over to the Robert Kline Art website to discover a curated collection of unique and handcrafted treasures! We’ve got something for everyone on your list!
 " srcset=
So, what are you waiting for? Grab your crafting supplies and let’s get those creative juices flowing! And remember, the most important ingredient in any craft project is to have fun!
Happy crafting, everyone!
- Robert Kline
