Blog
Craft Your Own Custom Wooden Picture Frames: A Step-by-Step Guide

Hey there, fellow craft enthusiasts! Robert Kline, your friendly neighborhood art aficionado here, ready to guide you on a rewarding journey of creating your very own custom wooden picture frames.
Imagine this: you’ve just snapped the perfect photo – a cherished memory you want to treasure forever. But something feels missing. It needs that special something to truly shine. Enter the humble yet mighty picture frame!
Store-bought frames can be pricey and often lack that personal touch. That’s why I’m thrilled to share my tried-and-true method for crafting beautiful, bespoke frames that perfectly complement your art and save you money in the process.
Whether you’re a seasoned DIYer or just starting out, this guide will equip you with the knowledge and confidence to build frames that are as unique as the memories they hold. So, gather your tools and materials, and let’s get crafting!
Gathering Your Tools and Materials
Before we embark on this creative journey, let’s ensure you have everything you need. Here’s a list of essential tools and materials:
Tools:
- Miter Saw
- Utility Knife
- Straight Edge
- Screwdriver
- Hammer
- Circular Saw (for cutting plexiglass, if needed)
Materials:
- Pictures to Frame
- Plexiglass (See notes below for tips on choosing the right size and thickness)
- Mat Board
- 1×2 boards (amount will depend on the size of your frame(s))
- ¾” or 1″ square dowels (amount will depend on the size of your frame(s))
- Cardboard
- Wood Glue
- Picture Frame Tabs
- Sawtooth Hanger
Notes on Plexiglass Options:
Plexiglass is a fantastic alternative to glass, offering durability and a crystal-clear finish. Pre-cut plexiglass panels are available in various sizes, or you can have them custom cut at your local hardware store.
Pro Tip: Save money by repurposing plexiglass from old poster frames – a sustainable and budget-friendly option!
Crafting Your Custom Picture Frames
Now that we have our tools and materials prepped, let’s dive into the step-by-step process of building your custom picture frames:
Step 1: Determining the Inside Frame Size
Begin by measuring your picture and decide how much mat board you want around it. The inside frame, made from thinner materials like dowels, determines the overall opening for your picture and mat board.
Pro Tip: Consider the size of your plexiglass when determining the inside frame dimensions. You can often avoid cutting plexiglass by adjusting the mat board and frame size to fit pre-cut sheets.
Step 2: Building the Inside Frames
With your measurements in hand, cut the 1x2s and dowels to create the inner frame. Miter the ends at 45 degrees for seamless corners.
Pro Tip: Use a fast-drying wood glue for quicker assembly. Clamp the pieces together or use weights to ensure a strong bond.
Step 3: Adding the Outside Frames
The outer frame adds depth and visual interest. Wrap 1x2s around the inner frame, mitering the ends for a polished look. Secure them with wood glue, ensuring the inner frame is inset to create a lip for holding the plexiglass, mat board, and backing.
Step 4: Cutting and Installing Plexiglass (If Needed)
If you need to cut your plexiglass to size, use a circular saw with a fine-tooth blade or a utility knife specifically designed for scoring plexiglass. Remember to remove the protective film after cutting.
Pro Tip: For a dust-free and secure finish, consider gluing the plexiglass to the back of the frame using a strong, clear-drying adhesive.
Step 5: Custom Cutting and Installing Mat Board
Mat board enhances the presentation of your artwork. Cut the mat board to the same size as your plexiglass and carefully cut out the center opening, making it slightly smaller than your picture.
Pro Tip: Use a sharp utility knife and a straight edge for clean, precise cuts on the mat board.
Step 6: Adding Hardware and Hangers
With your picture securely in place, cut a cardboard backing to the same size as the plexiglass and mat board. Secure it using turn buttons – this allows for easy photo changes in the future. Finally, attach a sawtooth hanger to the back for easy wall mounting.
Showcasing Your Custom Masterpieces
Congratulations! You’ve successfully crafted your very own custom wooden picture frames. Now, the only thing left to do is find the perfect spot to display your creations.
Robert Kline Art Tip: Experiment with different frame and mat board colors and textures to create truly unique pieces that reflect your personal style.
I encourage you to share photos of your finished frames in the comments below! And if you’re looking for more handmade treasures, be sure to explore the unique selection of handcrafted gifts and artwork available on the Robert Kline Art website. Happy crafting!
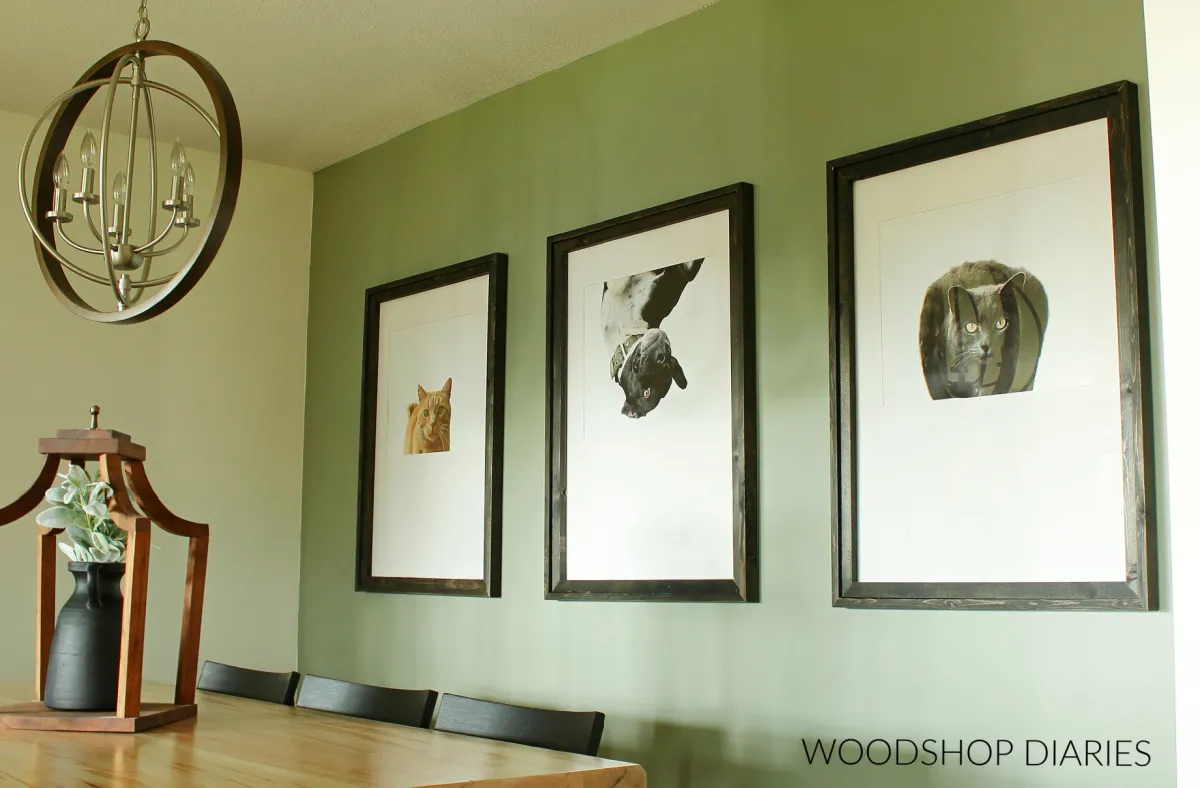
 Large black wooden picture frames hanging on green wall with pictures of cats and a dog on white backgrounds
Custom wooden frames add a touch of elegance and personality to any space.
 " class=
Let your creativity shine by experimenting with different wood types and finishes.
