Blog
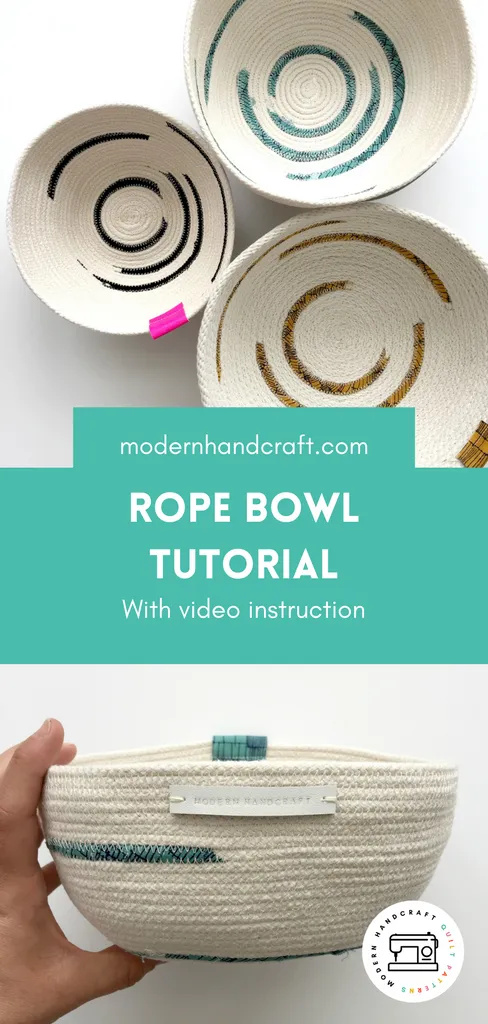
Handcrafted Rope Bowl Gift Guide: A Fun & Easy DIY Project

Hey there, fellow craft enthusiasts! Robert Kline here, and if you’ve been following my journey in the world of handmade artistry, you know my heart beats for unique and heartfelt creations. Lately, I’ve been captivated by the simple elegance of rope bowls, and let me tell you, they’re more than just a pretty centerpiece!
These charming bowls are incredibly versatile and surprisingly easy to make. Whether you’re looking for a thoughtful handmade gift idea or a fun weekend project to spruce up your home decor, rope bowls are the perfect solution!
Gathering Your Supplies: What You’ll Need for Your Rope Bowl
Before we dive into the step-by-step process, let’s gather our crafting arsenal. Here’s a list of materials you’ll need to bring your rope bowl vision to life:
- Natural Cotton 3/16-inch Rope: The star of the show! Choose a natural cotton rope for a classic look.
- Thread: Opt for a contrasting color for a decorative touch, or stick with cream or white for a subtle and cohesive aesthetic.
- Fabric Strips (Optional): Add a splash of color and personality by wrapping 1-inch fabric strips around the rope while sewing.
- Sewing Machine with Zigzag Stitch: You’ll need a trusty sewing machine that can handle a zigzag stitch for this project.
- Heavy-Duty Sewing Machine Needle: Since we’re working with rope, a sturdy needle is key for smooth sailing.
- Fabric or Leather Scrap (Optional): This is for adding a polished finish to the end of your rope bowl.
- Leather Labels (Optional): Elevate your rope bowl with a personalized touch by adding a leather label from shops like Cocosheaven on Etsy.
Step-by-Step Guide: Creating Your Masterpiece
Now comes the exciting part – bringing your rope bowl to life! Follow these steps, and you’ll be amazed at what you can create:
-
Starting Strong: Begin by coiling the rope tightly, ensuring each loop sits snugly against the last.
 Rope Bowl / Tutorial – Modernhandcraft.com
 -
Securing the Foundation: Use a zigzag stitch to sew along the inside edge of the rope coil, binding those loops together.
 Rope Bowl / Tutorial – Modernhandcraft.com
 -
Building the Walls: Continue coiling the rope around the initial base, using the zigzag stitch to secure each new layer to the one beneath.
 Rope Bowl / Tutorial – Modernhandcraft.com
 -
Adding a Pop of Personality (Optional): To incorporate fabric strips, simply align the edge of the fabric with the rope and sew it in place as you go.
-
Finishing Touches: Once you’ve reached your desired bowl size, neatly tuck the end of the rope underneath the last layer and secure it with a few stitches.
 Rope Bowl / Tutorial – Modernhandcraft.com
Tips and Tricks for Rope Bowl Perfection
- Consistent Tension is Key: Aim for an even tension while coiling the rope to maintain a uniform shape for your bowl.
- Experiment with Colors and Textures: Don’t hesitate to play with different rope colors and textures!
- Add a Personal Flourish: Get creative! Incorporate embellishments like beads, buttons, or embroidery for a unique touch.
Rope Bowls: The Perfect Handmade Gift
These charming rope bowls are more than just a craft project; they’re a vessel for your creativity and thoughtfulness. Fill them with treats, candles, or small treasures to create personalized gifts for any occasion.
 Rope Bowl / Tutorial – Modernhandcraft.com
Ready to take your rope bowl game to the next level? Here are a few inspiring ideas:
-
Two-Tone Delight: Start with one color of rope and transition to another midway through for a stunning visual effect.
 Rope Bowl / Tutorial – Modernhandcraft.com
 -
Fabric Fusion: Wrap fabric strips around the entire rope or just the top edge for a pop of color and personality.
-
Leather Accent: Cover the end of the rope with a piece of leather for a refined and durable finish.
 Rope Bowl / Tutorial – Modernhandcraft.com
Conclusion: Unleash Your Inner Artist with Robert Kline Art
I hope this rope bowl crafting adventure has sparked your imagination and inspired you to explore the endless possibilities of handmade creations! Remember, the beauty of crafting lies not only in the final product but also in the joy and satisfaction of making something with your own two hands.
Now, I’d love to hear from you! Share your rope bowl creations, tips, and questions in the comments below. Don’t forget to explore the exquisite collection of handcrafted gifts available on Robert Kline Art – perfect for adding a personal touch to any occasion.
Happy crafting, friends!
 Rope Bowl / Tutorial – Modernhandcraft.com
