Blog
DIY Macrame Plant Hanger: Add a Touch of Greenery to Your Home

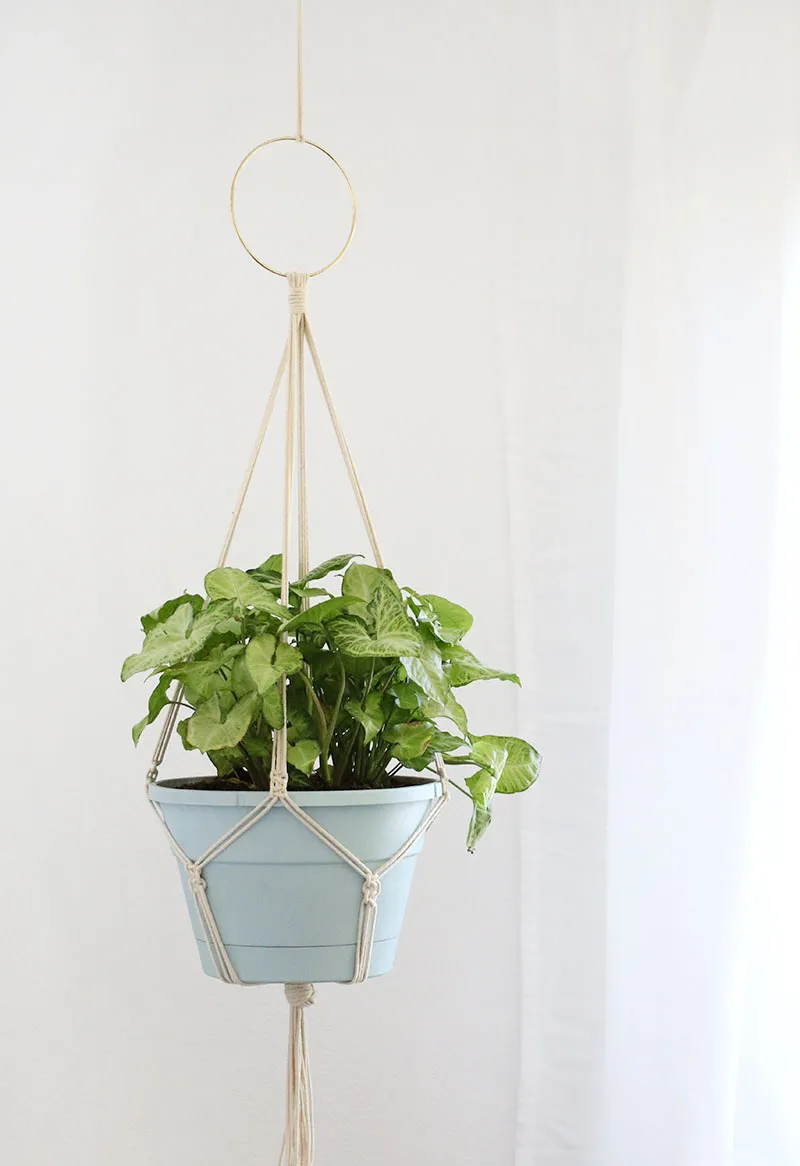
Are you looking for a simple yet stylish way to bring more greenery into your home? Look no further than this easy-to-follow DIY macrame plant hanger tutorial! As an avid crafter and plant enthusiast, I’m excited to guide you through the process of creating your own beautiful macrame hanger, adding a personal touch to your home décor.
This project is perfect for beginners, utilizing just two basic macrame knots to create a stunning and functional piece. So grab your supplies, and let’s get started!
Gathering Your Macrame Supplies
Before we dive into the knotting, let’s gather everything you’ll need:
- 3mm Natural Cotton Macrame Cord: This thickness provides a good balance of strength and flexibility for a plant hanger.
- 6-inch Gold Metal Ring: This will serve as the top loop of your hanger. Feel free to choose a different size or material to match your style.
- Pot with Tray: Select a pot and tray that complements your plant and your home décor. Don’t hesitate to get creative and personalize your pot with paint!
- Scissors: Sharp scissors are essential for clean cuts.
- Measuring Tape: This will help ensure your knots are evenly spaced.
- Miracle Gro Expand ‘N Gro: Give your plants the best start with this high-quality potting mix.
 DIY macrame plant hanger
Creating Your Macrame Plant Hanger: A Step-by-Step Guide
Step 1: Preparing Your Plant’s New Home
Begin by repotting your chosen plant into the prepared pot. Ensure you’re using a suitable potting mix like Miracle Gro Expand ‘N Gro to promote healthy growth. For guidance on repotting, check out my previous post [HERE](insert link to a blog post about repotting plants).
Step 2: Measuring and Cutting Your Cords
- Cut 8 strands of macrame cord, each 10 feet long. This length works well for a standard-sized planter. Adjust the length based on your pot size and desired hanger length.
- Fold each strand in half and loop it through the gold ring, ensuring the loop sits at the midpoint of the cord. You’ll now have 16 strands hanging down.
Step 3: Securing with a Wrapped Knot
- Cut a 2-foot piece of cord for the wrapped knot.
- Position this cord horizontally above the looped cords, with the short tail on the left and the long tail on the right.
- Wrap the long tail tightly around the looped cords and the short cord’s loop. Continue wrapping until you’re satisfied with the knot’s length.
- Thread the long tail through the remaining loop at the bottom.
- Pull the short tail to tighten the knot and tuck both tails neatly under the wraps.
Step 4: Crafting the First Row of Square Knots
- Divide your 16 strands into 4 groups of 4 strands each.
- For visual consistency, measure and mark 20 inches down from the wrapped knot on each group using a pencil.
- Within each group, separate the two outer strands (knotting cords) and the two inner strands (holding cords).
- To tie a square knot:
- Pass the left knotting cord over the holding cords and under the right knotting cord.
- Bring the right knotting cord under the holding cords and up over the left knotting cord.
- Pull both cords tight to complete the first half of the square knot.
- Repeat these steps, reversing the cord order (right over left, then left under right) to complete the second half of the square knot.
Step 5: Adding a Second Row of Square Knots
- Create new groups of 4 strands by taking the two rightmost cords from one group and combining them with the two leftmost cords of the adjacent group.
- Measure 5 inches down from the previous row of square knots and mark each new group.
- Tie two square knots at the marked points on each new group.
Step 6: Final Knot and Finishing Touches
- Gather all the cords together and measure down 7 inches from the second row of square knots.
- Tie a secure overhand knot to connect all cords at the measured point.
- Trim the cord ends to your desired length, ensuring an even and polished look.
Step 7: Hanging Your Macrame Masterpiece
- Gently ease your potted plant into the macrame hanger, carefully arranging the stems between the cords.
- Choose a sturdy hook and location to hang your planter, ensuring it can support the plant’s weight.
Congratulations!
You’ve successfully created a beautiful DIY macrame plant hanger! Not only does it enhance your home décor with a personal touch, but it also adds life and vibrancy to your space. Remember, crafting is all about experimentation and finding your unique style.
Now, I’d love to see your creations! Share your finished macrame plant hangers with me on [Robert Kline Art’s Facebook Page](link to your Facebook page) or tag me on Instagram [@yourinstagramhandle]. And don’t forget to explore more handcrafted treasures and DIY inspiration on the Robert Kline Art website – the perfect destination for unique gifts and handmade home décor.
