Blog
Capturing the Magic: A Guide to Stunning Sparkler Photography

Few things evoke the joyful nostalgia of summer celebrations quite like sparklers. The mesmerizing dance of light and the sheer delight on children’s faces as they twirl these miniature fireworks make for captivating photographic subjects. But how do you translate that fleeting magic into a stunning photograph? As an artist with a passion for capturing light, believe me, it’s easier than you think! Let’s dive into the art of sparkler photography, and by the end of this guide, you’ll be equipped to create your own breathtaking images.
Essential Gear and Settings for Sparkler Photography
First things first, let’s gather our tools. You don’t need a fancy studio setup, I promise. Here’s what you’ll need:
- A Camera with Manual Controls: Don’t worry, your smartphone camera likely won’t cut it for this. You’ll need a camera that lets you adjust shutter speed, aperture, and ISO manually.
- A Sturdy Tripod: Trust me, a shaky hand won’t do justice to those sparkling trails of light. A tripod will keep your camera steady for those long exposures.
- Sparklers (Plenty of them!): You’ll be surprised how quickly they burn out! Stock up to give yourself ample shooting time.
- A Flashlight: This will help you focus in the dark and add a touch of light to your subjects’ faces.
- A Dark Location: Head away from streetlights and bright ambient light. A darker setting will make your sparkler trails pop.
Now, let’s talk settings. Remember, we’re in manual mode:
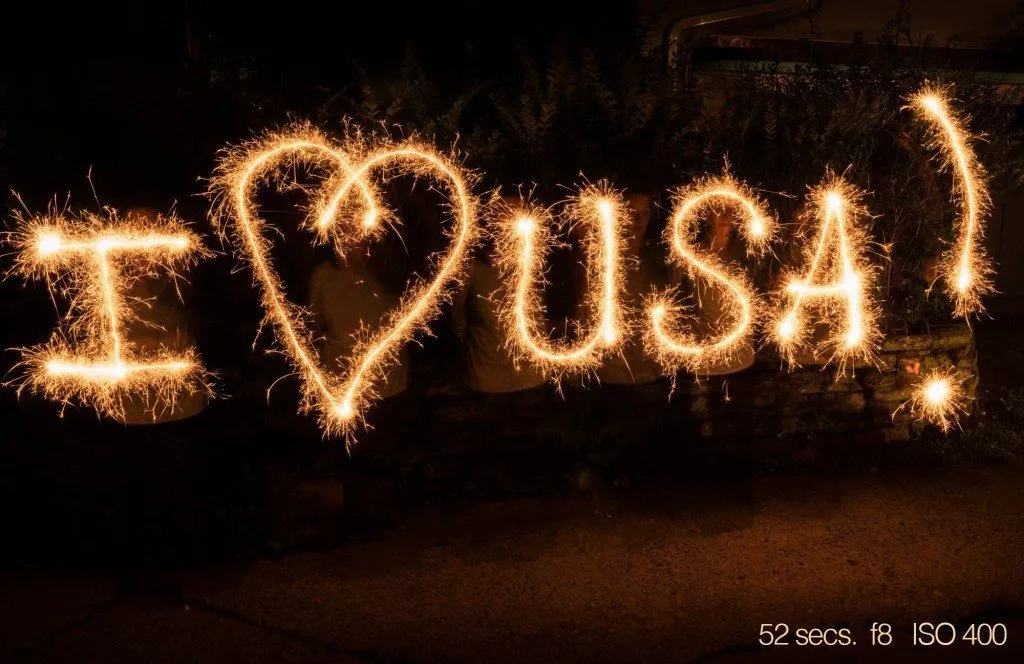
- Shutter Speed: This is where the magic happens. Start with a shutter speed of around 4-8 seconds. Experiment to see what creates the best trails for your liking.
- Aperture: A good starting point is around f/8. This will give you a balanced depth of field, keeping your subjects and the sparklers in focus.
- ISO: Keep it low, around 400, to minimize noise. The sparklers provide ample light, especially with a long exposure.
Safety First: Essential Precautions for Sparkler Photography
Before we delve into the creative techniques, a word of caution: sparklers are incredibly hot, even after they’ve burned out. Always supervise children, ensure everyone wears closed-toe shoes, and have a designated container for safely disposing of the spent sparklers.
Creating Stunning Compositions: Tips from Years of Experience
Here’s where your artistic vision comes into play. Remember:
- Focus on the Faces: Use your flashlight to illuminate your subjects briefly while focusing. This will help create a pleasing balance between the sparklers and the people holding them.
- Encourage Movement: Let your subjects have fun! Encourage them to write their names, draw shapes, or simply wave the sparklers. The unpredictable movements often lead to the most captivating results.
- Experiment with Angles: Don’t be afraid to get low or move around your subject. Changing your perspective can dramatically alter the final image.
Editing Your Sparkler Masterpieces: Enhancing the Magic
Once you’ve captured your shots, don’t be afraid to enhance them in post-processing. Here are a few tips:
- Adjust Brightness and Contrast: Fine-tune these settings to make the sparklers pop and the background recede.
- Experiment with Color Balance: Play with the color temperature to create a warm and inviting mood or a cooler, more dramatic feel.
Sharing Your Sparkler Photography with Robert Kline Art
I encourage you to share your sparkler photography creations! Tag #RobertKlineArt on social media. I’d love to see your interpretations of this magical technique. And remember, the most important ingredient in any creative endeavor is to have fun and embrace the unexpected beauty that unfolds.
 A young boy dressed in a patriotic shirt smiles brightly while holding a lit sparkler.
- Capturing the joy of sparklers is as rewarding as the photography itself!
Ready to take your crafting to the next level? Explore the unique handmade gifts and DIY inspiration available on Robert Kline Art. Let’s create something beautiful together!
