Blog
DIY Rustic Picture Frame: Showcase Your Memories with Charm

Hey there, fellow craft enthusiasts! Robert Kline, your trusted guide in the world of handmade artistry, here. Ever looked at a blank wall and thought, “This space needs some personality?” Today, we’re diving into a project that’s close to my heart – crafting a unique, rustic picture frame from repurposed wood. You’d be surprised how simple it is to create a piece that’s both stylish and brimming with personal touch!
Gathering Your Supplies: A Trip to the Creative Side
For this project, we’re embracing a rustic aesthetic, so think reclaimed wood, twine, and maybe even some vintage clothespins. Don’t worry if you’re not a seasoned woodworker – I’ll guide you through each step.
Here’s what you’ll need:
- Reclaimed wood: The star of the show! This could be anything from old barn wood (my personal favorite) to pallet wood.
- Kreg pocket hole screws: For sturdy and hidden joinery.
- Eye hooks: These will hold our twine photo display.
- Twine: Adds that rustic charm and holds your precious photos.
- Crafting clothespins: For a touch of vintage flair.
- Photos: Choose your favorites – the ones that make you smile.
- Miter saw: To get those perfect angled cuts (don’t worry, we’ll talk alternatives too!).
- Kreg pocket hole jig: For strong and professional-looking joints.
Crafting Your Rustic Masterpiece: Step-by-Step Guide
Ready to get your hands dirty? Let’s transform those raw materials into a beautiful, personalized photo display.
Step 1: Building the Frame
- Measure and Cut: Decide on the size of your frame and cut your reclaimed wood accordingly. If you’re comfortable with a miter saw, aim for 45-degree angles for those classic picture frame corners.
- Pro Tip: Not a fan of angles? No problem! Cut straight edges and join the corners at 90 degrees. You can secure them with nails or a metal bar at the back.
- Joinery: Use a Kreg Jig and pocket hole screws to create strong, hidden joints. No Kreg Jig? Wood glue and finishing nails work just as well. Remember, rustic is all about character, so don’t stress about perfect alignment.
- Embrace Imperfections: Rustic charm thrives on imperfections! Use a utility knife to distress the edges or highlight the wood’s natural texture.
Step 2: Adding the Eye Hooks
- Strategic Placement: Screw two eye hooks on the inside of the frame’s top edge and two on the bottom edge. No need for meticulous measuring here; eyeballing it adds to the rustic charm.
Step 3: Stringing the Twine
- Thread and Secure: Cut a generous length of twine and thread it through the top eye hooks. Pull it taut and secure it with knots at the back. Repeat for the bottom eye hooks. Remember, the twine will sag slightly with the weight of the photos, so make sure it’s nice and tight.
Step 4: Mounting Your Creation
- Command Strips for the Win: I love using 3M Command Picture Strips for hanging. They’re renter-friendly and make repositioning a breeze.
Step 5: The Gallery Reveal
- Clip and Arrange: This is where the magic happens! Use those charming clothespins to display your photos along the twine. Get creative with sizes and arrangements. Remember, this display isn’t just limited to photos. You can add dried flowers, postcards, or even small trinkets.
Rustic Charm, Endless Possibilities
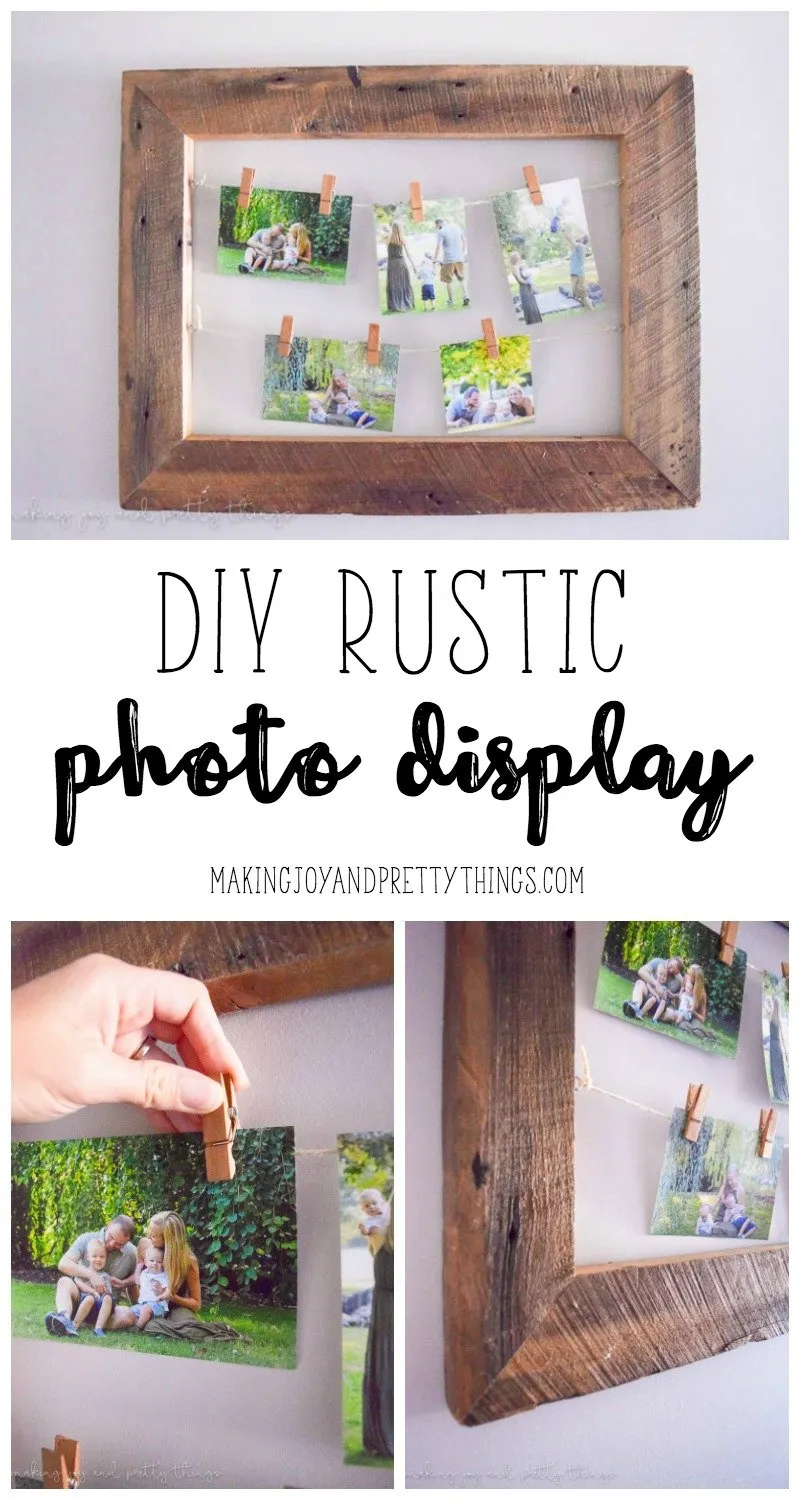
 A collage of photos of a DIY rustic picture frame made from recycled barnwood, string, and clothespins. Image text reads "DIY rustic photo display" in black font.
Congratulations! You’ve created a one-of-a-kind rustic picture frame that’s bursting with personality. Now, step back and admire your handiwork.
Remember, the beauty of this project lies in its versatility. Experiment with different finishes, embellishments, and photo arrangements to match your unique style.
I can’t wait to see what you create! Share your rustic picture frame masterpieces with me on the Robert Kline Art website or tag us on social media. Happy crafting!
