Blog
DIY Wood Burned Cutting Board: The Perfect Handmade Gift

Crafting personalized gifts brings a unique touch to any occasion. Here at Robert Kline Art, we’re passionate about exploring creative avenues, and today, we’re diving into the world of wood burning with a simple yet stunning project: a DIY wood burned cutting board!
This isn’t just a gift idea for Mother’s Day; it’s a fantastic present for any host or hostess, a new homeowner warming up their kitchen, or the foodie in your life who appreciates handcrafted quality. And the best part? It’s incredibly easy to make! Let’s gather our supplies and get crafting!
Materials You’ll Need:
- Woodburning Set
- Special woodburning tips (optional, for more intricate designs)
- Unfinished cutting board (or embrace the challenge and make your own!)
- Mineral oil
- Pencil
- Table saw (if making your own cutting board)
- Wood glue (if making your own cutting board)
- Clamps (if making your own cutting board)
- Miter saw (for squaring off edges)
- Sandpaper
- Ramekin or similar object for tracing (optional)
- Pliers
- Pretty ribbon for gifting
Creating Your Masterpiece:
Step 1: Prepare Your Cutting Board
You can either purchase a ready-made cutting board or embark on a rewarding journey by crafting your own. If you’re up for the challenge, hardwood species like maple, walnut, or bamboo are excellent choices for durability and hygiene.
Expert Tip: “Open-grained woods like red oak are not ideal for cutting boards as they can harbor bacteria more easily,” warns John Miller, a seasoned woodworker and owner of Miller’s Custom Woodcrafts.
If making your own, glue together boards of your chosen wood (approximately 1.5 inches wide) in a pattern you like. Ensure they are clamped tightly and left to dry for several hours, ideally overnight, to guarantee a secure bond. Once dry, square off the edges with a miter saw and sand thoroughly. A smooth surface is key for effortless wood burning!
Step 2: Bring Your Design to Life
Using a pencil, lightly sketch your design onto the cutting board. A ramekin or similar object can be used to trace perfect circles or curves. Once your design is finalized, heat your wood-burning tool for at least 5 minutes with your desired tip attached.
Pro Tip: “Always test your wood-burning tool on a scrap piece of wood first to get a feel for the pressure and temperature,” recommends Lisa Davis, a renowned pyrography artist and author of “The Art of Wood Burning.”
Step 3: It’s Time to Burn!
Carefully trace your pencil lines with the heated wood-burning tool. Vary the pressure and duration of contact for different effects. Remember, the longer the contact, the darker the burn mark. If incorporating different tips for varied designs, use pliers to safely switch them out, being mindful of the high temperatures.
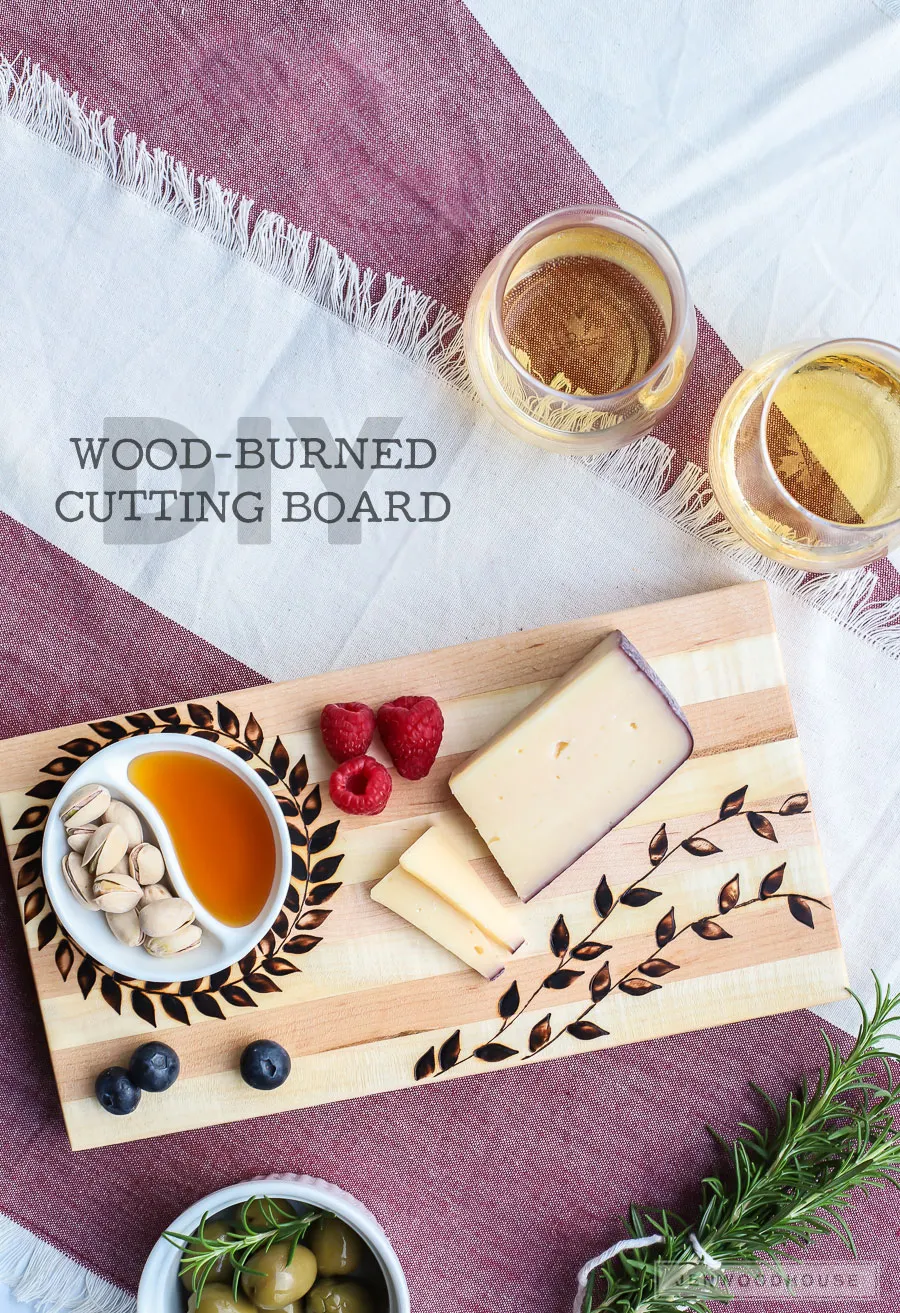
 How to make a DIY wood-burned cutting board – what an amazing gift idea!
Step 4: Seal and Protect
Once you’re satisfied with your wood-burned design, allow the tool to cool completely before storing it. Next, apply several coats of mineral oil to the entire surface of the cutting board, allowing it to soak in between applications. Mineral oil is food-safe and acts as a sealant, protecting your artwork and enhancing the natural beauty of the wood grain.
Step 5: Gift and Enjoy!
Tie a beautiful ribbon around your finished masterpiece, and voila! You’ve created a personalized, handcrafted gift that is sure to impress. Load it up with delicious treats for an extra special touch.
Unleash Your Creativity with Robert Kline Art
This DIY wood-burned cutting board is just the tip of the iceberg when it comes to exploring your creative potential. Here at Robert Kline Art, we encourage you to experiment, personalize, and share your creations with the world!
Leave us a comment below and tell us about your experience with this project. We’d love to hear your thoughts and see your finished cutting boards! Don’t forget to browse our website for more unique, handcrafted gift ideas and art supplies to fuel your passion.
