Blog
DIY Sea Glass Picture Frame: A Simple & Beautiful Gift Idea

Hey there, fellow craft enthusiasts! Robert Kline here, and I’m thrilled to share a simple yet stunning DIY project with you today – creating your own sea glass picture frames.
This project is incredibly versatile, perfect for adding a touch of coastal charm to your home décor or as a heartfelt, personalized gift. As someone who’s always been drawn to the beauty of handcrafted items, I find immense joy in transforming simple materials like sea glass into treasured keepsakes.
Why Sea Glass?
There’s something truly magical about sea glass. Each piece, tumbled and frosted by the ocean’s embrace, tells a story of time and tide. Using sea glass in your crafts brings a piece of that serene beauty into your creations, making each one unique and special.
Gathering Your Supplies
Ready to embark on this crafting journey with me? Here’s what you’ll need:
- Colorful Sea Glass: You can find pre-collected sea glass online or at craft stores. However, nothing beats the thrill of discovering your own! If you’re lucky enough to live near a beach, take a stroll along the shore and see what treasures the ocean has left behind.
- Acrylic Photo Frames: Opt for simple frames that complement the sea glass. Clear or white frames work beautifully, allowing the colors of the sea glass to shine through.
- Glue Gun & Glue Sticks: A hot glue gun is our trusty companion for this project, ensuring the sea glass stays securely in place.
- Your Favorite Photos: Choose photos that hold special meaning to you. Whether it’s a cherished memory captured with loved ones or a breathtaking landscape, the right photo will transform your creation into a treasured keepsake.
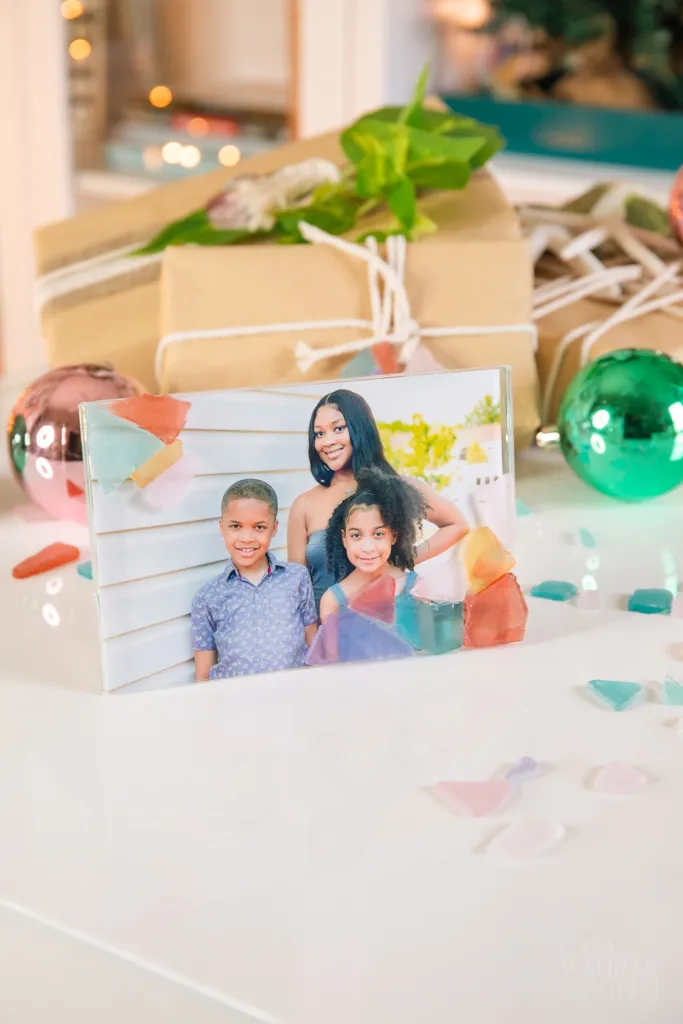
 DIY sea glass picture frame gift idea for DIY Christmas gift kids can make.
Creating Your Sea Glass Masterpiece
Now, let’s dive into the fun part – bringing your vision to life!
-
Plan Your Design: Before you break out the glue gun, take a moment to arrange your sea glass pieces on the frame. Experiment with different layouts and color combinations until you achieve a design that speaks to you.
-
Consider the Photo: As you arrange the sea glass, visualize how it will interact with your chosen photo. Ensure you’re not covering up any important details. You can even insert the photo temporarily as you work to fine-tune the placement.
-
Time to Glue!: Once you’re happy with the design, it’s time to secure those beautiful sea glass pieces. Apply a small amount of hot glue to the back of each piece and gently press it onto the frame. Allow the glue to cool and set completely before moving on to the next piece.
 DIY sea glass picture frame gift idea for DIY Christmas gift kids can make.
 -
A Note for Young Crafters: This project is a fantastic way to introduce children to the joys of crafting. However, always supervise children when using hot glue guns to prevent accidents. Depending on their age, you might need to assist with the gluing process.
-
Finishing Touches: With all the sea glass securely in place, insert your chosen photo. And there you have it – a stunning, handcrafted sea glass picture frame that’s ready to adorn your home or be gifted to someone special.
 DIY sea glass picture frame gift idea for DIY Christmas gift kids can make.
Tips from Robert Kline Art
Here are a few additional tips to make your sea glass picture frames truly shine:
- Variety is Key: Mix and match different colors, shapes, and sizes of sea glass to create a visually dynamic and captivating design.
- Embrace Imperfection: Remember, the beauty of sea glass lies in its imperfections. Don’t be afraid to incorporate pieces with unique textures or slightly chipped edges.
- Get Creative: Don’t limit yourself to picture frames! You can use this technique to embellish mirrors, trays, candle holders, or even create stunning wall art.
Share Your Creations!
I can’t wait to see the beautiful sea glass picture frames you create! Share your masterpieces with me on social media using #RobertKlineArt.
And remember, crafting is about more than just following instructions – it’s about exploring your creativity, experimenting with new ideas, and most importantly, having fun!
