Blog
DIY Painted Wooden Utensils: The Perfect Personalized Gift

Hey there, fellow craft enthusiasts! Robert Kline here, and I’m excited to share my latest artistic escapade with you: creating unique and vibrant painted wooden utensils.
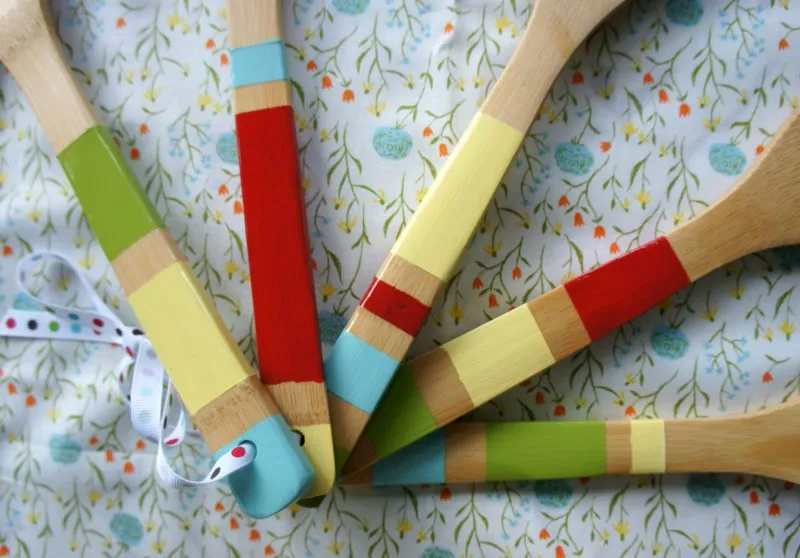
These beauties aren’t just practical for your kitchen, they also make incredibly thoughtful personalized gifts. I recently whipped up a batch for a friend’s birthday, and the joy on her face? Priceless. It’s the beauty of handmade gifts – they carry a personal touch you can’t find in any store.
Gathering Your Supplies: Simple and Accessible
First things first, let’s round up our materials. You’ll be happy to know this project uses readily available craft supplies:
- Wooden utensils: Your local craft store, kitchenware shop, or even online marketplaces are teeming with options!
- Acrylic paints: Choose a variety of colors that tickle your fancy. I personally love a good retro palette.
- Small bottle of varnish: Opt for a varnish that’s safe for food contact. This will seal and protect your artwork.
- Foam paint brush: Provides a smooth, even application for your paint.
- Washi tape: The secret weapon for creating crisp, clean lines and exciting patterns.
Bringing Your Vision to Life: Let’s Get Painting!
Now comes the fun part – transforming those plain wooden utensils into miniature works of art.
- Tape It Up: Using your washi tape, carefully section off the area you want to paint on each utensil. Remember, leave the part that touches food bare. Get creative with your taping! Think stripes, geometric patterns, or even abstract designs.
 painted wooden utensils
 - Unleash the Color: Now for the really enjoyable part – painting! Apply your chosen colors between the taped sections, allowing your artistic flair to shine. Don’t be afraid to experiment with different shades and combinations. Each utensil can have its own unique personality!
 painted wooden utensils
 painted wooden utensils
 - Patience is Key: Depending on your paint, multiple coats might be necessary to achieve vibrant, opaque coverage. Pro tip: Use low glasses to hold the utensils upright while they dry between coats.
- Sealing the Deal: Once the paint is completely dry, it’s time to seal your masterpieces. Apply at least four coats of varnish, ensuring you cover the painted areas thoroughly. This crucial step adds durability and protects the paint from wear and tear.
 painted wooden utensils
 - The Grand Reveal: Allow the varnish to dry completely (I usually wait a few days just to be safe), then carefully peel off the washi tape to reveal those satisfyingly crisp lines. And voilà! You’ve created one-of-a-kind, hand-painted wooden utensils.

 painted wooden utensils
 painted wooden utensils
Crafting Memories, One Brushstroke at a Time
Remember, the beauty of handmade lies in the imperfections. Don’t fret over tiny flaws; they add to the unique charm. This project is also a fantastic activity for craft nights with friends. Just factor in drying time – unless you have a trusty hairdryer handy!
So go ahead, gather your supplies, and embark on this colorful DIY adventure. I guarantee you’ll be amazed by what you can create. And hey, if you’re looking for more unique, handmade gift ideas, be sure to check out the other creations on Robert Kline Art. Happy crafting!
