Blog
DIY Painted Serving Tray: A Simple Guide to Upcycled Elegance

Hey there, fellow craft enthusiasts! Robert Kline, your resident art aficionado here. Today, we’re diving headfirst into the beautiful world of DIY with a project that’s as fun to create as it is functional: a painted wooden serving tray.
Whether you’re a seasoned pro or just starting your crafting journey, this guide is packed with tips and tricks to help you transform a humble wooden tray into a personalized masterpiece. So grab your brushes, unleash your creativity, and let’s get started!
Gathering Your Supplies
Before we embark on our artistic adventure, let’s gather our trusty tools:
- Wooden serving tray: Thrift stores, antique shops, and even your attic are great places to find these hidden treasures.
- Sandpaper: Medium grit (around 80) works best for prepping the surface.
- Cleaner/degreaser: A must-have for those thrifted finds, Simple Green or Krud Kutter are excellent choices.
- Paint: Let your creativity soar! Acrylic, chalk paint, even spray paint—the choice is yours.
- Paintbrushes: A variety of sizes will be helpful, including a medium size for the base coat and smaller ones for details.
- Stencils (optional): These can add a touch of whimsy or elegance.
- Pencil and scissors: For tracing and cutting stencils.
- Sealing spray (optional): Protect your masterpiece and make it last longer.
Prepping Your Canvas: Sanding and Cleaning
Just like a painter prepares their canvas, we need to prep our wooden tray.
- Sanding: Give the entire tray a good sanding with medium-grit sandpaper. This creates a smooth surface for the paint to adhere to.
- Cleaning: Wipe away any dust and then clean the tray with a degreaser, especially if it’s a thrifted find.
Adding a Splash of Color: Painting the Base Coat
Now for the fun part – adding color!
- Choosing your paint: Opt for a paint that adheres well to wood. Chalk paint offers a vintage vibe, while acrylics are versatile and easy to work with.
- Applying the base coat: Using a medium-sized brush, apply an even coat of paint to the tray’s surface.
- Drying time: Allow the first coat to dry completely before applying a second coat. A hairdryer can be your best friend here!
Unleashing Your Inner Artist: Adding Designs
Here’s where your personality shines through!
- Stenciling: If you’re using stencils, secure them with painter’s tape and dab paint over them, carefully removing the stencil once done.
- Freehand painting: For those who love to freestyle, grab your brushes and let your imagination run wild. Geometric patterns, floral motifs, or even abstract designs—the possibilities are endless.
- Adding dimension: Consider layering different colors and using a variety of brushstrokes for a more dynamic look.
Sealing the Deal: Protecting Your Artwork
To ensure your painted tray stands the test of time, consider sealing it.
- Choosing a sealant: A clear acrylic sealant in either a matte or gloss finish works wonders.
- Applying the sealant: Apply a thin, even coat following the manufacturer’s instructions.
Showcasing Your Masterpiece
Congratulations! You’ve transformed an ordinary wooden tray into a work of art. Now, let’s find the perfect spot to display your creation.
- Coffee table centerpiece: Arrange candles, flowers, or decorative objects on your tray for an eye-catching centerpiece.
- Bathroom organizer: Keep toiletries organized in style.
- Personalized gift: A handmade gift speaks volumes, and a painted tray is both beautiful and practical.
Conclusion
There you have it! Creating a DIY painted serving tray is a rewarding way to personalize your home décor while exploring your artistic side. Remember, there’s no right or wrong way to do it – it’s all about having fun and letting your creativity flow.
Don’t forget to share your masterpieces with me! I’d love to see your unique creations. And for more handmade treasures and crafting inspiration, be sure to explore the Robert Kline Art website. Happy crafting!
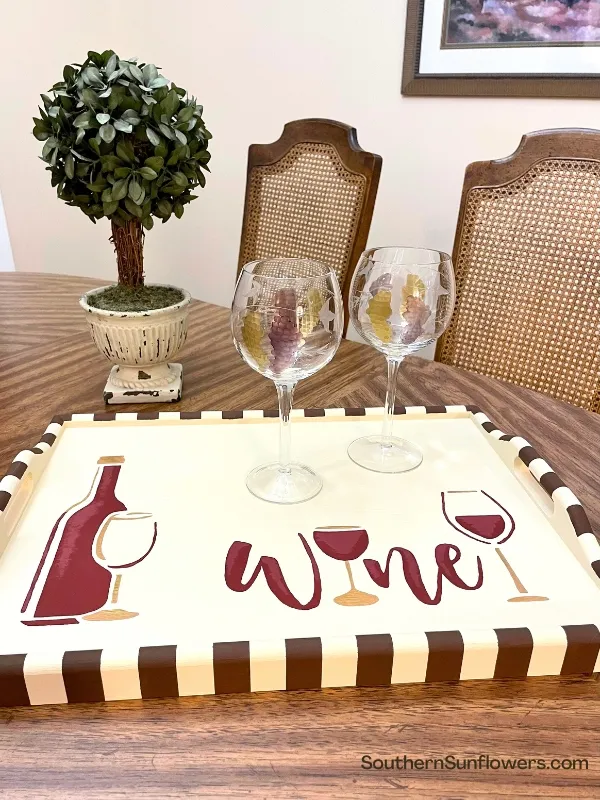
 painted wood serving tray displayed on a table
A beautifully painted serving tray adds a touch of personalized elegance to any home.
