Blog
DIY Reclaimed Wood Beach Signs: A Touch of Coastal Charm for Your Home

Hey there, fellow craft enthusiasts! Robert Kline, your trusted guide in the world of handmade artistry, here. Do you ever feel the pull of the ocean, even when you’re miles away? Today, we’re going to capture that beachy vibe with a fun and easy DIY project: reclaimed wood beach signs. These rustic signs are bursting with character and make the perfect addition to your home décor, or a thoughtful gift for a fellow beach lover. Let’s dive in!
Gathering Your Supplies
Before we embark on this creative journey, let’s gather our trusty tools and materials. Don’t worry, you won’t need anything too fancy:
- Reclaimed Wood Pieces: The beauty of this project lies in repurposing old wood. Check your garage, local lumber yards, or even online marketplaces for unique pieces.
- Sandpaper: You’ll want a variety of grits for smoothing rough edges and achieving that weathered look.
- Wire or Rope: This is optional, but adds a rustic touch for hanging. Alternatively, a sawtooth hanger works perfectly too!
- Acrylic Paint: Choose colors that speak to your beachy soul. Think ocean blues, sandy tans, and crisp whites.
- Paint Brushes: You’ll need a couple of different sizes for applying the base coat and lettering.
- Tracing Paper (Optional): If you’re like me and prefer a guide for lettering, tracing paper is your friend.
- Clear Wax (Optional): To protect your masterpiece and add a touch of aged elegance.
 A pile of reclaimed barn boards/www.seasyourday.com/DIY Reclaimed Wood Painted Beach Signs
Caption: Reclaimed wood is full of character, making each sign unique.
Prepping Your Reclaimed Wood
Remember that piece of wood you rescued from a forgotten corner of your garage? It’s time to give it a new life!
-
Clean and Scrub: Years of dust and grime may be clinging to your wood. A good scrub with soapy water, and a touch of bleach if needed, will do the trick. Remember to let it dry completely before moving on.
 Cleaning reclaimed wood with mixture of water and bleach
“Caption: A little cleaning goes a long way in prepping your wood.”
-
Smooth and Sand: Now for the satisfying part! Use sandpaper to smooth out rough edges and splinters. Don’t aim for perfection here; those imperfections add to the rustic charm. “I love using a wire brush to really bring out the grain of the wood,” says reclaimed wood artist, Sarah Jones. “It creates a beautiful texture.”
 Cleaning reclaimed wood with mixture of water and bleach
“Caption: Sanding reveals the natural beauty of the wood grain.”
Adding Your Personal Touch: Painting and Lettering
This is where your creativity takes center stage!
-
Base Coat (Optional): You can choose to embrace the natural beauty of the wood or apply a base coat of acrylic paint. Remember, we’re going for that weathered, beach-worn look, so imperfections are welcome!
-
Design Your Lettering: This is where your personality shines through! What message do you want your sign to convey? “Welcome to the Beach,” “Life is Better at the Beach,” or maybe a favorite quote about the ocean. Use your computer or even good old-fashioned pencil and paper to experiment with different fonts and layouts. Remember to keep in mind the size and shape of your wood.
-
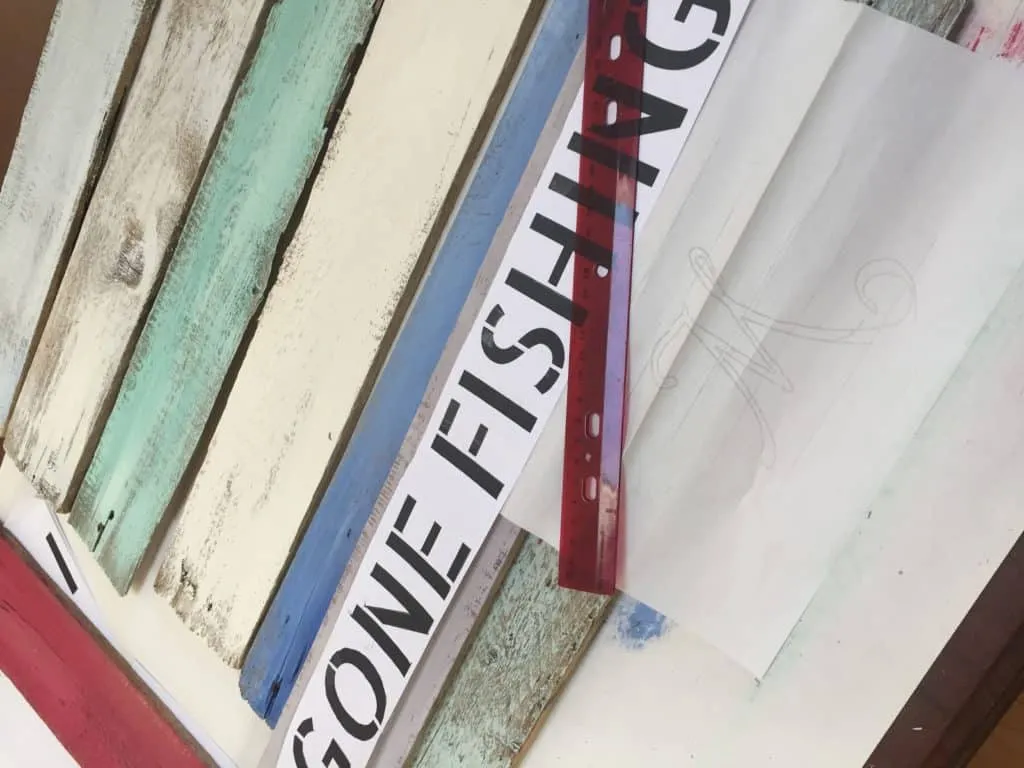
Transferring Your Design: For those who appreciate a helping hand (myself included!), tracing paper is your friend. Place your design under the tracing paper and trace over the letters with a pencil, pressing firmly to create a light indentation on the wood. If you’re feeling confident, freehand your lettering directly onto the wood.
 DIY Reclaimed Wood Beach Sign/Tracing letters onto wood surface
Caption: Use tracing paper to easily transfer your design.
-
Time to Paint: Now for the fun part! Use a contrasting acrylic paint color and carefully fill in your lettering. Don’t worry about being overly precise; a little imperfection adds to the charm. Stencils are also a great option for those who prefer a more uniform look.
 DIY Reclaimed Wood Beach Sign/Tracing letters onto wood surface
Caption: Choose paint colors that evoke a sense of the coast.
Adding Finishing Touches
You’re almost there! Just a couple more steps to enhance the beauty of your creation.
-
Distressing (Optional): Once the paint is dry, lightly sand over the letters and edges of the sign to enhance the weathered look.
-
Sealing (Optional): Apply a coat of clear wax to protect your sign and give it a subtle sheen. “A dark wax can really age the wood beautifully,” notes Sarah Jones.
 DIY Reclaimed Wood Beach Sign/Tracing letters onto wood surface
Caption: Distressing the edges enhances the vintage vibe.
Display Your Masterpiece
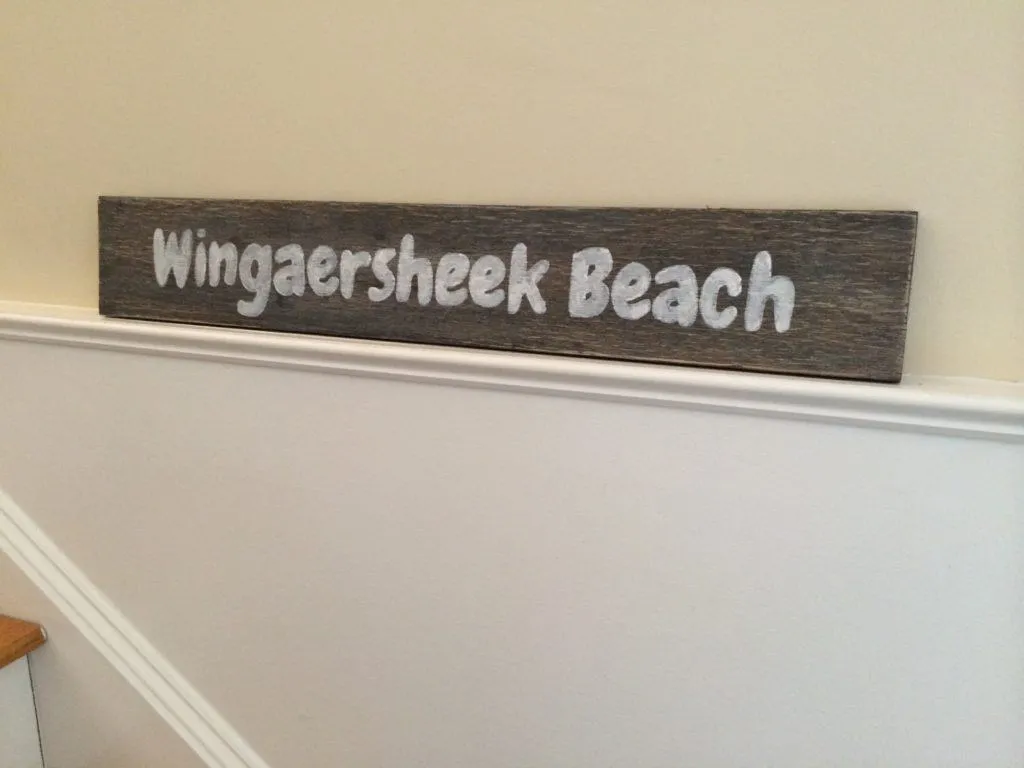
Congratulations, my friend! You’ve just created a unique piece of art that radiates coastal charm. Attach your chosen hanging hardware and find the perfect spot to display your creation. These signs look fantastic on porches, in living rooms, or even as part of a gallery wall.
 Reclaimed Wood Beach Signs DIY Tutorial/www.seasyourday.com
Caption: Proudly display your creation and let the compliments roll in!
Don’t forget to share your handmade beach signs with the Robert Kline Art community! Leave a comment below and let us know about your creative process and design choices.
Happy crafting, everyone!
