Blog
DIY Paint Stick Address Plaque: A Unique Touch for Your Home
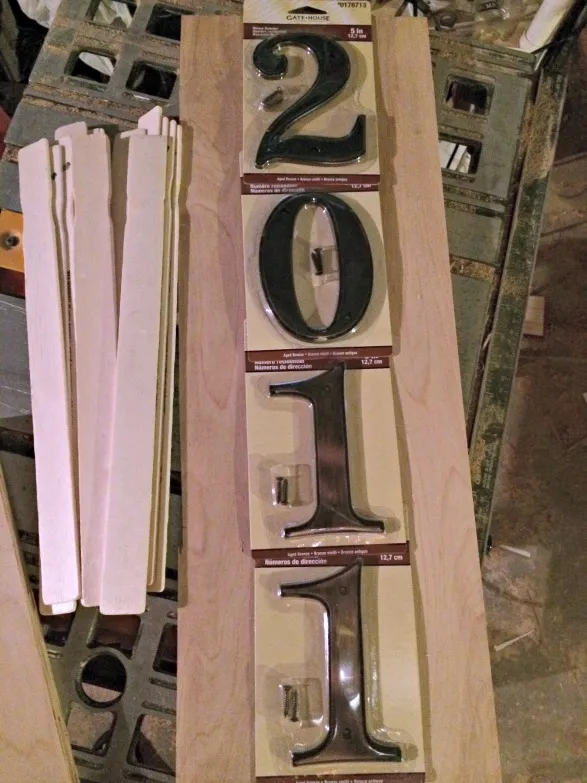
Hey there, fellow craft enthusiasts! Robert Kline here, and let me tell you, I’m always on the lookout for creative ways to add a personal touch to a home. Recently, I’ve been captivated by the charm of handmade address plaques. They’re not your typical front door decor, and that’s what makes them so special!
Today, I’m excited to share a fun and budget-friendly DIY project using a surprising material: paint sticks! That’s right, those humble wooden stirrers can be transformed into a charming and unique address plaque that’ll make your home the envy of the neighborhood.
Gathering Your Supplies
Before we dive in, let’s round up everything we need. As someone who values resourcefulness, I love that this project utilizes readily available materials:
- 1/2″ or 3/4″ wood board (I recommend a size around 7″ x 24″)
- Table saw or chop saw
- Gatehouse address numbers (choose a style that complements your taste)
- Paint sticks (around 20-25 should suffice, depending on the size of your plaque)
- Wood glue
- Clamps
- Paint (acrylic craft paint or leftover house paint works great!)
- Drill
- D-ring picture hangers
- Ribbon or twine for hanging
 Supplies needed for address plaque
(Alt text: An assortment of paint sticks, wood glue, and tools laid out on a table, ready for a DIY address plaque project)
Crafting Your Address Plaque
Now comes the fun part – let’s get crafting!
Step 1: Prepping Your Wood Base
Start by cutting your wood board to your desired dimensions. I opted for a 7″ x 24″ rectangle, but feel free to customize it. Once cut, smooth out any rough edges with sandpaper for a polished look.
Step 2: Creating the Paint Stick Design
Using a chop saw (or even a hand saw and a miter box), cut your paint sticks to match the width of your wood board. I found 7″ pieces worked well for my design. Next, lay out your cut paint sticks on the wood board, ensuring they’re evenly spaced. Secure each paint stick to the board using wood glue and clamps. Allow ample drying time before moving on.
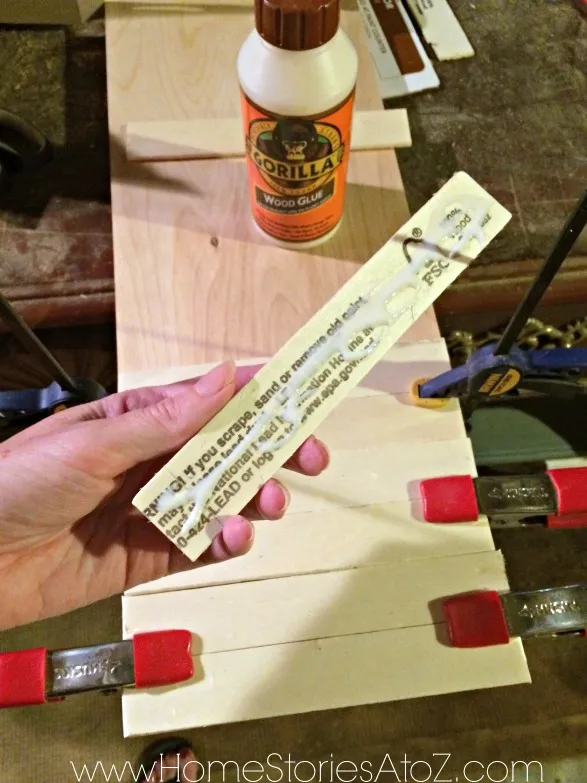 Attach paint sticks with wood glue
(Alt text: Applying wood glue to paint sticks before attaching them to the wood board for the address plaque.)
Step 3: Adding a Splash of Color
Now’s the time to infuse your personality! Paint your paint sticks using your chosen colors. You can opt for a uniform look or get creative with patterns, stripes, or even an ombre effect. Remember, it’s your masterpiece!
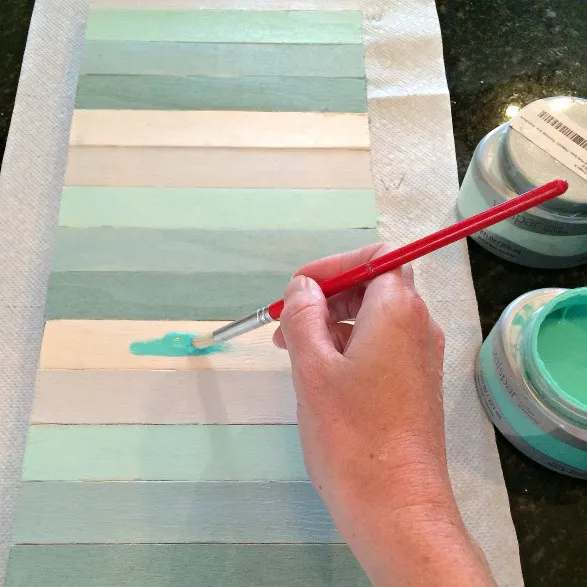 Paint the paint sticks
(Alt text: A close-up of brightly colored paint sticks being painted, showcasing the creative possibilities of this DIY project.)
Step 4: Affixing Your Address Numbers
Once the paint is dry, arrange your house numbers on the plaque. Mark the drilling spots for each number and use a drill bit slightly smaller than the screw size that came with your numbers. After drilling the holes, secure your numbers to the board.
Step 5: Hanging Hardware
For a professional finish, attach D-ring picture hangers to the back of the plaque. Mark their placement, drill pilot holes, and screw them in securely.
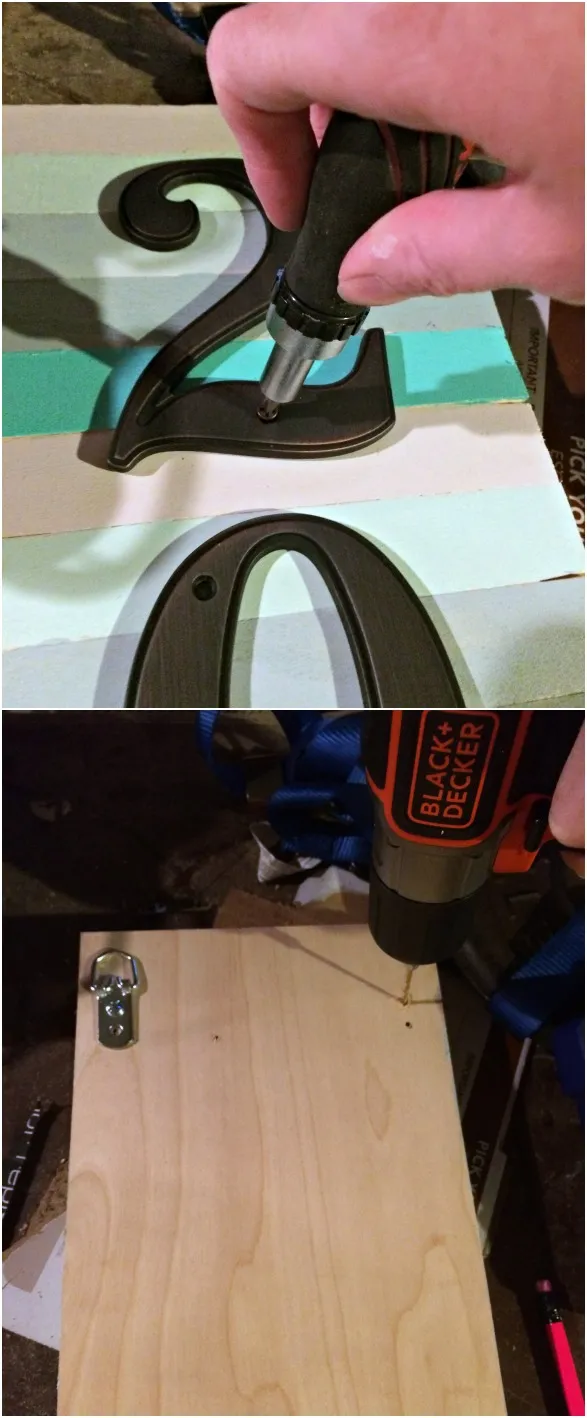 Attach numbers and D-ring hooks
(Alt text: Securing address numbers to the painted paint stick plaque and attaching D-ring hooks on the back for hanging.)
Step 6: Putting It All Together
Thread a ribbon or twine through the D-rings for easy hanging. And just like that, your unique paint stick address plaque is ready to adorn your front door!
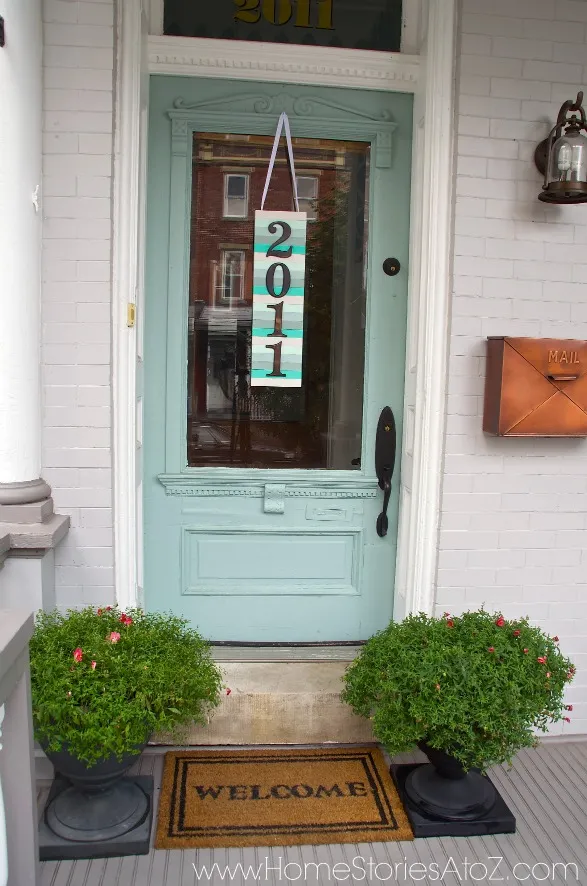 DIY paint stick address plaque
(Alt text: The completed DIY paint stick address plaque, displaying a charming and rustic aesthetic, perfect for a home’s exterior.)
A Personal Touch for Your Home
This DIY paint stick address plaque is not just a functional piece but a conversation starter. It’s a testament to the beauty of handcrafted items and a reflection of your personal style.
I encourage you to give this project a try and experience the joy of creating something unique for your home. Don’t forget to share your creations with me. I’m always excited to see the creative ways you bring these ideas to life!
And for more unique, handmade gift ideas, be sure to explore the fantastic selection on [Robert Kline Art](your website link)! We’ve got something special for everyone.
