Blog
The Ultimate Guide to DIY Natural Lip Scrubs: Kiss Dryness Goodbye!

Here at Robert Kline Art, we’re all about embracing the joy of crafting and creating. And what better way to pamper yourself than with a luxurious, all-natural lip scrub made with love by your own hands?
Living in a dry climate, I know firsthand the struggle of battling dry, chapped lips. It’s a constant battle that no amount of lip balm seems to win. That’s why I embarked on a quest to create the perfect natural lip scrub, something that would not only exfoliate but also deeply nourish my parched lips. After much experimentation (and a few sugar-coated mishaps!), I cracked the code.
This guide is the culmination of my journey, a treasure trove of tips and tricks to guide you in crafting your own batch of lip-smacking goodness. So, ditch the store-bought scrubs laden with chemicals and join me as we unlock the secrets to naturally soft, supple, and oh-so-kissable lips!
Why You’ll Love Homemade Lip Scrub
Remember that feeling when you realize you’ve left your lip balm at home? It’s a slippery slope from lip-licking to utter dryness despair. But fear not, my friends! Regular exfoliation with a natural lip scrub is the secret weapon you need.
Here’s why a DIY lip scrub should be a staple in your self-care routine:
- Banishes Dryness: Say goodbye to flaky, chapped lips! Our natural ingredients work together to gently remove dead skin, revealing the soft, smooth lips beneath.
- Boosts Moisture: We’re not just about exfoliation. Our blend of nourishing oils deeply hydrates and locks in moisture for long-lasting hydration.
- Plumps Naturally: Exfoliating your lips increases blood flow, giving them a naturally plump and healthy appearance. Pucker up!
- Saves Money & the Planet: Making your own lip scrub is surprisingly budget-friendly and eco-conscious. Plus, it’s incredibly satisfying!
The Perfect DIY Lip Scrub Recipe
Ready to bid farewell to dry lips forever? Let’s gather our ingredients and whip up a batch of this simple yet effective lip scrub.
Ingredients You’ll Need
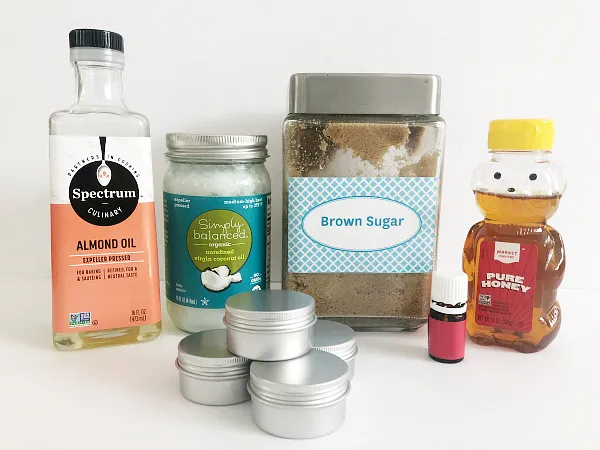
- Coconut Oil (1 teaspoon): The hero of hydration! Make sure you’re using regular coconut oil that’s solid at room temperature, not the fractionated kind.
- Almond Oil (1/2 teaspoon): A double whammy of moisture and softening power. Your lips will thank you.
- Essential Oil (2 drops, optional): I love adding a couple of drops of Frankincense for its skin-loving properties. Lavender, peppermint, or chamomile are fantastic alternatives.
- Sugar (5 teaspoons): Choose between brown sugar for a gentler scrub or granulated sugar for a more intense exfoliation.
- Honey (1/4 teaspoon): This liquid gold adds a touch of sweetness and helps bind the scrub while adding extra moisture.
 Natural Ingredients for Homemade Lip Scrub: Almond Oil, Coconut Oil, Brown Sugar, Honey, & Essential Oil (optional)
Image: The key ingredients for creating the ultimate natural lip scrub
Tools of the Trade
- Small, microwave-safe bowl
- Measuring spoons
- Lip balm tins for storing your scrub
Step-by-Step Guide
- Melt the Coconut Oil: Place the coconut oil in your microwave-safe bowl and heat it in short bursts (10-15 seconds) until melted.
- Mix in the Liquid Powerhouse: Add the almond oil and your chosen essential oil to the melted coconut oil. Stir well to combine.
- Sugar Rush: It’s time to add the sugar! Pour in your chosen sugar and mix thoroughly.
- Honey, I’m Home!: Add the honey and stir until everything is well combined and you have a nice, pliable consistency.
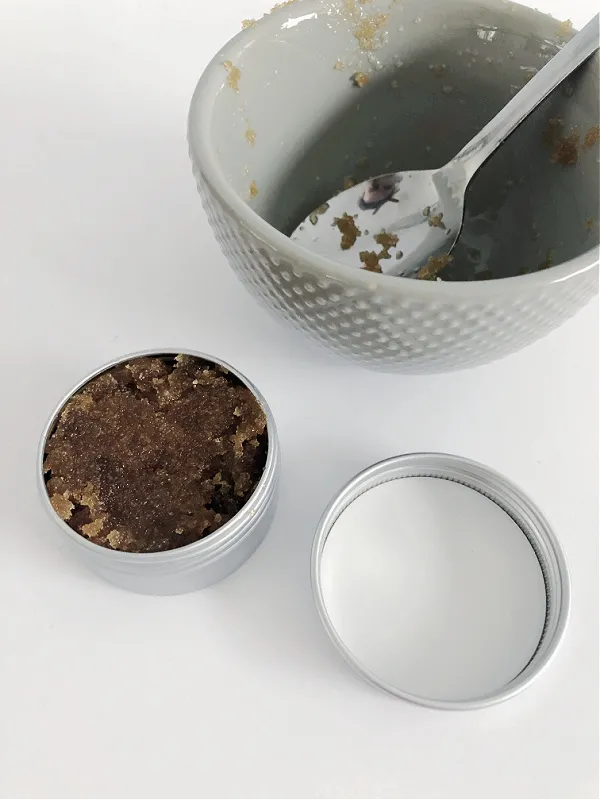
- Store and Admire: Transfer your beautifully crafted lip scrub into your lip balm tins.
 Adding DIY Lip Scrub to a Lip Balm Tin
Image: Storing your homemade lip scrub in lip balm tins ensures its freshness and makes it easy to use.
Using Your DIY Lip Scrub: Tips and Tricks
- Patch Test: Before diving headfirst into a lip-scrubbing frenzy, do a patch test on a small area of your skin to ensure you don’t have any adverse reactions.
- Scrub-a-Dub-Dub: Scoop a small amount of scrub with a clean spoon or cosmetic spatula (avoid using your fingers to prevent contamination). Gently massage the scrub onto your lips in circular motions for 30-60 seconds.
- Rinse and Revel: Rinse off the scrub with warm water and pat your lips dry with a clean towel.
- Moisturize Like a Pro: Seal in all that goodness with your favorite lip balm.
Expert Tip: “For a spa-like experience, apply a warm washcloth to your lips after exfoliating to further soften and soothe the skin,” advises Sarah, a seasoned skincare specialist.
FAQs: Your Lip Scrub Questions Answered
How Often Should I Exfoliate?
Start with once a week and see how your lips respond. If you’re still battling dryness, you can gradually increase it to twice a week.
Can I Substitute the Almond Oil?
Absolutely! Olive oil or fractionated coconut oil (the liquid kind) are great alternatives.
How Long Does My Lip Scrub Last?
Store your lip scrub in an airtight container at room temperature, and it should last for up to 3 months. Avoid dipping your fingers into the container to prolong its shelf life.
The Wrap Up: Embracing the Joy of Handmade
Creating your own natural lip scrub is a rewarding experience that allows you to prioritize self-care while embracing the beauty of handmade products. It’s a simple act of love for yourself or a thoughtful gift for someone special.
At Robert Kline Art, we believe that the most beautiful things are often made by hand. So why not give this recipe a try and discover the joy of crafting your own natural beauty products?
We’d love to hear about your lip-scrubbing adventures! Share your experiences, tips, and favorite variations in the comments below. Happy crafting!
