Blog
DIY Marbled Silk Scarves: Create Your Own Unique Fashion Statement

Have you ever strolled through a high-end boutique and found yourself mesmerized by the vibrant, swirling patterns of a marbled silk scarf? Perhaps you thought, “That’s gorgeous, but I could never make something like that.” Well, my friend, let me tell you, you absolutely can!
In this post, we’ll demystify the art of marbling and show you how to transform a simple white silk scarf into a wearable work of art. With just a few basic supplies and a dash of creativity, you’ll be creating stunning scarves that will turn heads and spark conversations.
Gathering Your Marbling Materials
One of the best things about this project is that most of the supplies are readily available at your local craft store. Here’s what you’ll need to get started:
- Marbling Kit: This handy kit typically includes the necessary chemicals to treat the water for marbling, along with an assortment of vibrant marbling paints.
- Silk Scarves: For this project, we’ll be using plain ivory-colored silk scarves. But feel free to experiment with other fabrics like cotton, linen, or even paper!
- Household Tools: You likely already have some of the tools you’ll need around the house, such as:
- Different types of combs (fine-toothed and wide-toothed work well)
- Cuticle sticks
- Toothpicks
- Skewers
- Large Plastic Bin: This will be your marbling vat. Choose a size that will comfortably accommodate the length of your scarf.
- Newspaper or Butcher’s Block Paper
- Rubber Gloves
Preparing the Magic Marbling Solution
The secret to successful marbling lies in creating the right water solution.
- Following the instructions provided with your marbling kit, carefully combine the marbling chemical with water. This special solution is what allows the paint to float and spread on the surface, creating those mesmerizing patterns.
- Allow the solution to sit undisturbed for about 45 minutes. During this time, it will transform into a light gel, the perfect consistency for marbling.
- Carefully pour the solution into your large plastic bin.
- Use a piece of newspaper or butcher’s block paper to gently skim the surface of the solution and remove any air bubbles.
Unleashing Your Inner Artist: The Marbling Process
Now for the exciting part – creating your marbled masterpiece!
- Adding the Paint: Gently squeeze small drops of marbling paint onto the surface of the solution. Watch in amazement as the paint droplets spread outwards, reacting with the chemical solution to create beautiful, organic shapes.
 Blog scarves paint supplies
- Pro Tip: Don’t be afraid to experiment with different color combinations! The beauty of marbling is that each design is unique.
- Creating the Marbling Effect: Now, take one of your household tools (a comb or cuticle stick works well) and gently drag it across the surface of the solution. The tool will pull and swirl the colors together, creating stunning marbled patterns.
- Experiment with Different Tools: Each tool will create a different type of pattern. Fine-toothed combs create delicate veins, while wide-toothed combs produce bolder swirls.
 " decoding=
- Experiment with Different Tools: Each tool will create a different type of pattern. Fine-toothed combs create delicate veins, while wide-toothed combs produce bolder swirls.
Transferring Your Masterpiece to Silk
- Gently Lay the Scarf: Carefully lay your silk scarf flat on top of the marbled solution, making sure it comes into contact with the entire surface.
- Important: Once the fabric touches the solution, avoid moving or shifting it, as this will disrupt the pattern.
- Lifting the Scarf: Once the entire scarf has made contact with the solution, gently lift it from the bin.
- Pro Tip: If you’re working with a longer scarf, you’ll need a bin that’s long enough to accommodate it. If your bin isn’t long enough, you can always trim the unmarbled section of the scarf later.
Setting the Colors: Washing and Drying
- Rinsing: Gently rinse the scarf under cool, running water to remove any excess marbling solution.
- Drying: Hang the scarf to dry in a well-ventilated area, out of direct sunlight.
Showcasing Your Marbled Creations
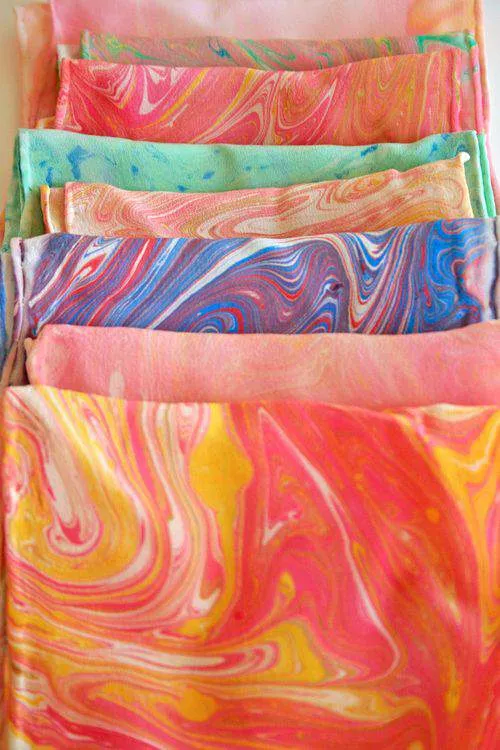
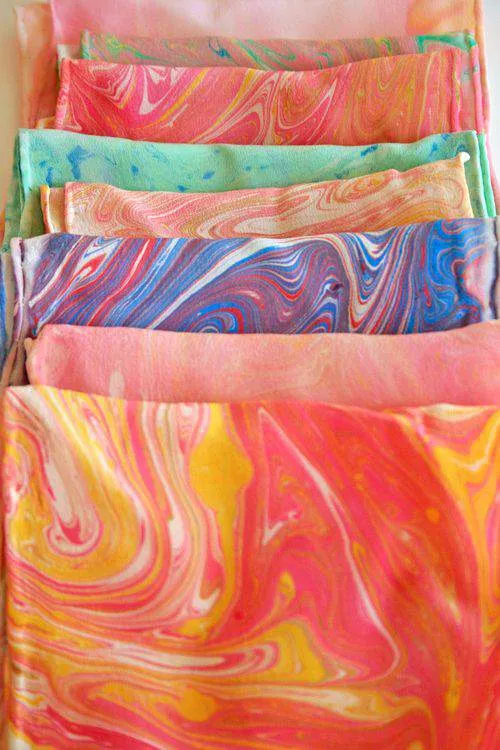
And there you have it – your very own DIY marbled silk scarf! The beauty of this technique is that no two scarves will ever be exactly alike, making each one a unique and special creation.
Here are a few ways to style your new marbled masterpiece:
- Wear it as a Neckerchief: Tie it around your neck for a pop of color and sophistication.
- Adorn Your Handbag: Add a touch of elegance to your favorite handbag by tying your scarf around the handle.
- Gift It to a Friend: These one-of-a-kind scarves make truly thoughtful and personalized gifts.
Marbling is a captivating and rewarding craft that allows you to unleash your creativity and create stunning, wearable art. Don’t be afraid to experiment with different color combinations, tools, and fabrics to discover your own unique marbling style.
If you’re feeling inspired to explore the world of handmade gifts and crafts, be sure to visit Robert Kline Art. We offer a curated collection of unique, handmade treasures that are perfect for adding a touch of artistry to your life.
