Blog
DIY Marbled Clay Photo Frame: A Unique and Personalized Gift

Hello fellow art enthusiasts! Today, we’re diving into the magical world of clay with a project that’s as fun to make as it is beautiful to behold: a DIY marbled clay photo frame. This project is perfect for adding a touch of your personality to your home décor, and it also makes for a truly heartfelt and personalized gift.
As someone who’s always had a passion for transforming simple materials into unique works of art, I find working with clay incredibly rewarding. The possibilities are endless, and the tactile nature of the craft is both therapeutic and inspiring. This marbled clay photo frame project is a testament to that, allowing you to experiment with colors, textures, and shapes to create a piece that reflects your unique style.
Gathering Your Materials
Before we embark on this creative journey, let’s gather our supplies. Fortunately, you won’t need anything too fancy. Here’s what you’ll need:
- Polymer clay in your choice of colors (I recommend using Sculpey Premo!)
- Clay tools (or a rolling pin and a plastic knife)
- A muffin pan
- A gold leafing pen (Krylon works great!)
Shaping Your Marbled Masterpiece
Step 1: Creating the Marble Effect
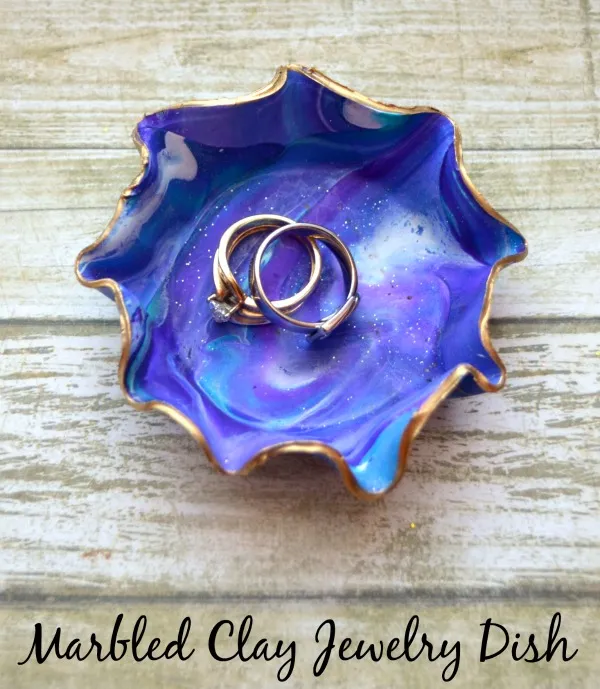
Let’s start by bringing those beautiful marbled patterns to life! Grab your chosen clay colors and break them into smaller pieces. For a striking contrast, try combining white, purple, blue glitter, and turquoise. Or, for a more earthy feel, experiment with leaf green, green, white, ultramarine blue hue, and turquoise.
Roll each color into a long, thin piece, resembling colorful strands of spaghetti. Now, twist these strands together to create a visually appealing blend of colors. Finally, gather the twisted clay and knead it into a ball. Keep mixing and shaping until you achieve the desired marbled effect. Remember, there are no rules here, just let your creativity guide you!
Step 2: Rolling Out the Dough
Now, grab your trusty rolling pin or a clay roller if you have one. Roll out your marbled clay to about 1/4 inch thickness. Remember to avoid using tools that you use for food preparation to keep everything safe and non-toxic.
Step 3: Cutting and Shaping the Frame
Using a cookie cutter, a glass, or any circular object of your preferred frame size, cut out a circle from your rolled-out clay. It’s time to give your frame its unique shape!
Step 4: Baking Your Creation
Turn your muffin pan upside down and gently place your clay circle over one of the muffin molds. This will create the base of your photo frame. Now, carefully drape the remaining clay around the edges, creating gentle folds and ripples for added texture and visual interest.
Once you’re happy with the shape, pop the muffin pan into the oven. Bake according to the instructions on your clay packaging. For Sculpey Premo, it’s usually 15 minutes at 275 degrees Fahrenheit.
Step 5: Adding a Touch of Gold
While your clay creation is cooling down, let’s add a touch of elegance. Grab your gold leafing pen and carefully trace around the top edge of the frame. This will create a stunning contrast against your marbled clay, giving it a professional and polished look.
Showcasing Your Handiwork
Congratulations! You’ve just created a unique, personalized marbled clay photo frame. Not only is it a beautiful addition to your home, but it also makes a truly special and thoughtful gift. Remember, each frame will be one-of-a-kind, reflecting the unique marbling and shaping you’ve created.
 clayjewelrydishpin
Exploring Further Clay Adventures
Don’t discard those leftover clay scraps! Embrace the spirit of creativity and use them to make smaller embellishments, like jewelry pendants or decorative accents for your frame.
What are your thoughts on this project? I encourage you to give it a try and share your creations with us in the comments below. Let’s inspire each other with the endless possibilities of clay crafting!
For more inspiring DIY projects and unique handmade gift ideas, explore the Robert Kline Art website. We’re passionate about helping you discover the joy of crafting and bringing your creative visions to life.
