Blog
DIY Macrame Hanging Fruit Hammock: Add a Touch of Boho to Your Kitchen

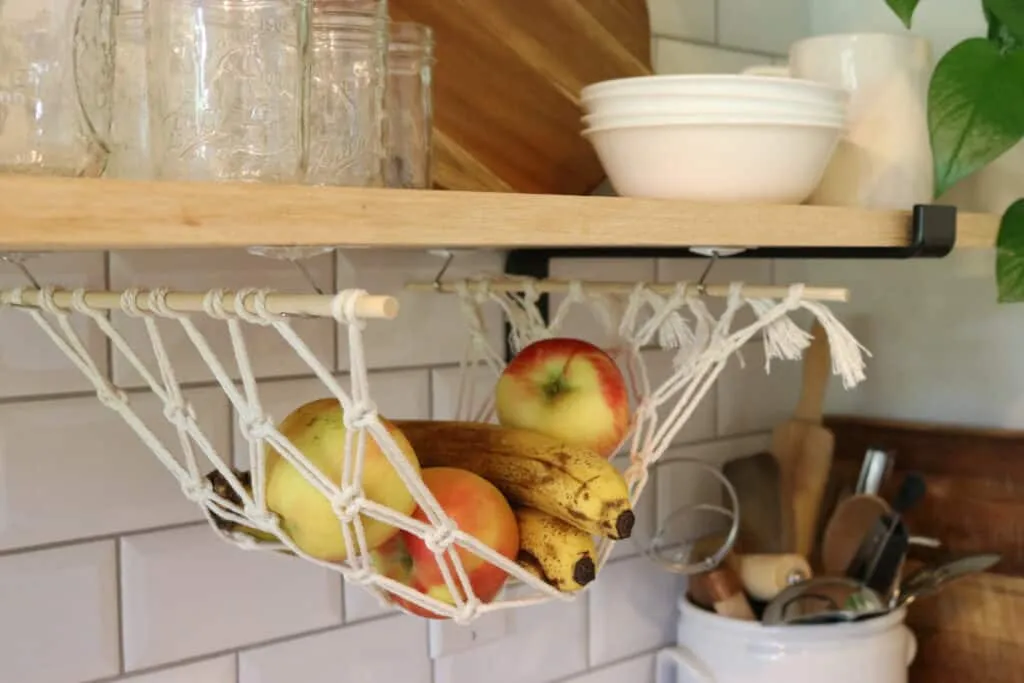
Hey there, fellow craft enthusiasts! Looking for a fun and easy DIY project that’ll add a touch of bohemian charm to your kitchen? Look no further than a macrame fruit hammock! These trendy creations are popping up everywhere, and for good reason. They’re not just stylish, but also practical, freeing up precious counter space while showcasing your fruits and veggies in a unique way.
As someone who’s been passionate about macrame for years, I’m excited to share my step-by-step guide to crafting your own macrame fruit hammock. Whether you’re a seasoned macrame pro or a complete beginner, this tutorial will guide you through each knot with clear instructions and helpful visuals.
Gather Your Supplies
One of the best things about this project is its simplicity! You only need a few materials to create your own stunning fruit hammock.
Here’s what you’ll need:
- Macrame rope: We recommend using 8 pieces, each cut to 6.5 feet in length. You can choose a color that complements your kitchen décor.
- Two wooden dowels: These will serve as the support for your hammock.
- Four Command strip hooks: These will allow you to hang your hammock without damaging your walls or cabinets.
- Scissors: For trimming the rope ends.
Pro Tip: To make things even easier, consider purchasing a pre-assembled macrame fruit hammock kit. These kits typically include all the materials you need in the correct quantities, saving you time and effort. Check out Etsy or your local craft store for options.
Let’s Get Knotting!
Now that you’ve gathered your supplies, it’s time to dive into the heart of this project: the macrame knots. Don’t worry if you’re new to macrame, we’ll be using just two simple knots that are easy to master: the Lark’s Head Knot and the Square Knot.
Step 1: Preparing Your Workspace
Before we begin, find a comfortable spot where you can spread out your materials. Tying a piece of yarn to each end of your dowel rods and hanging them on a doorknob or sturdy hook can make the knotting process easier.
Step 2: Attaching the Cords to the Dowel (Lark’s Head Knot)
- Take one piece of macrame rope and fold it in half to find the center.
- Place the looped center section over and behind the dowel rod.
- Bring the two loose ends of the rope over the dowel rod and through the loop.
- Gently pull the ends of the rope to tighten the knot.
Repeat this process for all 8 pieces of rope. Congratulations, you’ve mastered the Lark’s Head Knot!
 macrame fruit hammock tutorial
Step 3: Creating the Diamond Pattern (Square Knots)
-
First Row:
- Select the first four ropes on the left side.
- Bring the leftmost rope over the three ropes to its right.
- Take the rightmost rope and bring it over the rope you just moved, positioning it in front of the three other ropes.
- Pass the rightmost rope behind the two central ropes and thread it through the loop created by the leftmost rope.
- Gently pull both the leftmost and rightmost ropes to tighten, forming the first half of your square knot.
- Now, bring the rightmost rope over the other ropes, moving it to the left.
- Position the leftmost rope in front of the rope you just moved.
- Tuck the leftmost rope behind the two central ropes and through the loop created by the rightmost rope.
- Pull both loose ends to complete your first square knot.
-
Repeat for the Row: Continue creating square knots with the next four ropes, and so on, until you’ve completed a row of four square knots.
 macrame fruit hammock
Step 4: Building the Hammock Shape
-
Second Row: For the second row, temporarily drape the two outermost ropes on each side over the dowel rod to keep them out of the way. Create three square knots with the remaining six ropes.
-
Subsequent Rows: Continue creating rows of square knots, alternating between rows of four knots and rows of three knots. This alternating pattern creates the signature hammock shape.
 macrame fruit hammock
Step 5: Finishing Touches
Once you’ve reached the desired length for your hammock, leave about 3-4 inches of rope at the bottom. Securely attach each rope to the second dowel rod using a double knot. Trim any excess rope for a clean look.
Step 6: Hanging Your Macrame Masterpiece
Measure the width of your finished hammock and mark the desired location for your Command hooks. Make sure the hooks are spaced evenly to provide adequate support. Firmly press the hooks onto a clean, dry surface (underneath your kitchen cabinets or on a wall). Carefully hang your macrame fruit hammock on the hooks, and voila! You’ve successfully crafted a beautiful and functional piece of bohemian décor!
Conclusion
Creating a DIY macrame fruit hammock is a rewarding project that allows you to personalize your kitchen with a touch of handmade charm. As “Robert Kline Art” always says, the beauty of crafting lies in the journey as much as the destination. So, gather your supplies, embrace the art of knotting, and let your creativity bloom! Don’t hesitate to experiment with different rope colors and patterns to create a piece that truly reflects your unique style.
And remember, we’d love to see your creations! Share photos of your finished macrame fruit hammocks in the comments below. Happy crafting!
