Blog
DIY Macrame Wine Bottle Carrier: The Perfect Blend of Style and Function
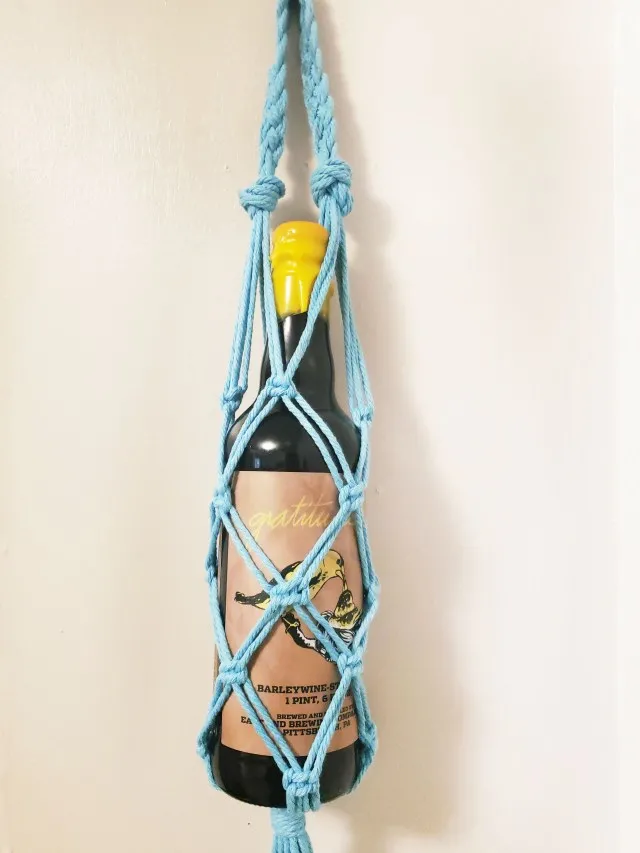
Bringing a bottle of wine to a party? Elevate your gifting game with a touch of handmade elegance! This easy-to-follow guide will have you crafting stunning macrame wine bottle carriers in no time. Forget generic gift bags; impress your friends with a personalized touch that screams creativity and care. Let’s transform those simple bottles into thoughtful, eye-catching presents.
Gathering Your Macrame Supplies
Every masterpiece begins with the right tools! Before we start knotting, let’s gather our supplies:
- Scissors: For precision cutting and trimming
- A bottle: This will serve as our guide for sizing the carrier
- 3mm macrame cord: Choose your favorite color and texture!
Pro Tip: Consider adding beads, charms, or tassels for a personalized flair!
 diy wine bag with macrame knots
A beautiful macrame wine bag with a bottle inside.
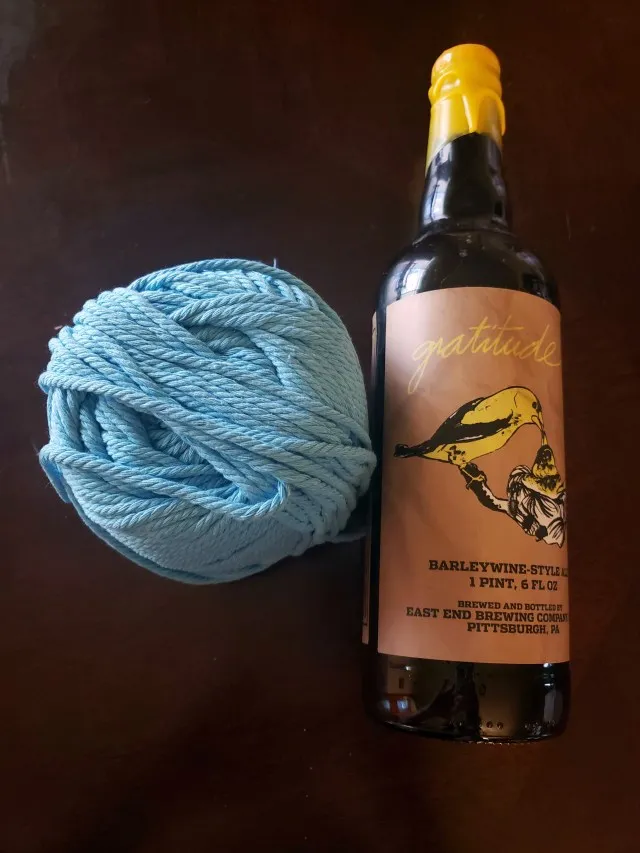 wine bag supplies
All the supplies you need for the wine bag are laid out on a table.
Step-by-Step Guide to Crafting Your Macrame Wine Bottle Carrier
Ready to unleash your inner artisan? Let’s get started!
Step 1: Preparing Your Macrame Cord
- Cut approximately 7 arm lengths of your chosen macrame cord. Remember, it’s always better to have a little extra than to come up short.
- Fold the cord in half, aligning the ends neatly.
- Fold it in half once more, bringing all four ends together.
- Make a decisive cut at the bottom loop, ensuring half of your cords remain connected while the bottom half is separated.
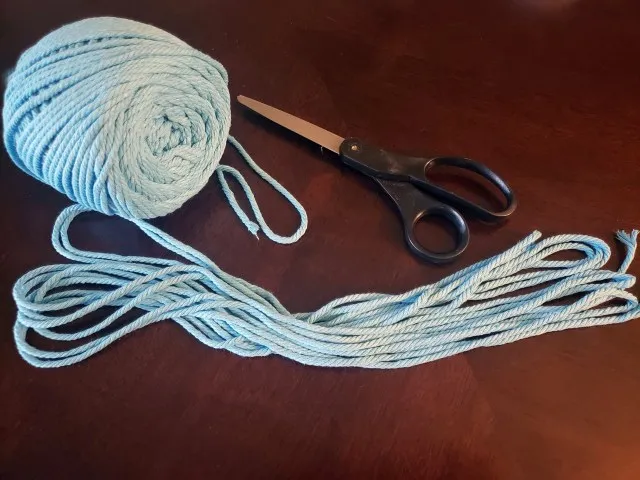 wine bag macrame tutorial
The macrame cord is folded in half and then in half again. Cut the cord at the bottom.
Step 2: Weaving the Handle
- Tie a secure knot on the left side of your cord bundle, about 3-4 inches from the top. This marks the beginning of our sturdy handle.
- Braid the cord consistently until you reach an even length on the right side, ensuring a balanced and symmetrical handle.
- Separate the braided cord into four distinct groups, each containing 2 strands. Visualize them as the building blocks of our handle’s pattern.
- Now, let’s create the braid: Take the group on the far right and guide it over the second group, then under the third group, and finally over the last group. Repeat this rhythmic over-under pattern to achieve a visually appealing braid.
- Secure the end of your braid by tying another knot on the right side, mirroring the knot you made on the left.
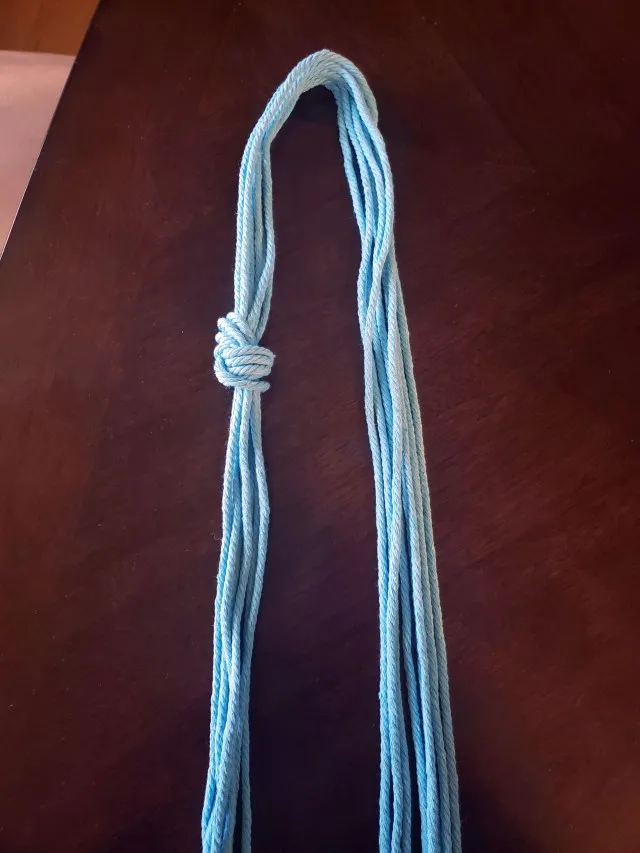 wine bag tutorial
Tie a knot on one side and braid the cord to create a handle.
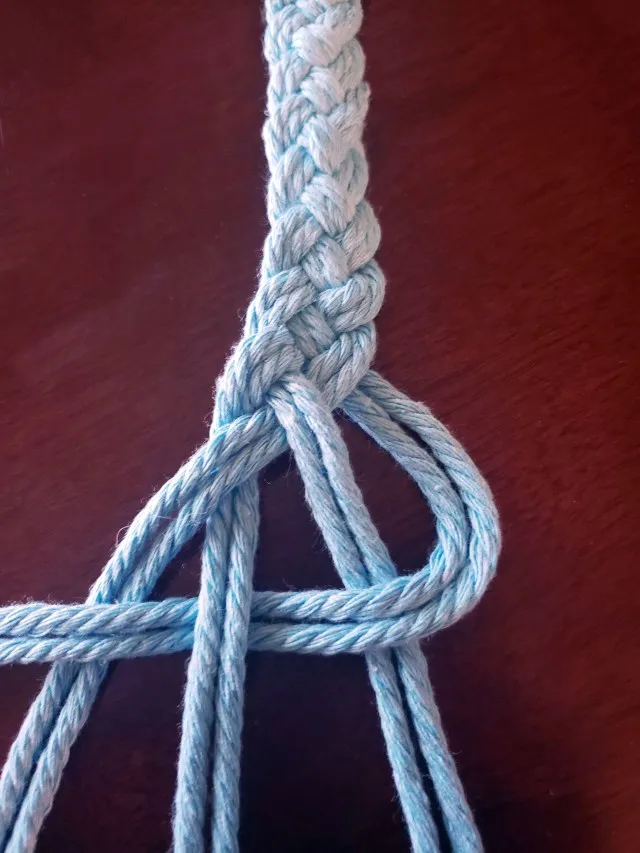 macrame braid
Separate the strands into four sections to create a four-strand braid.
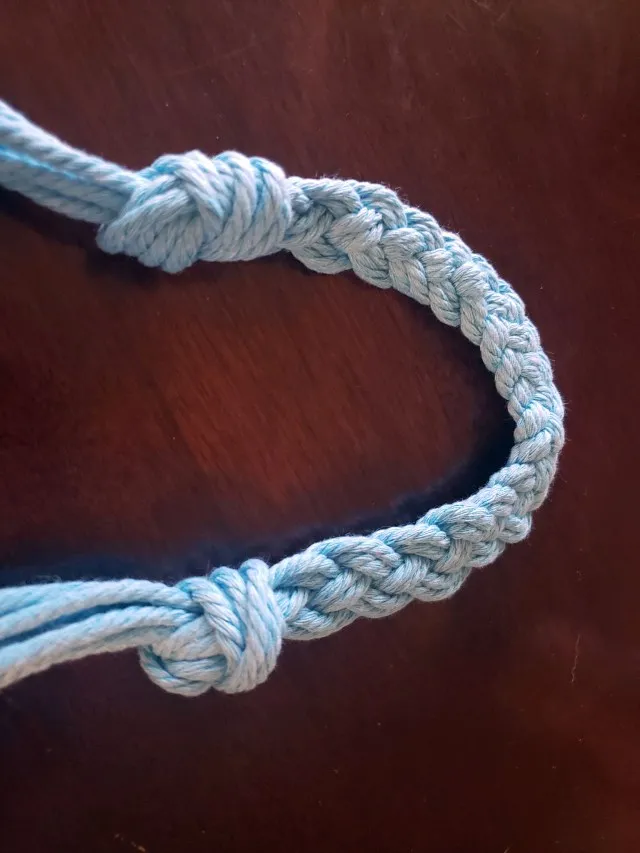 macrame braided handle
Continue braiding the handle until you get to the desired length.
Step 3: Creating the Knotted Base
- Begin by separating four strands of rope. This will form the foundation of our bottle-holding base.
- Take the end of the leftmost strand and weave it over the middle two strands, ensuring it goes under the last strand. This creates the framework for our first knot.
- Now, take the fourth strand, located on the far right, and pass it over the end of the first strand, under the middle two strands, and finally through the loop created by the first strand.
- Pull all four strands taut, firmly securing your first knot. Repeat this knotting process once more using the same cords, strengthening the base.
- Continue this knotting technique around the circumference of the bag until you have a total of four evenly spaced knots. This forms the structural foundation of our carrier.
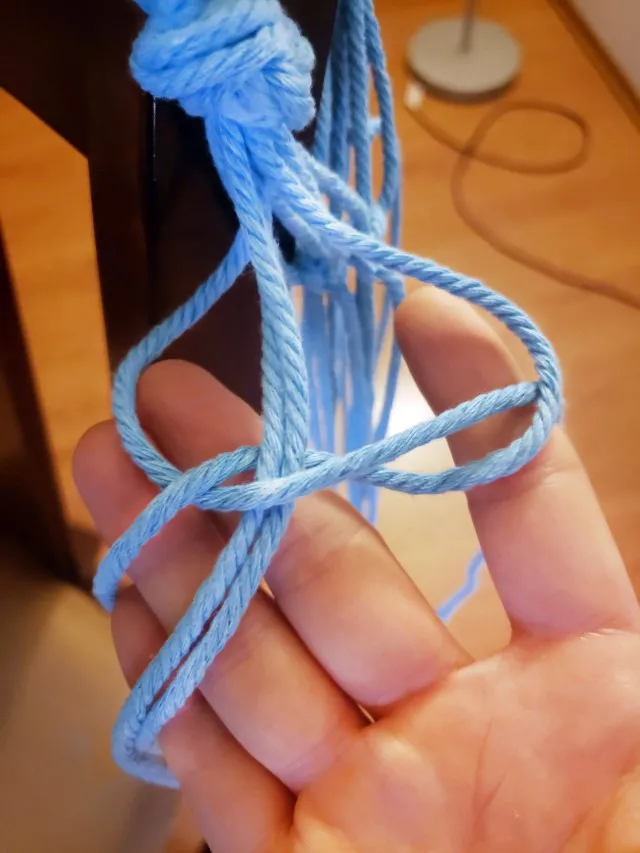 macrame wine carrier diy
Start tying square knots with the remaining macrame cord.
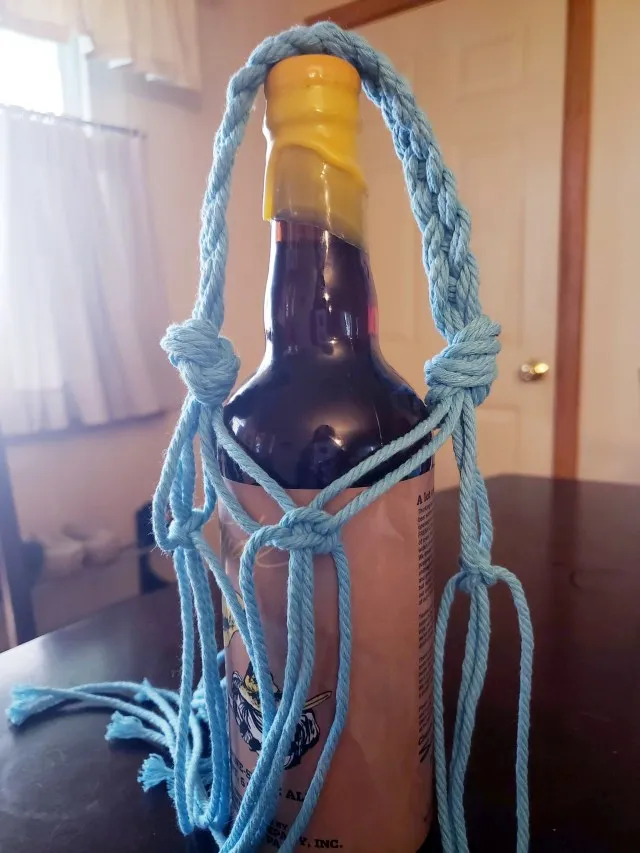 wine carrier with macrame knots
Continue adding knots around the bottle.
Step 4: Building the Layered Knot Pattern
- To add visual interest and texture, we’ll create a second layer of knots. Take the two closest cords from adjacent knots and tie two more knots, building upon the existing pattern.
- Repeat this process around the entire circumference of the carrier, ensuring symmetry and balance.
- Continue building these layered knots downwards, adjusting the spacing as needed to accommodate the shape of your bottle. Stop knotting when you’re satisfied with the length of your carrier.
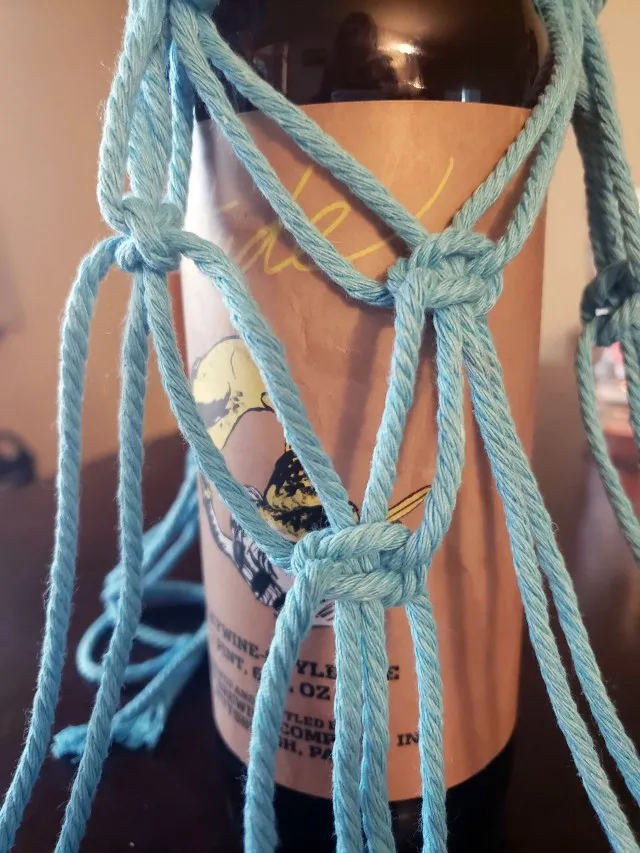 macrame knots
Use a square knot for the macrame wine carrier.
Step 5: Securing the Carrier with a Gathering Knot
- Cut a separate piece of macrame cord. This will be used to create a secure gathering knot at the bottom of our carrier, preventing the bottle from slipping out.
- Form a long loop with the cord, ensuring it faces downward. Leave a small portion of the cord facing upwards, as shown in the image below. Place this loop on top of the excess cord hanging from the bottom of your carrier.
- Take the longer end of your newly created loop and wrap it around the excess cord of your carrier approximately 6-7 times. This creates a snug and secure closure.
- Thread the end of the wrapping cord through the loop you created earlier. Pull the cord at the top to tighten the gathering knot.
- Trim any excess cord for a clean finish. If desired, add a dab of glue to the knot for extra security.
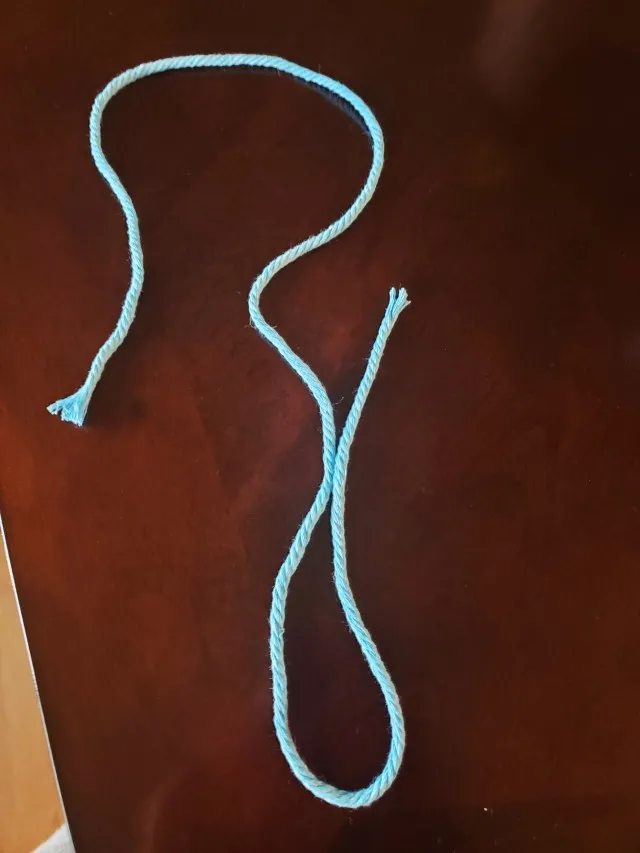 gather knot step 1
Make a loop with another piece of cord.
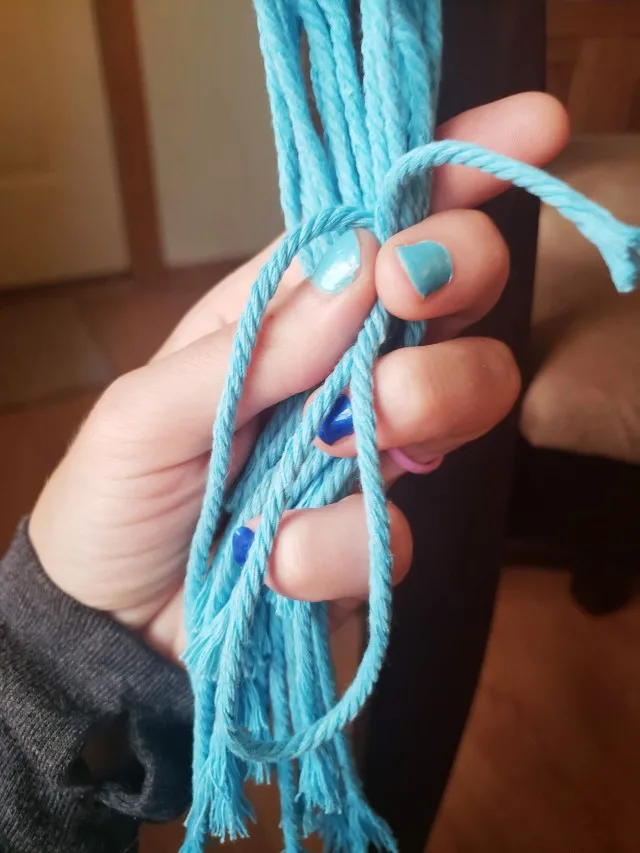 gather knot step 2
Wrap the cord around the macrame strands several times.
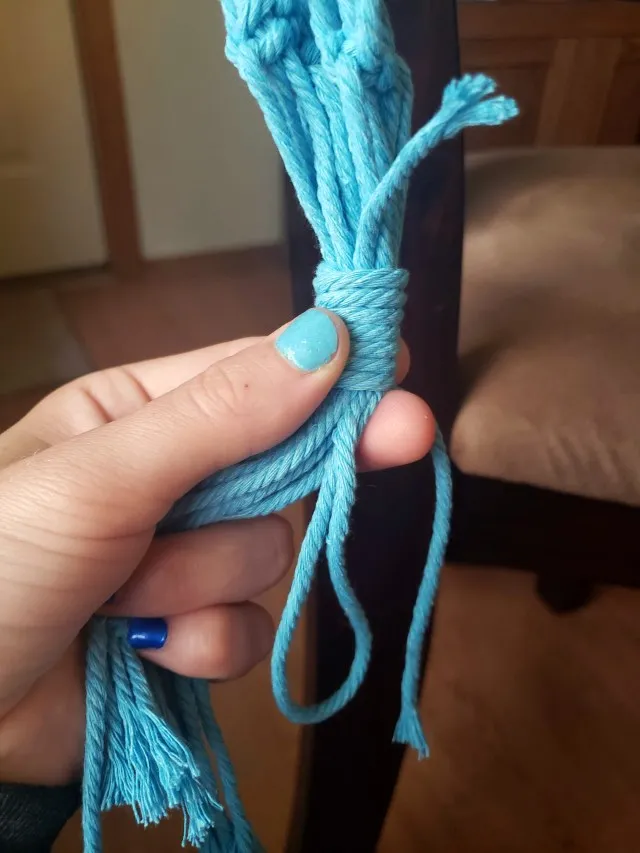 gather knot step 4
Pull the cord through the loop to secure the knot.
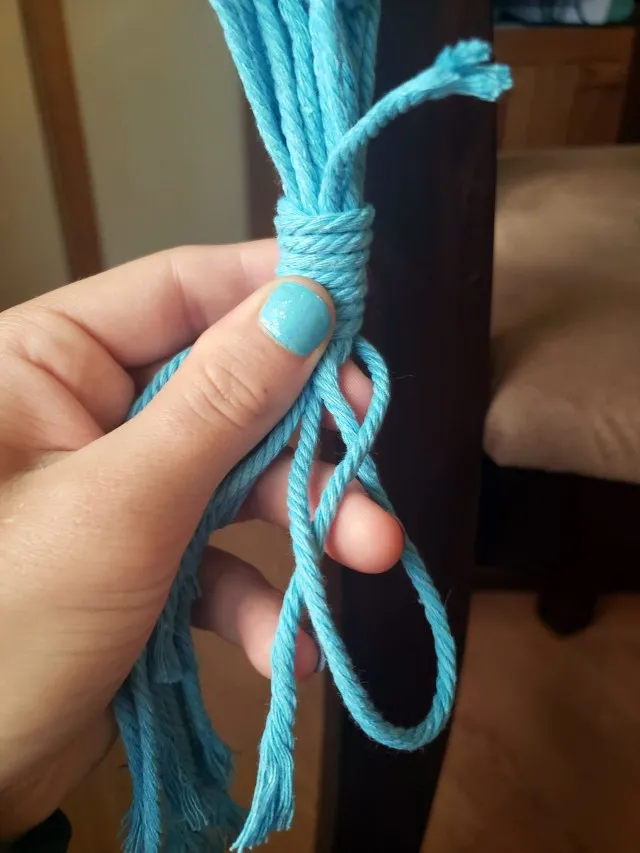 gather knot step 3
Pull the end of the cord to tighten the knot.
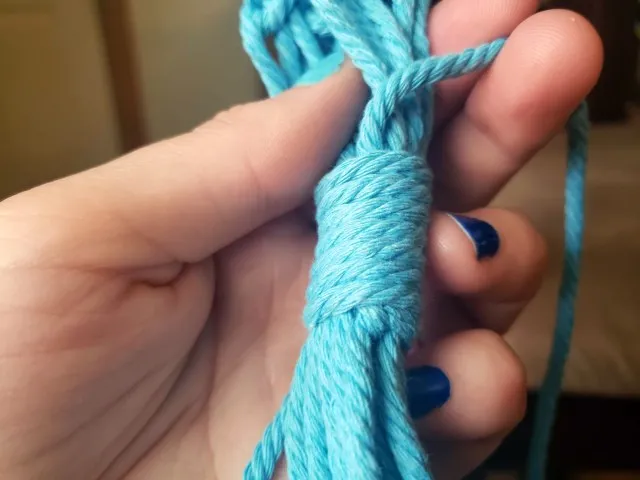 gathering knot
The knot should look like this when it’s tightened.
You did it!
You’ve transformed simple materials into a work of art! Use it to carry wine, beer, whiskey, or any other beverage in style. Not only is this DIY project practical, but it’s also a fantastic opportunity to personalize gifts for your loved ones. Embrace your creativity and enjoy the process!
Looking for more unique, handmade gift ideas? Browse the exquisite selection of handcrafted treasures on Robert Kline Art! From intricate jewelry to stunning home decor, find the perfect gift for every occasion.
